Roundtable TSMS Guide
Roundtable Software, Inc.
12.5.1
Copyright © 2003-2023 Ledbetter & Harp, LLC
Roundtable® software products are licensed by Roundtable Software, Inc. and copyrighted by Ledbetter & Harp, LLC, with all rights reserved. This manual is also copyrighted and all rights are reserved. This manual may not, in whole or in part, be copied, photocopied, translated, or reduced to any electronic medium or machine-readable form without prior consent, in writing, from Roundtable Software, Inc. or Ledbetter & Harp, LLC.
The information in this document is subject to change without notice, and neither Roundtable Software, Inc., nor Ledbetter & Harp, LLC assume responsibility for any errors that may appear in this document.
Printed in U.S.A.
Roundtable® is a registered trademark of Ledbetter & Harp, LLC.
Windows® is a registered trademark of Microsoft Corporation in the United States and other countries..
Progress® and OpenEdge® are registered trademarks of Progress Software Corporation.
UNIX® is a registered trademark of The Open Group in the US and other countries.
All company and product names are the trademarks or registered trademarks of their respective companies.
Table of Contents
- Preface
- 1. Software Configuration Management
- 2. The Tabletop
- 3. Administration
- 3.1. Introduction
- 3.2. Shortcut Properties
- 3.3. Starting Roundtable
- 3.4. Logging Out of Roundtable
- 3.5. Exiting Roundtable
- 3.6. User Preferences
- 3.7. System Preferences
- 3.8. Site Information
- 3.9. Defining Your Application
- 3.10. Configuration Hierarchy
- 3.11. Products
- 3.11.1. Products Window Description
- 3.11.2. Adding a Product
- 3.11.3. Editing a Product Description
- 3.11.4. Deleting a Product
- 3.11.5. Creating a Variant Product
- 3.11.6. Product Report
- 3.11.7. Adding a Product Module
- 3.11.8. Editing a Product Module Description
- 3.11.9. Deleting a Product Module
- 3.11.10. Moving a Product Module
- 3.11.11. Product Module Report
- 3.12. Workspace Module Definitions
- 3.13. Subtypes
- 3.13.1. Code Subtypes Window Description
- 3.13.2. Subtype Theory
- 3.13.3. Subtype Example - Part I
- 3.13.4. Subtype Example - Part II
- 3.13.5. Subtype Example - Part III
- 3.13.6. Adding a Subtype
- 3.13.7. Editing a Subtype or Subtype Part
- 3.13.8. Deleting a Subtype
- 3.13.9. Code Subtypes Report
- 3.13.10. Name Programs
- 3.13.11. Build Programs
- 3.14. Security
- 3.15. User Reports
- 3.16. Loading Multiple Workspaces
- 4. Workspaces
- 4.1. Introduction
- 4.2. Workspace Maintenance
- 4.3. Viewing Workspace Event History
- 4.4. Workspace Reports
- 4.5. Workspace Sources
- 4.6. Editing Workspace Module Parameters
- 4.7. Object Variants
- 4.8. Database Schema Updates
- 4.8.1. Schema Update Window Description
- 4.8.2. Building the Schema Update List
- 4.8.3. Database Storage Areas
- 4.8.4. Toggle Index to Activate/Deactivate
- 4.8.5. Skipping a List Item
- 4.8.6. Applying a Table as New
- 4.8.7. Data Procedures
- 4.8.8. Updating Physical Schema
- 4.8.9. Deleting the Schema Update List
- 4.8.10. Logical and Physical Schema Synchronization
- 4.8.11. Database Integrity Check Report
- 4.9. Load Schema
- 4.10. Assign Schema
- 4.11. Remove Unused Schema
- 4.12. Releases
- 4.13. Imports
- 4.14. Deployments
- 4.14.1. Deployments Window Description
- 4.14.2. Deployments Folder
- 4.14.3. Adding a Remote Site
- 4.14.4. Editing a Remote Site
- 4.14.5. Deleting a Remote Site
- 4.14.6. Printing the Site Report
- 4.14.7. Adding a Deployment
- 4.14.8. Editing a Release Number and Directory
- 4.14.9. Deleting a Work-in-Process Deployment
- 4.14.10. Building a Schema Update List
- 4.14.11. Making an Update Directory
- 4.14.12. Updating at a Remote Site
- 4.14.13. The Update Process
- 4.14.14. Completing a Deployment
- 4.15. Procedure Updates and Compiles on Remote Sites
- 4.16. Database Schema Updates on Remote Sites
- 5. Task Management
- 5.1. Introduction
- 5.2. What Is Task Management?
- 5.3. Task Maintenance
- 5.4. Task Reports
- 5.5. Task Activities
- 5.5.1. Finding a Task
- 5.5.2. Listing Versions in a Task
- 5.5.3. Comparing a Task Version with Its Previous Version
- 5.5.4. Moving a WIP Object to Another Task
- 5.5.5. Updating Version Notes
- 5.5.6. Changing the Share Status of Objects
- 5.5.7. Refreshing Group/Public Source of Task Objects
- 5.5.8. Listing Lab Objects
- 5.6. Task Labs
- 5.7. Task Groups Maintenance
- 5.8. Task Notations
- 6. Objects
- 6.1. Introduction
- 6.2. The Repository
- 6.3. Object Properties Window Folders
- 6.4. PCODE Objects
- 6.4.1. Config Folder Description
- 6.4.2. Adding a PCODE Object
- 6.4.3. Object Name Aliasing
- 6.4.4. Editing the Config Folder
- 6.4.5. Editing a PCODE Object
- 6.4.6. Unlocking Objects
- 6.4.7. Changing the Subtype of an Object
- 6.4.8. Changing the Product Module of an Object
- 6.4.9. Renaming an Object
- 6.4.10. WRX Files
- 6.4.11. Object Xref Level
- 6.4.12. Object Version Blame
- 6.5. DOC Objects
- 6.6. Schema Objects
- 6.7. Object Actions
- 6.8. Lab Objects
- 6.9. Object Reports
- 6.9.1. Versions in Product Module Report
- 6.9.2. Versions in Product Module Report Window
- 6.9.3. Printing the Versions in Product Module Report
- 6.9.4. Versions in Workspace Report
- 6.9.5. Versions in Workspace Report Dialog Box Description
- 6.9.6. Printing the Versions in Workspace Report
- 6.9.7. Xref Report
- 6.9.8. Where Used Report
- 6.9.9. Object Usage Report
- 6.9.10. Call Diagram Report
- 6.9.11. Unused Objects Report
- 6.9.12. External Objects Report
- 6.9.13. Index Usage Report
- 6.9.14. Class Details Report
- 6.10. Object Backups
- 7. Tools
- 7.1. Introduction
- 7.2. Group Checkout Utility
- 7.3. Group Delete Utility
- 7.4. Compiling Tools
- 7.5. Module Load
- 7.6. Test Version Integrity
- 7.7. Visual Difference
- 7.8. Partner Site Replication Window
- 7.9. Server Upload Window
- 7.10. Repository Check Report
- 7.11. Build Names Table
- 7.12. Administrator Toolkit
- 7.13. User Shelves
- A. Interfaces
- A.1. Introduction
- A.2. Edit Program: rtb/p/rtb_open.p
- A.3. Managing Application Data with the Edit Program
- A.4. Report Source Files Locations
- A.5. Task Record Access Using the user-task-ref Field
- A.6. Roundtable PROPATH Management
- A.7. Roundtable Interfaces with the ADE
- A.8. Hooks and Application Programming Interfaces (API)
- Glossary
List of Tables
- 3.1. Workspace Permissions
- 3.2. Object Permissions
- 3.3. Task Permissions
Table of Contents
This book provides the current or prospective Roundtable user with comprehensive information about the Roundtable Total Software Management System (TSMS) including its concepts, user interface, and usage. This book is not intended to be used as an implementation guide nor as a training guide for Roundtable TSMS.
This book is intended for OpenEdge developers, Managers of OpenEdge developers and staff responsible for quality assurance and deployment of OpenEdge applications.
Chapter 1, “Software Configuration Management”
Provides a high-level overview of the configuration management discipline and explains how to use Roundtable to achieve effective Software Configuration Management.
Chapter 2, “The Tabletop”
Provides an overview of the Roundtable Tabletop and demonstrates the integration between the OpenEdge ADE and Roundtable.
Chapter 3, “Administration”
Discusses each area that must be addressed before you set up your system.
Chapter 4, “Workspaces”
Introduces you to Workspaces and presents detailed information about utilizing Workspaces in your development environment.
Chapter 5, “Task Management”
Explains Task management in depth.
Chapter 6, “Objects”
Explains each of the Object Types available in the Roundtable system.
Chapter 7, “Tools”
Documents a number of useful tools provided in the Roundtable environment.
Appendix A, “Interfaces”
Provides examples of how to access Roundtable data directly and how to add your own interface routines.
UNAUTHORIZED MODIFICATION OF ROUNDTABLE REPOSITORY DATA PROHIBITED
The Roundtable TSMS repository database contains complex data relationships that must be maintained to ensure the proper functioning of Roundtable products.
In order to preserve the referential integrity of repository data, the Roundtable repository data must NOT be altered outside of the Roundtable application, unless specifically directed to do so by Roundtable Technical Support personnel. Any unauthorized modification to repository data can result in an unusable repository and may render the installation unsupportable by Roundtable Technical Support.
We are dedicated to providing quality customer support services to our customers worldwide.The process for receiving technical support is as follows:
North American Support
Email: <support@roundtable-software.com>
Web: https://www.roundtable-software.com/support/
European Support
Email: <support-europe@roundtable-software.com>
Web: https://www.roundtable-software.com/support/
Latin America, Africa, and Asia/Pacific
Please contact the Progress Software Technical Support center for your region to receive front-line support.
Table of Contents
The Roundtable Total Software Management System product is a team-oriented extension for the Progress OpenEdge development environment that provides extensive Software Configuration Management (SCM) and programming productivity tools. This chapter provides a high-level overview of the configuration management discipline and explains how to use Roundtable to achieve effective SCM.
SCM is the discipline of managing the entire life cycle of a software project. While the term is often used to describe change control systems, just implementing a change control system does not mean that a organization is practicing SCM.
Practicing SCM requires the application of business and engineering policies and procedures to ensure an appropriate level of control and auditability throughout a software project. Implementing SCM involves introducing tools to help manage the many aspects of both the business and engineering domains of the software project.
SCM is comprised of four well-defined activities: Configuration Identification, Configuration Control, Configuration Auditing, and Configuration Status Accounting.
An organization that implements SCM usually focuses on the tools that the SCM software provides rather than on the SCM discipline. A key issue in implementing SCM is identifying the roles and responsibilities of the individuals involved in the software project. A primary concern of the SCM discipline is how teams work together to build systems. The organization that implements SCM can realize enormous benefit from implementing strong engineering and business management policies in support of the team process, regardless of the tools provided by the SCM software. An organization that effectively implements SCM unifies business and engineering management disciplines.
Just about everyone in the software industry has a horror story about the project that doubled or tripled in cost and failed to do anything useful. Most of these failures could have been avoided if the organizations had implemented SCM. SCM's control of and visibility into the software development process would have made it possible for management to adjust, redefine, or cancel the project before it ran aground.
The most difficult issue facing the business manager of a software development effort is auditability. It is extraordinarily difficult to know, with any degree of certainty, what the state of a software project is at any given time. Additionally, the trend is toward more complex software tools, and business systems of increasingly larger scope.
The ideal SCM system allows you to simplify, streamline, and seamlessly integrate the management of the software life cycle into the development environment so that business managers can play an active and meaningful role in the process of software definition, development, and maintenance. The challenge is to introduce the management principles of control, auditability, and status accounting in a way that engages the software engineer, designer, and quality assurance staff in the cooperative effort.
Software engineers often resist introducing management practices into the software development process. They are concerned that management practices will cramp creativity and increase paperwork. To deal with these issues and maintain the morale of the group, the new tools must do at least as much for the software engineer as they do for the business manager. The Roundtable system can and has accomplished this!
When you present engineering personnel with an SCM implementation, the main reason for their resistance is that they see the system as extra work and an affront to their abilities. Telling the software engineer that the SCM system will allow management to manage them better will not get engineers excited. To get their attention, you show them new tools that improve communication among the engineering staff, reduce meeting time, allow decisions on change requests to be made quickly, and keep management out of their hair. Roundtable tools integrate with the development environment and fill the needs of software, quality assurance, and support engineering as well as the needs of management.
Roundtable allows management to become more involved in the software development process without compromising or inhibiting the creativity or productivity of the engineering staff.
Roundtable makes it possible for everyone involved in the SCM process to communicate and share information electronically. Roundtable's task management paradigm provides engineers and managers with almost immediate response to action item requests throughout the project. Additionally, it puts much of the project information at the fingertips of both managers and engineers right inside the development environment.
One of the most difficult steps in implementing SCM is choosing the correct SCM model for your organization. Roundtable allows your organization to design and implement an SCM model that achieves a high degree of concurrence between the capabilities of the system and the needs of the project being managed. The essential issue in designing the model is how much of the configuration auditing process to apply and how many workspaces to implement.
An SCM system is comprised of tools that support the four basic activities of SCM:
Configuration identification is simply the identification of a relative arrangement of software system components. An important part of configuration identification is the realization that a software project is comprised of much more than source code. A software project might include:
Contract or marketing specifications
Functional requirements documentation
Architectural design documents
Quality assurance guidelines
Coding standards documentation
Component analysis documents
Component design documents
Source code/binary code
Tool configurations used to produce system builds
Test data suites
User documentation (including on-line help)
The configuration identification framework must provide an intellectual and mathematical basis for describing the relative arrangement of these system components at a specific point in the development process. Over time, software systems undergo an iterative, incremental evolution that can be described as a series of baselines. The following table lists some commonly used SCM baselines. The terms provide a good starting point for a discussion of which baselines a given product development effort needs.
| Abbreviation | Description |
|---|---|
| FB | Functional baseline (often called requirements specification) |
| AB | Allocated baseline (often called functional specification) |
| DB | Design baseline (often called engineering baseline) |
| Alpha | Alpha baseline |
| Beta | Beta baseline |
| PB | Product baseline (golden masters) |
The following table lists system components and indicates the baselines with which they are usually associated:
| System Components | FB | AB | DB | Alpha | Beta | PB |
|---|---|---|---|---|---|---|
| Contract or marketing specifications | Yes | Yes | Yes | Yes | Yes | Yes |
| Functional requirements documentation | Yes | Yes | Yes | Yes | Yes | Yes |
| Architectural design documents | Yes | Yes | Yes | Yes | Yes | |
| Quality assurance guidelines | Yes | Yes | Yes | Yes | Yes | |
| Coding standards documentation | Yes | Yes | Yes | Yes | Yes | |
| Component analysis documents | Yes | Yes | Yes | Yes | Yes | |
| Component design documents | Yes | Yes | Yes | Yes | ||
| Source code/binary code | Yes | Yes | Yes | |||
| Tool configurations used to produce system builds | Yes | Yes | Yes | |||
| Test data suites | Yes | Yes | Yes | |||
| User documentation (including on-line help) | Yes | Yes |
Your system may require more or fewer baselines, and some of the system components belong in different baselines. Your objective in identifying a baseline is to define what should be in the system at a given point in time.
Baselines are often incorrectly referred to as milestones. However, milestones identify points in the project schedule where you reach specifically identified goals. Often, there are many project milestones within each project baseline. Configuration auditing is the process of ensuring that a system does contain everything implied by its baseline status.
Early SCM efforts saw the waterfall development cycle entrenched in the policies, procedures, and tools used to implement the SCM discipline. Modern software development incorporates an iterative development process that includes rapid prototyping, JAD sessions, and component-oriented system construction. These and other factors make the waterfall development cycle a poor model around which to construct project- and software-management policy and procedures. If SCM is to be a natural and intuitive part of the software development process, its policies, procedures, and tools must accurately record and model the activities of the process. The SCM discipline must support iterative development and the management of parallel activities.
Iterative development involves the incremental improvement of a baseline through a series of measure, cut, and fit cycles. The underlying theory is that it is not possible to completely define the problem domain of a given application without the experience of trying to build some parts of it. Design methodologies are based on the concept of decomposition. You must break down a large system into smaller parts in order to understand the relationships of objects in the problem domain.
The relationships of components in a complex software system are not always obvious until the development process is underway. Changes in system design often occur as a result of issues that surface during the development process. Often, decision makers for a project are not technically oriented and can be reluctant to make decisions based on design abstractions. Instead, they want to see major portions of the system functionality surfaced before they make these decisions.
Roundtable provides an answer to this iterative development process by allowing multiple instances of the software system to exist concurrently. These instances are called workspaces. These workspaces support an incremental development cycle that is fully controllable under the SCM disciplines.
Refer to the three workspaces in the following diagram:
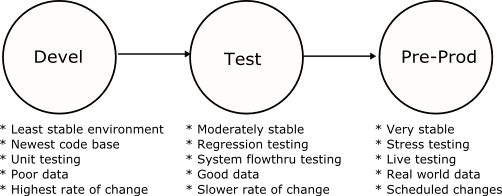 |
The arrows indicate a flow of new and updated system components from workspace to workspace. This flow is controlled by you, the developer, and generally occurs when a self -consistent set of changes is completed in one workspace and is ready for importation into the next (target) workspace. The important issue in this promotion of changes from one workspace to another is that all modified components are promoted together as a unit, and that comprehensive documentation of the impact of the modifications on the target workspace is available.
A workspace is defined primarily by its use, while a baseline defines the expected content of a workspace. Because you are in control of how many workspaces exist in your development environment and how they are used, Roundtable has no strict rules regarding the relationship between workspaces and baselines. However, here are some general guidelines based on the simple workspace example previously shown:
Development workspace — Primary development area
Functional baseline
Allocated baseline
Design baseline
Test workspace — Primary testing, limited changes (mostly bug fixing)
Alpha baseline
Beta baseline
Pre-prod workspace — Primary deployment
Production baseline
In some environments, there is a tendency to think of the Test and Pre-prod environments as builds of a system. This approach is clumsy and less than satisfactory for larger development efforts as it precludes the opportunity for maintenance or emergency patch activities in any workspace except Development. If there is significant change in the development environment after the build that represents the Test workspace, it may not be possible to produce a patch for the test environment in a timely way.
Roundtable provides extensive support for identifying potentially dangerous concurrent changes to software system components in different workspaces. This conflict is called orphan change management. For more detail, see Section 4.7, “Object Variants”. This support for orphan change management allows parallel development to occur in two or more workspaces simultaneously with an appropriate level of control and visibility.
Your business model drives your decision to allow changes outside the Development workspace. Consider the following situation.
You oversee the development of an in-house MIS system of significant size. Management demands that some, but not all, of the system become operational as soon as possible. Your team members code these early deliveries first and promote them from the Development workspace into the Test workspace, where testing begins.
In the meantime, programmers working on the new system components make changes to some of the previous components to accommodate the interface and shared-data requirements.
In the Test workspace, the testers discover bugs and other problems in the system components. The programmers, working on the system in the Development workspace, inform you that while they can make the changes requested by the testers, they cannot deliver the changes into the Test workspace because the system components in question have been modified to work with the new system components. However, management still wants the system components that are in the Test workspace.
This situation presents a compelling argument for making the bug fixes and required changes in the Test workspace. The Roundtable orphan change management functionality makes this possible with minimum risk.
Parallel development occurs when there are many variations (or flavors) of a system. For example, a core business system might be modified for different clients or for vertical markets. Roundtable maintains each variant in a separate workspace and manages the promotion of code.
A later section in this chapter addresses more advanced issues of workspace management for a variety of situations.
In Roundtable, the basic configuration item is called an object. Each object is stored in a repository, which is a OpenEdge database. You can query information on these objects using the OpenEdge ABL.
The repository stores a version ancestry for each object, which is comprised of each version of the object. Rather than store the full content of each object, most object versions are in a delta format which lists only the changes from the previous version.
Objects are stored in the repository using a unique key with the following components:
Object type
Product module
Object name
Version code
Any configuration of your system can be expressed as a list of object versions, with each object version specified by the four component values required to extract the object from the repository. When you specify the contents of a workspace, Roundtable extracts the appropriate objects from the repository and writes the contents of the object to OS files or, as in the case of schema objects, into the OpenEdge database schema.
The object types supported by Roundtable include:
PDBASE: A database definition.
PFILE: A table definition.
PFIELD: A field (column) definition.
PCODE: A general file container, usually source code or binary resources.
DOC: A document file.
The other components of the key are described in the following sections.
Configuration identification of a system involves decomposition of the system into smaller, more manageable, modules. Roundtable supports the mapping of a logical configuration hierarchy to a physical configuration hierarchy.
The logical configuration hierarchy is the hierarchy of the objects in the repository. Each object belongs to a product module, and each product module belongs to a product. This defines a three-level, logical view of the object stored in the repository:
Product
Product module (one or more per product)
Object (one or more per product module)
The logical configuration hierarchy provides a way to define the logical relationships of objects quickly. It also serves as a form of documentation for your system design. Generally, it is a good practice to define your product modules along the functional boundaries of your system. For example, if you develop a general accounting application, you may have product modules for general ledger, accounts payable, and accounts receivable.
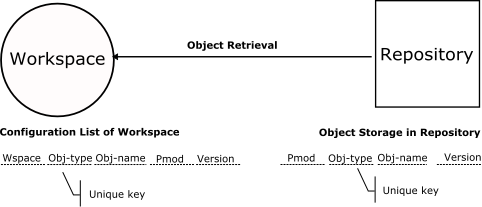
The physical configuration hierarchy is the definition of workspace contents, down to the specific directories in which to store objects. Each workspace represents a collection of object versions. Roundtable manages a table of these object versions, called the configuration list. The following fields define the unique key for objects in this table:
Workspace ID (Wspace-id)
Object type (PDBASE, PFILE, PFIELD, PCODE, or DOC)
Object name
In conjunction with the object type and object name above, the following fields are included in the configuration list, allowing the unique identification of the object version contained in the workspace:
Object Version
Object Pmod
Refer to the following diagram:
 |
Each entry in the configuration list also specifies a workspace module. Workspace modules map objects belonging to a product module, associated with the workspace module, to a specific directory structure. (The directory structure is always specified relative to a root directory for the workspace.) Each product module is associated with only one workspace module, but many product modules can be associated with that workspace module. This allows objects from multiple product modules to coexist in the same directory if necessary. This functionality allows the effective management of custom systems.
The following diagram illustrates a simple system:
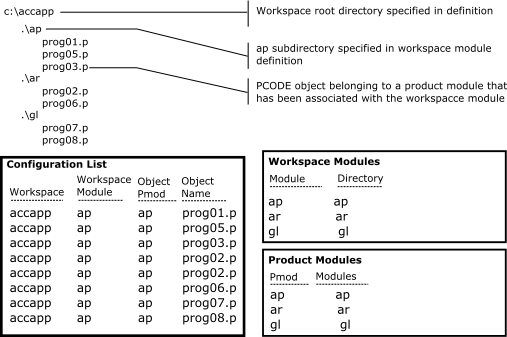 |
There is a one-to-one correspondence between the workspace module name and the directory name associated with the workspace module. In addition, there is a simple one-to-one correspondence between the workspace module name and the product module name. When you design a new system, you should retain these simple relationships.
The following diagram demonstrates a slightly more complex system:
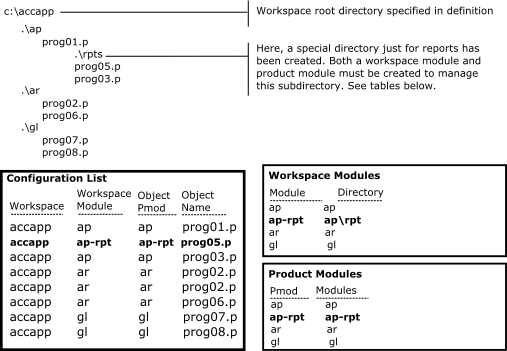 |
The subdirectory aprpt contains accounts payable reporting procedures. This example illustrates the need to create a workspace module and product module for each subdirectory in the system.
You might want to map objects that appear in the same physical directory to different product modules. The following diagram shows this approach:
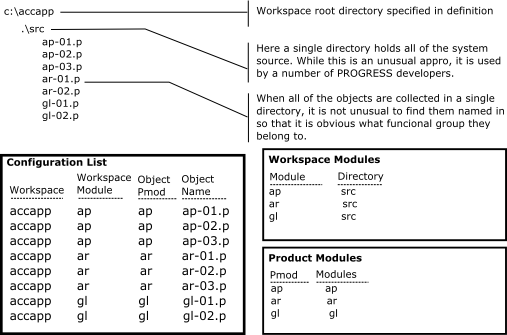 |
So you can see by these examples, it is possible to map any level of directory structure to workspace modules in the Roundtable environment.
The Configuration Control Board (CCB) plays a central role in the configuration control process. It is often comprised of both buyer and seller representatives and is responsible for making decisions about the changes to be made to the system definition during the course of the project. The CCB approves, monitors, and controls:
The conversion of design objects into system (software) configuration items
Changes to the system
To ensure the success of an SCM effort, it is important to adopt a formal SCM plan. A typical Configuration Management Plan contains the following checklist:
System Description
An overview of the system being built
Configuration management (CM) organization
The CCB
Identification
Control
Auditing
Status accounting
Other product assurance disciplines
CM Tools
Identification tools and labeling conventions
Control tools
Auditing tools
CM procedures
Design stages
Development stage
Deployment stage
Operational/maintenance stages
CM Resources
Budget dollar
Budget staffing
Budget other
There are many good texts on SCM that provide information on how to implement a full SCM plan and define and assign the responsibilities of the CCB. A common-sense approach to implementing a CCB is usually enough, unless the software project is huge or is for the military. For work done under government contract, find out which of the many SCM standards documents the contract requires and implement those standards. The standards cover every phase of the software project life cycle, and even provide sample forms and report formats to facilitate communication during the project.
Roundtable provides a task paradigm for assigning and tracking work performed in a software project. No changes may be made to objects under Roundtable control without an active task to perform the work. Use the Roundtable security system and tasks together to implement a variety of controlled workflow policies. These policies can vary by workspace.
As the system director, you determine who can create, use, and complete tasks. In a loosely managed environment, it is not unusual for programmers to have this authority. When you require complete control over the changes made in a system, you can set security permissions so that only you can create a task, check out an object under the task, and complete the task. In other words, the programmer can only work on objects you provide under the task. Roundtable security is set up by function and user, so you can achieve a balance between control and flexibility.
Tasks also provide an effective reporting mechanism. You can generate a report that describes the task and each of the objects being created or modified under the task. This report provides information to team members who are interested in your work because it overlaps theirs, and to managers who need to track the progress of the project.
On smaller projects, the CCB may directly authorize all tasks, even if the tasks are actually created and entered by the programming staff.
Configuration control requires that your SCM system provide at least the following three simple version control capabilities:
Protection from lost changes
Version identification
Version retrieval
Roundtable provides protection from lost changes as a check-in/check-out process that essentially grants write access to a single user for a system component in a workspace. Version identification tracks current and previous versions of a file using a unique numeric identifier. Version retrieval allows a user to request a copy of some previous version of a file.
Roundtable provides the following enhanced change control features:
Version branching (parallel development/orphan change management)
Variant identification and management (management of custom variants having independent version ancestries)
Shared and private workareas (sometimes called sandboxes)
The Roundtable workspace management functionality provides another level of change control not found in most SCM systems, a form of version merging at the system-configuration level.
Roundtable provides a sophisticated mechanism for both protecting and sharing work being performed by team members. When you want work in progress to be completely isolated from other users, you may check source objects out to a task directory that is not visible to other users of the workspace. The previously completed version of the source object remains in the workspace directory structure so that other users can continue to use the older version of the object. (Remember, all work done within a Roundtable-controlled workspace is done under an assigned task. You may specify a task directory when you create the task. The task belongs to the programmer to whom it is assigned, and the task directories should be unique to the task, if possible.)
When two or more programmers must work closely together on part of the system, Roundtable can copy the source objects being worked on by a programmer into a group-directory that is associated with one or more tasks. Roundtable sets up the PROPATH with paths in the following order:
Task directory
Group directories
Workspace directory
This capability allows you to make a source object that is not yet completed available to other programmers. This is useful when you need to modify a common include file or procedure.
You may also want to make a source object that is not yet completed available to all of the users of a workspace. Roundtable can copy a source object from the task directory into the workspace directory on demand. Roundtable can also reverse this decision and restore the previously completed version of the object into the workspace directory. This functionality makes it possible for everyone to test modifications before an object is complete.
Roundtable manages the placement of a source object in the task, group, and workspace directories based on the share status of the source object version. The share status of an object can be changed as necessary, and Roundtable performs all association housekeeping for you. This housekeeping includes recompilations to ensure accurate system views for each user.
Configuration auditing is the process of confirming that all system components that should be in a given baseline are in the baseline. The checklists in the next few sections illustrate some of the questions asked during the audit process for sample baselines. When a baseline audit is completed, the baseline is said to be sanctioned. Roundtable provides workspace, product, and task reports that identify the status of each registered component (object). It also provides textual information describing the component and its version identification. Use these reports to address some of the questions on the configuration audit checklists.
Configuration auditing is the mechanism management uses to ensure that a software project is on track and building what is actually required. Some argue that a given software project has so much R&D content that configuration auditing is not useful. This is not the case at all. If the team must use exploratory engineering to refine the product definition, this should usually be done without the overhead of full configuration auditing. However, it is dangerous and foolhardy to commit to the development of a product if its required concepts, design, and implementation strategies cannot be stated at the level of detail required by the configuration audit process.
The functional baseline (FB) describes the system on a top-level functional basis. The FB is the first baseline produced. An SCM audit of the functional baseline should answer the following questions:
Is there is a clear trace between system requirements and software requirements?
Is it possible to sort out software from system requirements?
Is there a system concept that is consistent with stated operational requirements?
Is the functional design of subsystems consistent with stated system requirements?
Do the user, seller, and buyer agree on the content of the functional baseline?
The allocated baseline (AB) is the mapping of system design to functional components. It is important to know what parts of the system provide the functionality identified in the FB. An SCM audit of the AB should answer the following questions:
Is there clear traceability of the functional specification in the FB and the allocated functional items in the AB. In other words, is it clear which parts of the system provide each function identified in the FB?
Are all functions that are identified in the FB mapped to functional items in the AB?
Are models and algorithms that define functions to be performed logically and mathematically correct and consistent in both a verification and validation sense?
Does the AB clearly separate hardware, off-the-shelf software components, and new software functions?
Are all questions concerning technical options, trade-offs, operation requirements, etc., that may impact subsequent detailed design, answered or at least identified?
Do the user, seller, and buyer agree on the content of the AB?
The design baseline (DB) is comprised of detailed designs for each functional component of the system. An SCM audit of the DB should answer the following questions:
Does each detailed design item correlate with a functional component?
Is the DB complete enough to be used in a design review process?
Has a design review process been completed and all resulting issues resolved?
Does the DB fulfill product assurance requirements (including design standards, procedures, and facilities for testing)?
Is the overall architectural and design approach clear?
Do the user, seller, and buyer agree on the content of the DB?
The alpha baseline should define the first cut of some or all of the system that can be examined as a working software system and used to gather information from potential users and do proof-of-concept testing. An SCM audit of the alpha baseline should answer the following questions:
Are the screens and processes in the system a direct expression of the specifications in the AB and the design in the DB?
Does the alpha baseline contain enough functionality to allow meaningful comments by the software reviewers?
Has the alpha baseline satisfied product assurance requirements? (Note that these requirements may be greatly relaxed from those applied to the product baseline, described later.)
Have provisions been made for the support of the alpha release?
Has a plan been developed for incorporating alpha baseline comments into the system?
Do the user, seller, and buyer agree on the content of the alpha baseline?
The beta baseline should define the first cut of some or all of the system that can be examined as a working software system used in an actual production setting and used to gather information from potential users and do proof-of-concept testing. An SCM audit of the beta baseline should focus on establishing answers to the following questions:
Are the screens and processes in the system a direct expression of the specifications in the AB and the design in the DB?
Does the beta baseline contain enough functionality to allow its use in a production setting?
Has the beta baseline satisfied product assurance requirements? (Note that these requirements may be marginally relaxed from those applied to the product baseline, described later.)
Have provisions been made for the support of the beta baseline release?
Has a plan been developed for incorporating beta baseline comments into the system?
Does an expedite mechanism exist for reporting critical bugs discovered in the beta baseline?
Are the appropriate processes in place to develop and deliver patches to beta baseline users?
Have adequate policies and procedures been developed to track and manage beta baseline users?
Do the user, seller, and buyer agree on the content of the beta baseline?
Do the user, seller, and buyer concur that the beta baseline is complete and free of any defects that prohibit establishing the beta baseline?
The product baseline (PB) is comprised of the completed system. It defines the system and is often referred to as the "as-built" definition. An SCM audit of the PB should answer the following questions:
Are the source code and data structures of the PB a direct translation of the DB?
Do the FB, AB, DB, and PB correspond? In other words, is it possible to state with certainty that what was contracted to be built was in fact built?
Has the PB satisfied product assurance requirements?
Are all of the deliverable components that comprise the system registered as part of the PB?
Does the PB fulfill all known and specified operational requirements?
Have standards and good programming practices been met and approved by the product assurance department?
Do the user, seller, and buyer concur that the PB is complete and free of any defects that prohibit establishing the PB?
Configuration status accounting ensures that a complete and accessible record of the changes to a software system and reasons for such changes are available. Most programmers do configuration status accounting without knowing they do it, by keeping a programmer's notebook and inserting comments in the source code. The objective in configuration status accounting is to record why, when, and by whom a change is made. Configuration status accounting is often a reporting function that pulls the required information out of data stores created and managed by the configuration control tools in the SCM system.
Roundtable provides extensive configuration status accounting through the implementation of task and workspace management. Essentially, no change can be made to the software without it being tracked as part of a task in a specific workspace.
You should develop a formal information flow among the groups involved in the SCM effort. A simple example of this information flow follows:
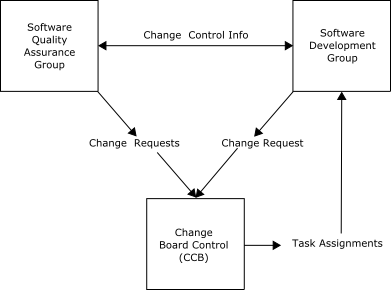 |
This simplified model places the CCB in a role of direct, day-to-day involvement in the development process through the creation of task assignments. In Roundtable, all work is performed under the auspices of a task assignment, and changes can be tracked back to that task. It is normal practice to enter a description of the change request or design reference into the task assignment so that changes to the system made under a given task can be tracked back to an original specification document. This example uses change request as a general term covering all types of change notification documents. Change notification documents are not directly managed in the Roundtable system, although there is an indexed userref# field in the task record that you can use to tie the task record to a user-supplied defect record or group of records.
SCM illustrates the development process and provides better information for management and more predictable delivery schedules. The goals of SCM are to:
Improve profitability
Save time
Reduce the amount and improve the quality of communication between management and programmers
Reduce the cost of producing software
Achieve a net increase in productivity
Shorten the development cycle time from design to delivery
Improve the accuracy of the estimating process
Improve the project management information flow within the development, testing, and deployment cycles
Make the version control process as transparent as possible
Make higher-quality information quickly available to each team member
Make accessing system configuration information a natural and simple part of the development process
You implement SCM policy by defining what work should be done in each Roundtable workspace and by defining the flow of changed objects allowed between workspaces. The Roundtable importation process searches source workspaces for objects that should be imported into the current target workspace. You define networks of workspaces by specifying a list of source workspaces for each workspace, and by providing the additional product configuration information that allows Roundtable to determine which objects in the source workspace are candidates for importation. The definition of source workspaces is part of the setup for a new workspace and does not have to be repeated for every importation.
SCM policies and procedures for managing a software development effort depend on the kind of software development being undertaken. It is common for software development to result in a product release.
Product releases are generally deployed to large numbers of users and packaged for installation, by the user at the user's site, with little or no involvement by the software developer. The ongoing development of the OpenEdge ABL is a good example of a product-release-oriented development effort.
Product releases occur at well-defined intervals and often contain significant advances in system functionality. It is not unusual for a year or more to pass between major releases of such a product.
Many justifications exist for pursuing the product release strategy. One of these is the tooling time required to manufacture everything from written documentation to packaging. Another reason is that as the complexity of a system grows, it becomes very difficult to predict the indirect impact of changes made to the system. Therefore, the system must be tested thoroughly, as a complete and stable entity, several times prior to release.
The following sequence of diagrams depicts the evolution of a product managed by the Roundtable system:
 |
 |
 |
Roundtable retains a complete evolutionary development history of the system in the Devel workspace. The Ver 1.x workspace contains configuration histories for that generation of the software system. It is not unusual for maintenance efforts to be active in the Ver 1.x workspace to provide some level of support for the older software after the Ver 2.x generation is released. While it is possible to import new or modified software from the Test workspace, this is usually a very selective and infrequent occurrence.
The strategy presented provides continued support of older generation products. Roundtable allows you to manage on-going development in any of the workspaces above and then merge the completed work into other workspaces. For example, if a bug is fixed in the Ver 1.x workspace and the modified procedure is unchanged in the Devel workspace, Roundtable informs you that you can bring the newer code into the Devel workspace so the bug can be eliminated from the Ver 2.x product.
Refer to the following diagram:
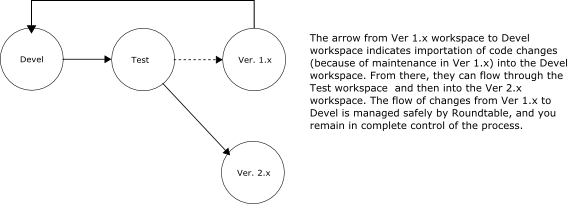 |
In general, it is possible to establish a flow between any two workspaces at any time. The key to effective workspace management lies in having clear policies for workspace promotions and understanding how these workspace promotion activities relate to the versions of your system.
Another common software development life cycle involves the incremental deployment of an application as various components are completed. This is common in IS environments where the developers have a relatively small audience and a high degree of involvement with end users. This kind of development life cycle is also common where custom business systems are being developed and the user wants to see the progress of the application.
It is not unusual for development to commence before there is a firm and complete understanding of the scope and specific functionality to be included in the system. While many would argue that the answer to this problem is to insist on defining specifications before work begins, there are many pressures that lead to a compromise.
Regardless of what circumstance leads to implementing an incremental deployment strategy, Roundtable provides tools that allow you to manage this approach effectively, according to accepted SCM practices.
Refer to the following diagram:
 |
Each Roundtable workspace is a complete instance of your software application. Because Roundtable makes it possible to manage multiple workspaces easily, you can manage incremental deployment successfully.
You must be aware of some troublesome problems with incremental deployment, and you must develop policies and procedures to ensure effective management of your incremental deployment strategy. These problems involve the unavoidable parallel development that occurs in, at least, the Development and Test workspaces. Parallel development occurs whenever a change is made to the same object in two different workspaces at the same time. Roundtable, of course, ensures that each of these concurrent modifications results in different version numbers, but it is possible for changes in one of the versions to be lost. The version whose change would be lost is called the orphan version.
Consider the following situation:
An object is created in the Development workspace and completed with the version number 01.00.00.
The object is promoted into the Test workspace. Testing of the object begins.
The object is checked out into the Development workspace and work begins on major modifications that will take two weeks to complete.
A bug is discovered in the object in the Test workspace. The bug must be repaired before the remaining tests can be performed. Since the object in the Development workspace is now broken because of the new work being done on it, you need to fix the bug in the Test workspace.
You check out the object in the Test workspace. Since Roundtable knows that the object is checked out in the Development workspace, the system warns you that a possible object orphan condition exists. You fix the bug in the object you have checked out in the Test workspace. You inform the programmer who is working on the object in the Development workspace of the changes you made so the fix can be incorporated into that version.
You check in the object in the Test workspace and choose to increment the revision number, so the version code of the object in the Test workspace is 01.01.00. This object, and other completed changes in the Test workspace, can then be imported into the Pre-Prod workspace.
The programmer checks in the object in the Development workspace and chooses to increment the version number, so the version code of the object is 02.00.00. Roundtable provides a report that the programmer can run before a check in or task completion process that reports on any orphan conditions that exist.
When you choose to import objects from the Development workspace into the Test workspace, the object (discussed in this exercise) version 01.01.00 in the Test workspace is replaced by the object version 02.00.00 completed in the Development workspace.
The most important action of this process is informing the programmer in the development area that a change was made to the same object in the Test workspace. Otherwise, the programmer may not catch the bug that was found in the original procedure and it will resurface when the new version 02.00.00 is imported into the Test workspace.
Roundtable warns the user when orphan conditions exist that could lead to lost changes.
Another potential problem area with an incremental life cycle occurs when preparing updates to system installs in the field. The Roundtable deployment system makes this simple. You can define one or more sites to be updated from a given workspace. For each of these sites, you can track each deployment sent to the site. Roundtable tracks the content of each deployment, so there is never any doubt about which objects are at a site and what the version of each object is.
Roundtable creates incremental deployments after the first deployment. An incremental deployment consists of only the objects that have changed since the last deployment, and a list of those procedures that must be recompiled because of the changes being delivered. Because only the changes in the system are being delivered, the size of the update package is usually very small compared to the size of the whole system.
Many PROGRESS Application Partners customize the applications they sell. This business practice presents special challenges to the implementation of SCM. It is important to recognize the difference between customizing a core application and simply building custom systems from scratch. If you are building custom systems from scratch, each system can, and should, be treated as a separate configuration, thus avoiding any complications in the application of the SCM discipline. However, if you have a core application to which you add or change functionality, enormous benefits come from managing the core application and each custom variant so that changes in the core application can be easily promoted into selected custom systems.
For example, customers who want to purchase your application with custom enhancements are often concerned about the difficulty of getting updates to your core application and to the custom enhancements. In fact, many of these customers may be abandoning their current systems because they can no longer get cost-effective updates from an existing vendor. Roundtable provides an effective solution to this problem.
The objects managed in the Roundtable system are stored in the repository by the following unique key:
Object type
Product module (Pmod)
Object name
Version code
The pmod component of this key allows Roundtable to store two objects with the same object type and name in the repository. Refer to the following table:
| Object Type | Product Module | Object Name | Version |
|---|---|---|---|
| PCODE | core_ap | menu.p | 01.00.00 |
| PCODE | core_ap | menu.p | 01.01.00 |
| PCODE | cust1_ap | menu.p | 01.00.00 |
| PCODE | cust1_ap | menu.p | 02.00.00 |
This table shows that the object menu.p exists under both a core_ap and cust1_ap product module. The menu.p object belonging to the cust1_ap is a custom variant. It represents a replacement for the menu.p object belonging to the core_ap module.
The ability to store two objects of the same type and name, but with a different product module, allows Roundtable to track custom variant objects in a workspace. Refer to the following diagram:
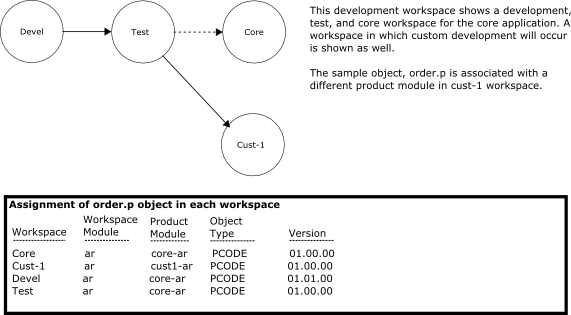 |
To manage the development of a custom system, begin by creating a workspace in which the custom system will be developed (Cust-1 in the example). Then create one or more product modules to contain the custom objects for the system (cust1-ar in the example). You can now completely replace an object with a custom variant of the object (order.p in the example).
Objects with different product modules have completely separate version ancestries. For example, a version 01.00.00 exists for order.p under each product module. This makes it obvious that the object is a complete replacement for the core object and not simply a branch version.
The Roundtable importation process is custom variant smart. It will not unwittingly overwrite your custom work when you import changes from the core system into your custom workspace. The rule that Roundtable applies is very simple: if the object in the target workspace is not from the same product module found in the source workspace, Roundtable overwrites it only when specifically instructed to do so.
It is sometimes necessary to coordinate and manage related development activities occurring at locations not directly connected to a central repository of configuration information. This situation might occur because of geographic separation, the involvement of separate organizations, or the use of incompatible tools in the development process.
Roundtable provides the ability to transfer configuration information among repositories to facilitate distributed development. Each of these repositories is identified by a site number and is often referred to as a site. The following sections discuss the basic issues involved when doing distributed development and offer specific approaches to common distributed development scenarios.
This discussion about distributed development focus on implementation strategies. Use the references to chapter topics provided to supplement the materials in this overview.
Each distributed development group runs its own copy of the Roundtable system and has an independent repository where configuration information is stored. Each repository is identified by a unique site number. A site number of 0 is allowed. It is treated in a special manner and is the default value on first-time installations of the Roundtable system. The site designated with the number 0 is called the central site.
Each additional site in the distributed development network of repositories will have unique site numbers in the range of 1 to 999. A site with a number other than 0 is called a partner site. The site numbers can be assigned in any order but cannot be changed once assigned.
Site numbers are used to provide a unified naming convention for information belonging to each site. This is accomplished by using the site number as a separate key field in some repository tables and by using the site number as a code prefix for other tables. This identification of information by site provides the foundation for the sharing of information among distributed repositories.
Much of the information you place in the configuration repository must be identified by a user supplied code. The format of this code is important and is validated to conform to the following rules:
If entering a code on the central site (site 0), then the code must not begin with a numeric character.
If entering a code on a partner site (site number other than 0), then the code must begin with three numeric digits that identify the partner site.
Using this strategy, the system is able to identify the originating site of each record in the distributed network. The system allows only the originating site to modify a record.
The names of products, product modules, and subtypes are examples of items in the Roundtable system that are affected by site numbering rules.
The system provides the ability to do a special form of deployment to partner sites. Deployments to partner sites include selected repository information dumped to text file format. A utility called the Partner Site Load utility reads this repository information into the partner site repository.
The process of deploying to a partner site is no different that deploying to a customer as discussed earlier, but the type of site must be set to "partner". Partner sites can deploy to other partner sites and to the central site. The central site can deploy to any partner site.
A site receives the deployment package and runs the partner site load utility to update the repository with the new information. The receiving site will usually manage a receipt workspace that represents the latest configuration received. When a receipt workspace is used it must also be updated from the deployment.
Deployments represent the configuration of a workspace at a given release level. A deployment to a partner site is comprised of two components:
A source deployment containing a full or incremental update for the remote site
Additional repository information sufficient to manage the delivered configuration as a workspace at the partner site
A receipt workspace is a read-only copy of the workspace that exists at the sending site. It cannot be altered at the receiving site. However, information can be imported from the receipt workspace into a local workspace. Importing objects from a receipt workspace into locally managed workspaces is performed by the import process.
Many vendors provide source to customers so that the customer’s development staff can enhance and extend the vendor's application. When the customer also has the Roundtable system, it is possible for the vendor to deliver partner site deployments to the customer. Partner site deployment facilitates the integration of application upgrades to the customer in a controlled and managed way. Refer to the following diagram:
 |
As the vendor develops new enhancements to the Sports product, they are delivered to the customer as partner site deployments. Partner site deployments contain both repository information and the normal remote site update package.
At site 1, the customer imports from the Sports Ver1 workspace into the 001Devel workspace. Where necessary, the customer can replace objects in the application with customized objects (variants) to modify the vendor’s application. These custom objects are protected from overwrite in future importation processes. The customer can also extend the functionality of the application by adding new objects to the application.
The diagram shows the vendor's application deployment workspace with a name of Sports Ver 1. This is done to emphasize that the releases received by a remote site in this manner are usually incremental releases, often called dot releases. When a vendor wants to distribute a new major version of a software application, it is sometimes necessary for both the vendor and the customer to manage a legacy system for a period of time. The following diagram shows how this might be done:
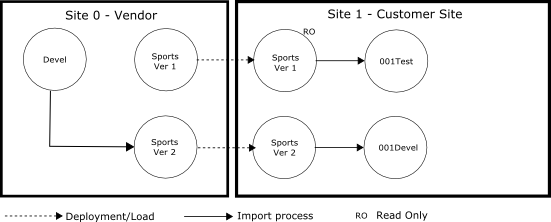 |
In the preceding diagram the new Sports Ver 2 application is delivered to the customer in a new receipt workspace, and the workspace promotion strategy is changed at the customer’s site to do integration and development with the new application. Legacy systems generally require minor maintenance and modifications, and this can be done in the 001Test workspace. The major work of integrating the new functionality of Sports Ver 2 is performed in the 001Devel workspace.
When the integration of the new system is completed, the legacy system can be dropped as shown in the following diagram:
 |
In the preceding section you saw how it is possible for an application system to be delivered into a receipt workspace at the customer site. Objects are then imported from the receipt workspace into the customer's development workspace. Note that the customer can replace objects in the application system with custom objects (variants) as required in the development workspace without fear that these will be overwritten during future imports.
This protection from overwrite is accomplished by creating custom products and product modules that belong to the customer site. The new objects created to replace an object in the vendor's application are created under a product module belonging to the customer’s site. The import process will not overwrite an object in the target workspace when the object’s product module is different from that found in the source workspace. This protects the custom objects from being overwritten.
To replace an object with a custom object in the application:
Create a custom product and product module that will own the new custom object if necessary. You might already have custom products and product modules from some previous modification.
Assign the custom product and product module to the customer's development workspace sources if they are not already assigned. This is done through Roundtable's Workspace Sources Window.
Add a new object as usual, but use the name of the existing object, and use your custom module for the new object. The existing object source is provided as a starting point for your new object.
One simple form of distributed development occurs when a single organization has two development sites that cannot be connected to a central configuration repository. For this example, assume that a cooperative software development effort is pursued by two development teams separated geographically. Team A is located in India and team B is located in California.
Each team has one configuration repository and one or more workspaces relating to their different responsibilities. The teams have the following responsibilities:
Team A - India
Primary Development
Unit Testing
Team B - California
System Testing
Deployment to Customers
Support
The following diagram describes the distributed development process with a workspace network map:
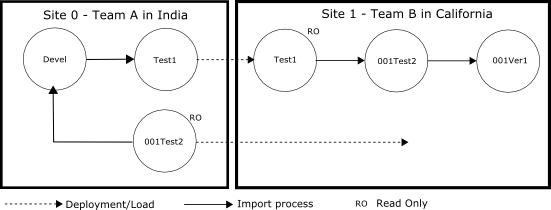 |
The preceding workspace network map shows six workspaces. The objects in the Devel and Test1 workspaces at site 0 can be modified by the members of team A at site 0. The objects in the 001Test2 workspace at site 0 cannot be modified by team A, Instead, only the partner site load utility can modify the contents of the 001Test2 workspace because it is a receipt workspace. A receipt workspace is always a read-only workspace as indicated by the RO designation in the diagram.
The objects in the Test1 workspace at site 1 cannot be modified by team B. Again, only the partner site load utility can modify the contents of the Test1 workspace because it is a receipt workspace.
The purpose of each of these workspaces is defined by the workflow of the teams:
| Workspace | Work Performed |
|---|---|
| Devel | Primary development area. |
| Test1 | Updates are imported from Devel into Test1. Unit testing is performed in this area. Deployments to the partner site in India are performed from this workspace. |
| 001Test2 | Updates are imported from Test1 into 001Test2. System testing and emergency fixes are performed in this workspace. Objects fixed in this workspace begin as a copy of the object imported from Test1. These object copies belong to a product module that is owned by site 1. Deployments for site 0 are made out of the 001Test2 workspace. This makes it possible for the development team at site 0 to see any fixes made to the software application by team B at site 1. By using the visual difference facility team A can identify what changes should be incorporated into the system. |
| 001Ver1 | Deployments to create product packaging are made from this workspace. |
A more complex form of distributed development occurs when a single organization has two development sites that cannot be connected to a central configuration repository and primary development is shared. For this example, assume that a cooperative software development effort is pursued by two development teams separated geographically. Team A is located in India and team B is located in California.
Each team has one configuration repository and one or more workspaces relating to their different responsibilities. The teams have the following responsibilities:
Team A - India
Primary Development Accounting
Unit Testing Accounting
Team B - California
Primary Development Operations
Unit Testing Operations
System Testing for full system
Deployment to Customers
Support
The best way to describe the distributed development process is with a workspace network map as shown below:
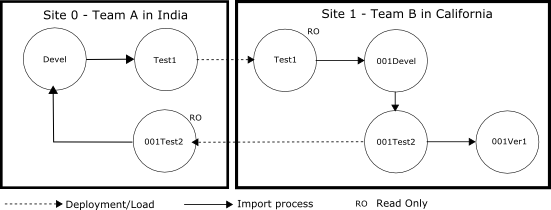 |
The workspace network map above shows seven workspaces. The objects in the Devel and Test1 workspaces at site 0 can be modified by the members of team A at site 0. The objects in the 001Test2 workspace at site 0 cannot be modified by team A. Instead, only the partner site load utility can modify the contents of the 001Test2 workspace because it is a receipt workspace. A receipt workspace is always a read-only workspaces as indicated by the RO designation in the diagram.
The objects in the Test1 workspace at site 1 cannot be modified by team B. Again, only the partner site load utility can modify the contents of the Test1 workspace because it is a receipt workspace.
The purpose of each of these workspaces is defined by the workflow of the teams:
| Workspace | Work Performed |
|---|---|
| Devel | Primary development area for Accounting. Used by team A at site 0. The Operations code developed by team B at site 1 is imported from the workspace 001Test2 into the Devel workspace. Thus the Devel workspace contains the entire system. Members of team A can only modify objects that belong to product modules owned by site 0. |
| Test1 | Updates are imported from Devel into Test1. Unit testing is performed in this area. Deployments to the partner site 1 are performed from this workspace. |
| 001Devel | Primary development area for Operations. Used by team B at site 1. |
| 001Test2 | Updates are imported from Test1 into 001Test2. System testing and emergency fixes are performed in this workspace. Objects fixed in this workspace begin as a copy of the object imported from Test1. These object copies belong to a product module that is owned by site 1. Deployments for site 0 are made from the 001Test2 workspace. This makes it possible for the development team at site 0 to see any fixes made to the software application by team B at site 1. By using the visual difference facility team A can identify what changes should be incorporated into the system. |
| 001Ver1 | Deployments to create product packaging are made from this workspace. |
Table of Contents
Roundtable organizes the collection of repository objects that make up software applications into Workspaces. The Roundtable Tabletop provides access to these Workspaces and places a number of important productivity tools within easy reach.
This overview of Roundtable Tabletop will also demonstrate how Roundtable is integrated with the OpenEdge development environment. You will soon discover that most day-to-day development activities can performed without leaving the Roundtable environment!
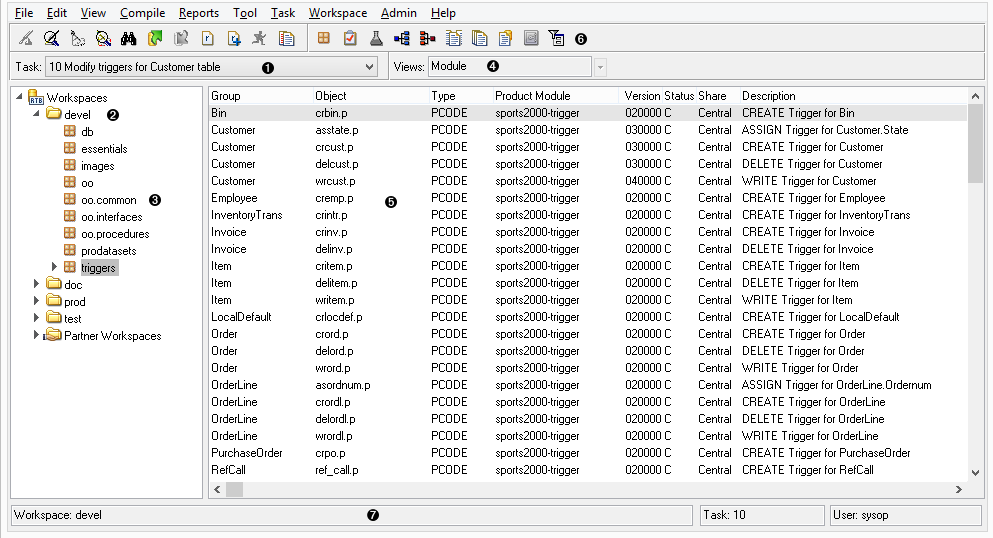
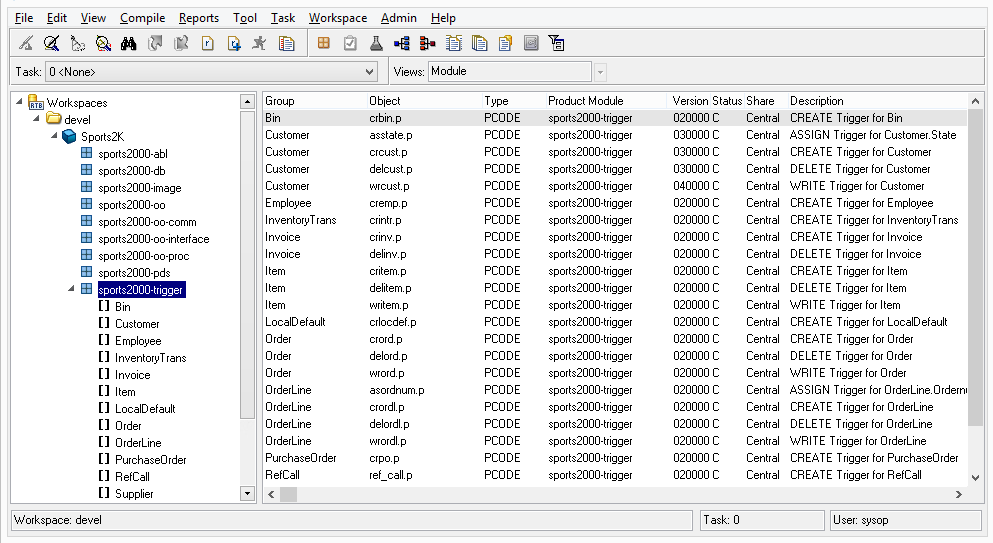
Welcome to the Roundtable environment! All Roundtable functionality is accessible via the Tabletop window.
The default view shows Workspace contents grouped by Workspace Modules.
Optionally, you can view Workspace Contents by Product and Product Modules.
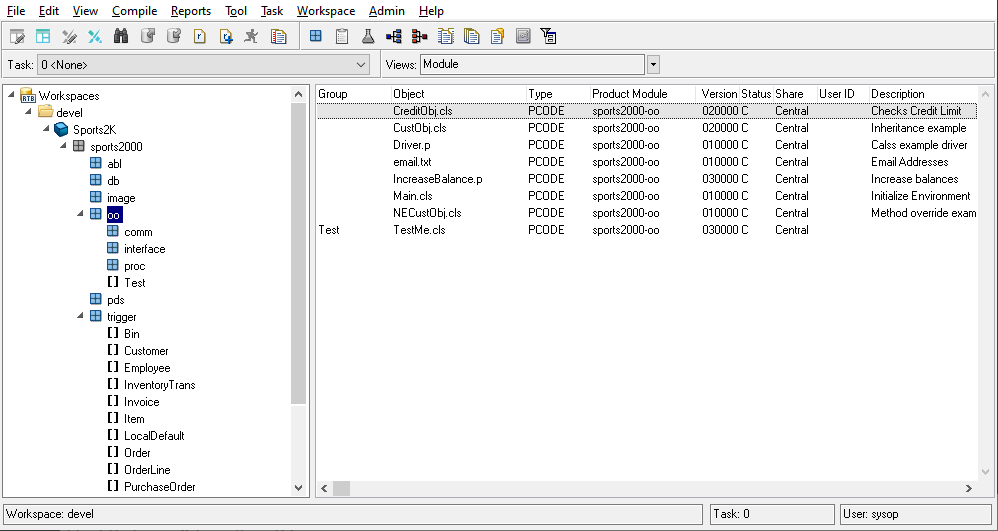
If you have named your Product Modules or Workspace Modules using a delimiter character, you can also choose to display the Tabletop in a hierarchical format.
![[Note]](../images/admon/note.png) | |
| See Section 3.6, “User Preferences” for more details on the different options for changing the default view. |
The table below describes the most commonly used Tabletop user-interface elements:
| Item | Tabletop Area | Description |
|---|---|---|
| 1 | Current Task | A drop-down list from which you select a WIP Task. Only Tasks for which you are a manager or programmer are displayed. If a Workspace is selected, only your WIP Tasks for the selected Workspace appear in the list. The 'sysop' user will see all WIP Tasks. |
| 2 | Workspaces | TreeView nodes by which you select the current Workspace. Workspaces are represented by a file folder icon. When a Workspace is selected, Roundtable connects the defined application databases for the selected Workspace. |
| 3 | Modules | TreeView nodes by which you select a Workspace Module. An icon resembling a package represents Modules. The currently selected Module is represented by a magnifying glass over a package. |
| 4 | Current/Recent Views | A drop-down list that indicates the current view, and allows you to return to a recent view. The recent views list contains up to 20 most-recent views. |
| 5 | Object Browse | The Object Browse is for you to select an object or object component to view or edit. Objects are the configuration items that comprise your software application. The information shown in the Object Browse varies with the currently selected view. |
| 6 | Toolbar | The toolbar contains buttons that execute commonly required operations. |
| 7 | Status Bar | Indicates the current Workspace, Task and User. |
You control the content of the Tabletop by selecting a view. The views provided include:
Module: Shows objects belonging to current Workspace Module and group.
Task: Shows objects checked-out under the current Task.
Lab: Shows objects in the Lab under the current Task.
Xref: Shows all objects referenced by a specified object.
Where Used: Shows all objects that reference a specified object.
Versions: Shows all versions of selected object.
Version Ancestry: Shows the ancestral lineage of selected object.
Object History View: Shows Workspace event history for a specified object.
Backup View: Shows automatic backups for the selected object.
The contents of the Tabletop Object Browse change based upon the selected view. If the Object Properties window (see Section 2.4, “Object Properties Window”) is open, the contents of the window change as you select an object in the Object Browse.
In Module View, the Object Browse contains objects belonging to the Module selected from the TreeView. By default, Roundtable uses Group codes (user defined values that can be entered for each object) to sort the objects in the Object Browse. You can assign the same Group code to a set of closely related objects so they appear together in the Object Browse.
Follow these steps to use Module View.
Choose → or Module View button.
Use the TreeView to select a Module in the Workspace. Only those objects in the selected Module appear in the Object Browse.
(Optional) Use the Filter Button Button to specify a filter that restricts objects. You can filter my object Group, Type, object name, and Product Module.
The Object Browse contains the following fields:
| Field | Description |
|---|---|
| Group | Object Group |
| Object | Object name |
| Type | Object type |
| Product Module | Object Product Module |
| Version | Object Version |
| Status | Object status: C (complete) or W (work in process) |
| Share | Object Share-Status |
| User ID | When WIP, the user-id who checked-out the Object. |
| Description | Object description |
The Task View fills the Object Browse with objects belonging to the Task specified in the Task drop-down list.
Follow these steps to use Task View.
Choose → or Task View button.
If the Task is not already selected, use the Task drop-down list to select a Task.
The Object Browse contains the following fields:
| Field | Description |
|---|---|
| Version | Object version |
| Object | Object name |
| Status | Object status: C (complete) or W (work in process) |
| Product Module | Object Product Module |
| Prev Ver | Previous version of the object |
| Task# | Object version Task |
| Share | Object Share-Status |
| Description | Object description |
![[Note]](../images/admon/note.png) | |
| Completed objects are included in this view based upon user preference. |
The Lab View fills the Object Browse with objects belonging to the Lab associated with the Task specified in the Task drop-down list.
Follow these steps to use Lab View:
In the Task drop-down list, select a Task that has a Share Status of Task, Group or Public.
Choose → or Lab View button.
The Object Browse contains the following fields:
| Field | Description |
|---|---|
| Object | Object name |
| Product Module | Object Product Module |
| Base Version | The version that the Lab object is based upon |
| Current Version | The current version of the corresponding Workspace object |
| Dirty | Indicates whether or not the corresponding Workspace object has changed since the Lab object was added or last reviewed |
| Reviewed | Indicates whether or not changes to the corresponding Workspace object have been reviewed for impact upon the Lab object |
| Update Notes | User-supplied notes related to the changes made to the object. These notes will be carried over if the Lab object is checked-out into the Workspace. |
The Roundtable Tabletop includes both xref and where-used views which allow for easy viewing of the relationships between objects in the selected Workspace.
The Xref View is useful for examining the architecture of your application and navigating through the architecture quickly. You may go through your application hierarchy recursively by selecting Xref on an object shown in the Object Browse presented by a previous Xref.
Follow these steps to use Xref View.
Select an object in any other view.
Choose → or the Xref View button. The Object Browse displays with all objects used by the selected object.
The Object Browse contains the following fields:
| Field | Description |
|---|---|
| Object | Referenced object name |
| Type | Object type |
| Status | Object status |
| Actions | Actions performed on the referenced object |
| Xref Type | Cross reference type |
| Ref Text | Referenced object name or reference text |
From the Where Used View, you can ensure that a change in the selected object is compatible with each of its users. For example, when you change the arguments of an include file, you can select the include file object, and use the Where Used View to navigate to each of the procedures that use the include file.
Follow these steps to use Where Used View.
Select an object in any other view.
Choose → or the Where Used View button. The Object Browse displays with all objects that use the selected object.
The Object Browse contains the following fields:
| Field | Description |
|---|---|
| Object | Referencing object name |
| Type | Object type |
| Status | Object status |
| Actions | Actions performed by the referencing object |
| Xref Type | Cross reference type |
| Source Type | Source reference type |
| Ref Text | Referenced object name or reference text |
The following tables describe the actions and reference types found in the Xref and Where Used Views.
Xref Actions and Descriptions:
| Action | Description |
|---|---|
| A | Access |
| C | Create |
| D | Delete |
| E | Execute |
| I | Include |
| N | New |
| P | Publish, Subscribe, or Unsubscribe |
| R | Reference |
| S | Search |
| U | Update |
| W | Whole Index Search |
| X | External Reference |
Xref Types and Descriptions:
| Reference Type | Description |
|---|---|
| ANNOTATION | Code annotation |
| CLASS | Class creation or cast |
| CONSTRUCTOR | Constructor definition |
| DATA-MEMBER | Data-member access or definition |
| DBASE | Database |
| DESTRUCTOR | Destructor definition |
| DLL | Windows DLL definition |
| EVENT | Published, Subscribed, or Unsubscribed event |
| FIELD | Database field |
| FILE | Database file |
| FUNC | Function definition |
| GVAR | Global Variable |
| IMPLEMENTATION | Interface implementation |
| INCLD | Include file reference |
| INDEX | Index |
| INTERFACE | Interface definition |
| INTPROC | Internal procedure |
| METHOD | Method invocation or definition |
| PART | Object part include |
| PROG | Program execution |
| PROPERTY | Class property reference |
| SDS | Shared dataset |
| SEQ | Database sequence |
| SFRM | Shared frame |
| SOREF | SmartObject reference |
| SUBCLASS | Class inheritance |
| SVAR | Shared variable |
| SWF | Shared workfile |
| TFLD | Temp-table field |
| WFLD | Shared workfile field |
| XINCLD | External include reference |
| XPROG | External program reference |
| XCLASS | External class reference |
| XSUBCLASS | External subclass reference |
| _FILE | Metaschema _file reference |
| _FIELD | Metaschema _field reference |
| _INDEX | Metaschema _index reference |
In the Version List View of an object, the Object Browse is filled with all versions of the selected object regardless of the Workspace in which the versions were created. Each row in the Object Browse shows a different version of the object. This makes it possible to quickly review the changes made to the object in all Workspaces.
Follow these steps to use Versions List View.
Select an object in any other view.
Choose → or Version View button.
The Object Browse contains the following fields:
| Field | Description |
|---|---|
| Version | Version number |
| Object | Object name |
| Status | Object status: C (complete) or W (work in process) |
| Pmodule | Object version Product Module |
| Prev Ver | Version from which a version was created |
| Task# | Task under which the version was created |
| Workspace ID | Workspace in which the version was created |
| Update Notes | Update notes for the version |
In the Version Ancestry View of an object, the Object Browse lists the object version currently assigned to the Workspace, followed by the ancestry for the selected version - regardless of the Workspace or Product Module in which the ancestor versions were created. The ancestry is displayed in reverse order (the selected version, followed by its immediate ancestor, followed by that version's immediate ancestor, and so forth).
Follow these steps to use Versions Ancestry View.
Select an object in any other view.
Choose → or Version Ancestry button.
The Object Browse contains the following fields:
| Field | Description |
|---|---|
| Version | Version number |
| Object | Object name |
| Status | Object status: C (complete) or W (work in process) |
| Pmodule | Object version Product Module |
| Task# | Task under which the version was created |
| Update Notes | Update notes for the version |
![[Note]](../images/admon/note.png) | |
| If the object has been moved from another Product Module, the versions of the object in the other Module appear in red. |
In the Object History View, the browse table is filling with a complete history of each action taken on the selected object in the current Workspace.
Follow these steps to use the Object History View:
Select an object in any other view.
Choose → or chose the Object History button.
The Object History View contains the following fields:
| Field | Description |
|---|---|
| Event# | Workspace event history number for action |
| Date | Date the action occurred |
| Action | Type of action performed |
| Version | Object version on which the action was performed |
| User Id | User who performed the action |
| Product Module | Object Product Module |
| Release Info | First Release in which this action appeared |
The Backups View fill the Object Browse with backups that have been created for the selected object.
Follow these steps to use the Backups View:
Select an object in any other view.
Choose → or chose the Object Backups button.
The Object Backups View contains the following fields:
| Field | Description |
|---|---|
| Object | Object name |
| Product Module | Object Product Module |
| Version | Object Version |
| Task | Object version Task |
| User Id | User who editing when Backup was created |
| Timestamp | Date and time when Backup was created |
The Informal Object Xref is a cross-reference that shows each informal object used by a selected object. Informal objects include items that are not explicitly tracked as objects by Roundtable.
Follow these steps to use Informal Object Xref.
Choose → . The Select Informal Xref Parameters dialog box appears.
Select an object type from the Referenced Object Type drop-down list.
Type a name in the Referenced Object Name field, then choose the OK button.
In the Recent Views List, the Object Browse displays a history of the navigation you have performed in a Workspace through the selection of various views on various objects.
Follow these steps to use Recent View.
Choose the Down-arrow button to the right of the Views box above the Object Browse. A popup menu of recent views appears.
To switch to any of these previous views, select an item from the popup menu.
Entries are created in the recent list each time you change the current view. The list can contain up to 20 views.
You can view information about the select object by viewing the Object Properties window. To view the Object Properties window, choose → from the Tabletop menu.
As you select an object in the Object Browse, the contents of the folders of the Object Properties window are filled with information about the selected object or object component. Choosing the folder tab brings the contents of the folder to the top so that you can see what it contains. There folder types available vary with the current type of object and view selected. The folders provided include:
| Spec | Object version information for selected object version |
|---|---|
| Config | Configuration of object in Workspace |
| Note | Description of change made for selected object version |
| Task | Task information for selected object version |
| Dbase | Database connection parameters for PDBASE object and DBase menu |
| Table | Table header definition for PFILE object and table menu |
| Field | Field attributes defined for PFIELD object and field menu |
The following sections provide a brief description of each folder available in the system. More detailed descriptions of these folders appear in the section Objects.
The Spec folder contains the specification of the object version selected in the Object Browse. The specification information includes the object's version information, a brief synopsis of the object's function and the status of the object. The Spec Tab is available for all objects.
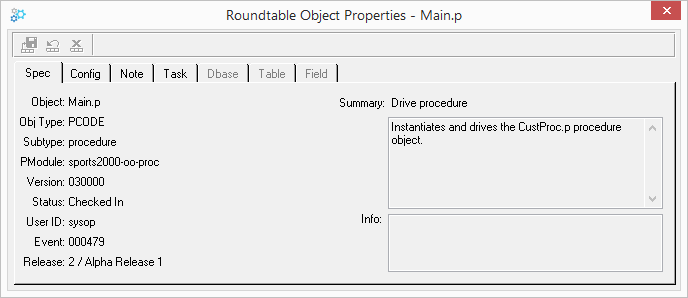 |
For more detailed information, see Section 6.3.1, “Spec Folder Description”.
The Config folder contains the configuration of the object currently selected in the Object Browse. This configuration information determines how operations on the object are handled in the Workspace. This folder is only shown for PCODE and DOC type objects. Most of the fields are not enabled for DOC type objects.
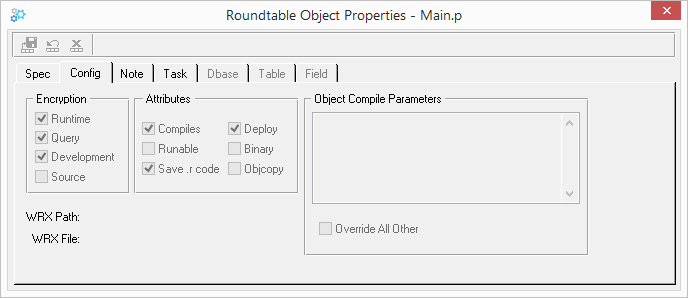 |
For more detailed information, see Section 6.4.1, “Config Folder Description”.
The Note folder contains the update history note of the object version selected in the Object Browse. Each time you close a file you have modified, Roundtable prompts you for this note. This tab is available for all objects.
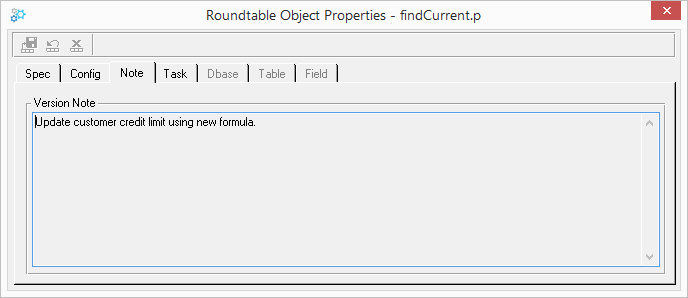 |
For more detailed information, see Section 6.3.3, “Note Folder Description”.
The Task folder contains information about the Task under which the object version selected in the Object Browse was created. This tab is available for all objects.
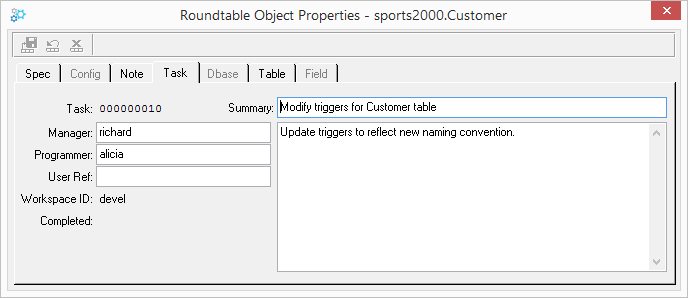 |
For more detailed information, see Section 6.3.2, “Task Folder Description”.
The Dbase folder associates a physical database with the PDBASE object selected in the Object Browse. The information in this folder specifies where the database resides and the connection parameters required to connect to the database. The Connect Order field allows you to specify the order in which multiple databases in a Workspace are connected. The first application database connected in a Workspace is connected with the DICTDB alias.
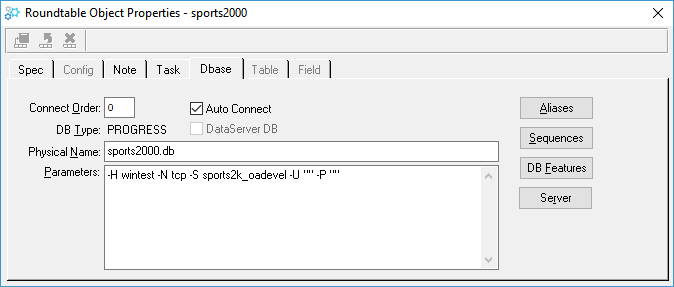 |
For more detailed information, see Section 6.6.5.1, “Dbase Folder Description”.
The Table folder contains the PFILE associated with the PFILE object selected in the Object Browse.
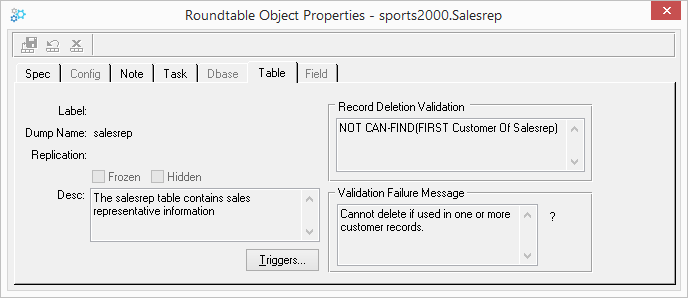 |
For more detailed information, see Section 6.6.6.1, “Table Folder Description”.
The Field folder contains the attributes of a field defined by a PFIELD object. This folder is available when a PFIELD object is selected in any view.
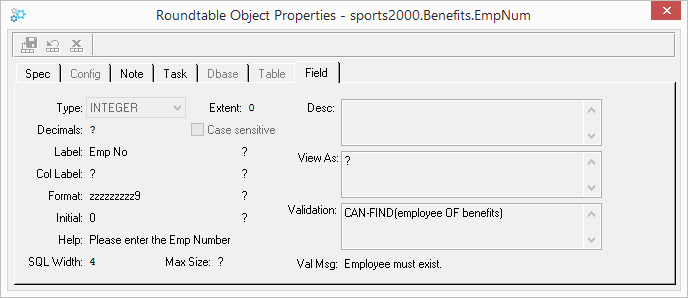 |
For more detailed information, see Section 6.6.7.1, “Field Folder Description”.
The following sections describe some common navigational operations from the Roundtable Tabletop.
From the Tabletop, you can search for any type of object assigned to the currently selected Workspace.
Choose → from the Tabletop menu bar. The Find Object in Workspace dialog box appears:
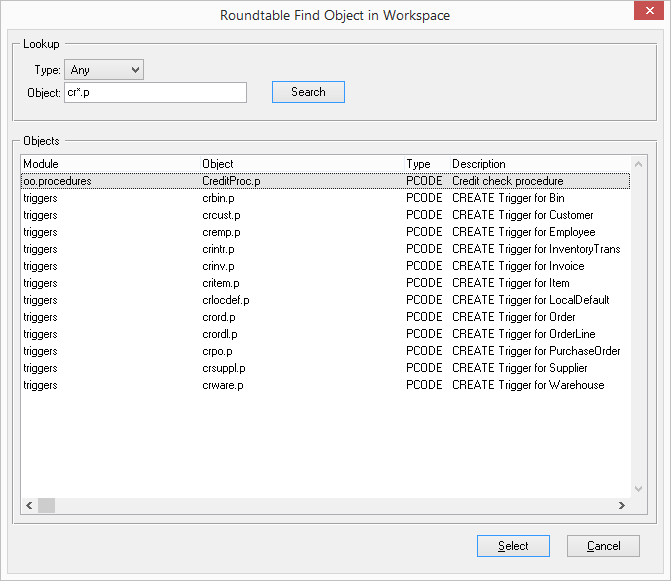
Optionally select an Object Type using the Type drop-down list.
Enter a partial or full search pattern in the Object field. The pattern can contain wildcard characters * (multiple characters) and ? (single character).
Choose the Search button. Roundtable searches for objects that match the Type that you selected and the pattern and that you entered.
If Roundtable finds one or more objects matching your search criteria, those objects are displayed in the Objects browse on the lower portion of the dialog. Otherwise, a message appears.
To select a found object, select the object in the Objects browse on the lower portion of the dialog and choose the Select button or double-click on the object.
Ensure that AppBuilder is running.
Select an object in the Object Browse.
Choose either the Edit in AppBuilder button or View in AppBuilder button on the Tabletop toolbar. Optionally, if the object is formatted for AppBuilder, you can instead double-click on the object to open it in AppBuilder.
![[Note]](../images/admon/note.png) | |
| You cannot open an object for editing if it is not WIP under the currently selected Task. |
When Roundtable is running, the OpenEdge AppBuilder redirects all of its file open, save, save-as, and close activities to the Tabletop. For example, when you choose → from the AppBuilder menu bar, the Roundtable Open Object window appears as shown below.
 |
Also, the caption of the title bar of the Tabletop window changes to "ADE FILE OPEN". Select an object as described in "Loading an Object into AppBuilder Directly from the Tabletop". If necessary you can check out the object before choosing to open it.
Select an object in the Object Browse.
Choose either the Object History button or View in Procedure Editor button on the Tabletop toolbar. Optionally, if the object is not formatted for AppBuilder, or AppBuilder is not running, you can instead double-click on the object to open it in a Procedure Editor window.
![[Note]](../images/admon/note.png) | |
| You cannot open an object for editing if it is not WIP under the currently selected Task. |
When Roundtable is running, the OpenEdge Procedure Editor redirects all of its file open, save, save-as, and close activities to the Tabletop. For example, when you choose → from the Procedure Editor menu bar, the Roundtable Open Object window appears as shown below.
 |
Also, the caption of the title bar of the Tabletop window changes to "ADE FILE OPEN". Select an object as described in "Loading an Object into a Procedure Editor Window Directly from the Tabletop". If necessary you can check out the object before choosing to open it.
Often, an application includes non-ABL source files. Bitmaps are a good example of this. You must have defined a Subtype that uses an ABL procedure, such as rtb/p/rtb_open.p, to launch an appropriate editor for the file based on the file's extension. This procedure queries the Windows registry to check what application is associated with files having the extension of the file selected and then launches that application against the selected file.
Select a non-ABL object in the Object Browse.
Open the object by double-clicking. The application associated with file's extension is launched. If the object is not checked out under your current Task, a dialog box opens warning you that the object is read-only. This means that you cannot save any changes you make to the object in the procedure window.
When finished viewing/editing the object, close the associated application.
If the object was checked out then choose → to clear the lock on the object. Any locks will be cleared when you exit your Roundtable session as well.
![[Important]](../images/admon/important.png) | |
| External applications launched by Roundtable can write changes to the files loaded into them even if these files are not checked out! This can lead to problems for other users in the system and possible loss of the changes made to the file. Do not save changes made to read-only objects in external applications. |
Table of Contents
- 3.1. Introduction
- 3.2. Shortcut Properties
- 3.3. Starting Roundtable
- 3.4. Logging Out of Roundtable
- 3.5. Exiting Roundtable
- 3.6. User Preferences
- 3.7. System Preferences
- 3.8. Site Information
- 3.9. Defining Your Application
- 3.10. Configuration Hierarchy
- 3.11. Products
- 3.11.1. Products Window Description
- 3.11.2. Adding a Product
- 3.11.3. Editing a Product Description
- 3.11.4. Deleting a Product
- 3.11.5. Creating a Variant Product
- 3.11.6. Product Report
- 3.11.7. Adding a Product Module
- 3.11.8. Editing a Product Module Description
- 3.11.9. Deleting a Product Module
- 3.11.10. Moving a Product Module
- 3.11.11. Product Module Report
- 3.12. Workspace Module Definitions
- 3.13. Subtypes
- 3.13.1. Code Subtypes Window Description
- 3.13.2. Subtype Theory
- 3.13.3. Subtype Example - Part I
- 3.13.4. Subtype Example - Part II
- 3.13.5. Subtype Example - Part III
- 3.13.6. Adding a Subtype
- 3.13.7. Editing a Subtype or Subtype Part
- 3.13.8. Deleting a Subtype
- 3.13.9. Code Subtypes Report
- 3.13.10. Name Programs
- 3.13.11. Build Programs
- 3.14. Security
- 3.15. User Reports
- 3.16. Loading Multiple Workspaces
This chapter discusses the following administrative tasks:
Starting and exiting Roundtable
Customizing Roundtable using the Windows registry
Mapping your current OpenEdge application
Adding and maintaining products and Product Modules
Adding and maintaining Subtypes
Setting up your system parameters
Setting up security
Configuring Roundtable, with a step-by-step summary
Loading your application, with a step-by-step summary
When adding a shortcut the following properties should be used:
Description: Roundtable
Target Location:
prowin[32].exe
database connection parameters-pfully qualified path to _rtb.rStart in (example):
c:\rtbwork
![[Note]](../images/admon/note.png) | |
| Each user must have their own working directory (Start in). Working directories cannot be shared. |
Follow these steps to start Roundtable:
Run Roundtable using the Roundtable application shortcut. The Roundtable Login dialog box appears.
Type your user ID and password. If no users have been defined, you must log in as the 'sysop' user which was created during the installation process.
If enabled, select the 'Save my Credentials' option to store your credentials and automatically log into future sessions.
Choose the OK button to complete the login. The Roundtable Tabletop and OpenEdge startup procedure (the OpenEdge Desktop by default) appear.
![[Note]](../images/admon/note.png) | |
| For information on creating user accounts, see Section 3.14, “Security”. |
![[Note]](../images/admon/note.png) | |
| If your user password has expired or is no longer valid, you will be prompted to change your password. |
You can logout of Roundtable by choosing → from the Roundtable Tabletop menu. When you logout of Roundtable, your Roundtable session ends, and the Tabletop remains open, with no Workspaces displayed or selected. You can login to Roundtable again by choosing → from the Roundtable Tabletop menu. To completely exit Roundtable, please see Section 3.5, “Exiting Roundtable” below.
![[Tip]](../images/admon/tip.png) | |
If you need to quickly perform an activity as another user account (such as sysop), and you know the password for that account, simply logout of your current session, login as the other user, perform the activity, logout, and then log back in using your own user name and password. This way, you don't have to completely exit the Tabletop to quickly perform the necessary activity. |
Choose → from the OpenEdge startup procedure (the OpenEdge Desktop by default) to close Roundtable along with your OpenEdge session.
If you choose → Roundtable from the Tabletop, then you can re-start Roundtable at any time by choosing → from AppBuilder.
You use the User Preferences dialog a to specify a number of Roundtable settings that affect Roundtable. To change these Roundtable settings, choose → → from the Tabletop menu. The Roundtable User Preferences dialog appears.
The following fields can be found in the User Preferences Dialog:
| Item | Description |
|---|---|
Compile w/XREF on object assign | Activate to compile objects with xref when prompted to compile an object on assignment to a Workspace. |
Connect Workspace databases | Activate to connect the Roundtable session to the Workspace database(s) when a Workspace is selected. Normally, this option should be activated. However, if you are developing remotely, with via an AppServer connection to the Roundtable repository, you may wish to deactivate this option. |
Show dialog before editing "Read Only" program | Activate to display a message box that explains to the user that it is necessary to checkout the object before it can be edited. |
Suppress version notes prompt | Activate to suppress the prompt for version notes after closing an object opened for edit. |
Prompt for credentials for Tabletop login | Activate to always prompt for credentials when logging in from the Tabletop even when credentials are cached. |
Startup Procedure | Specifies the OpenEdge procedure (AppBuilder, Desktop, or Procedure Editor) to run when starting Roundtable. |
Show Products and Product Modules | Select this option to view the Workspace content grouped by Products and Product Modules. |
Show Workspace Modules | Select this option to view the Workspace content grouped by Workspace Modules. |
Enable Hierarchical Presentation | Activate to view the Workspace Product Modules or Workspace Modules in a hierahical presentation. When the given Delimiter Character exists in the Product Module or Workspace Module name, a new child node will be created in the treeview. For example, if enabled and the "-" character is specified as the delimiter, a Product Module named "sports2000-procedures" would create a "sports2000" node with a child node named "procedures". |
Show completed objects in Tasks view | Activate to show completed objects when using the "Objects in Task" view. |
Compile Batch Size | Specify the number of objects to compile per batch when using Selective Compile. When running Roundtable in an appserver configuration, a larger batch size will result in fewer appserver calls but a less responsive user interface. The default value is 5. |
Write All Results to Compile Log | Activate to write all results to compile log when using Selective Compile. |
Visual Diff Command | Specifies the command line for running you visual differencing application. The command line should include numbered parameters that will be substituted at runtime as follows: "%1" - Pathname to left file "%2" - Pathname to right file "%3" - Pathname to middle file "%4" - Title for left file "%5" - Title for right file "%6" - Title for middle file |
| Three-Way Differencing | Activate if your visual diffencing application supports three-way differencing and the command line has been configured for three-way differencing. |
| Close Visual Diff Dialog on Compare Selection | Activate to automatically close the Visual Diff dialog when the "Compare" button is selected. |
Default Task Directory | Specify a default directory for Tasks with a non-Central share-status. Environment variables are supported (e.g. %userprofile%). |
| Append Task Number to Default Directory | Activate to add the Task number to the end of the Task directory. |
| Enable Jira Integration | Activate to enable the Jira integration components. |
| Stored Login Credentials | Select the Remove button to clear your stored credentials. |
You use the System Preferences dialog a to specify a number of Roundtable settings that affect Roundtable. To change these Roundtable settings, choose → → from the Tabletop menu.
![[Note]](../images/admon/note.png) | |
| You must be logged in as the sysop user, a Security Administrator or an Administrator to maintain System Preferences. |
The following fields can be found in the Sytem Preferences Dialog:
| Item | Description |
|---|---|
| Session Duration | The number of hours a user's sessions should persist. During login, if the user has any prior sessions older than the specified number of hours, those sessions will be terminated. Enter 0 (zero) to disable automatic session termination. |
| Allow Storage of Local Credentials | This flag is used to determine if users all allowed to store their login credentials locally. |
| Allow Non-Unique | This flag is used to determine if non-unique PCODE object names are allowed in a workspace. When this system flag is set to Yes, then multiple non-schema objects can have the same object name within a Workspace but they must reside in different physical subdirectories. This means they must belong to different Product Modules and different Workspace Modules as well. Schema object names (PDBASE, PFILE and PFIELD) must still be unique within a Workspace. |
| Enable Object Backup | This flag is used to determine if backups are created on each save of a WIP Object. |
| Maximum Backups | This value specifies the maximum number of backups that are kept for a WIP Object per user. |
| Delete Backups | Specifies if Object backups should be deleted at check-in or at the subsequent check-out. |
| Enable Security Auditing | This flag is used to enable/disable logging of security events. |
| Process RUN statements with no extension | This flag is used to instruct the RUN xref-processing to attempt to resolve RUN statements with no extension to a Workspace Object. |
| Resolve RUN statements that specify r-code | This flag is used to instruct the RUN xref-processing to attempt to resolve RUN statements that specify r-code to a Workspace Object. |
| Resolve RUN Value statements | This flag is used to instruct the RUN xref-processing to attempt to resolve RUN VALUE statements to a Workspace Object. |
| Password Options | Select one or more options to enforce strong passwords. |
| Expires | This value specifies the number of days a user password can exist before it expires. Specify a value of 0 for no expiration. When this value is updated, all existing user passwords are given a new expiration date based upon the current date. |
You can use the → dialog box to enter your Site Information (company, license information, site number).
The following table describes the fields found on the About Roundtable dialog box:
| Field | Description |
|---|---|
| Serial Number | The serial number provided on your license agreement. |
| Control Number | The control number provided on your license agreement. |
| Company | Optional. Organization name of the licensee. |
| Expiry Date | Display only. The date that the license expires. |
| User Limit | Display only. The number of users granted for the license. |
| Site # | The Site Number value is used only when you have more than one Roundtable repository and must move information from one repository to another. Using multiple repositories is an advanced feature of the Roundtable system. See Section 1.10, “Distributed Development”. |
Follow these steps to set the site information:
Choose → form the Tabletop menu. The About Roundtable dialog box appears.
Choose the Update Record button to enable the Site Information fields.
Fill in the values, and then choose the Save Record button.
There are a number of steps required to set up Roundtable. The following list provides you with an outline of these steps. At each step, you should review the manual for detailed instructions and descriptions.
Create Module Definitions. See Section 3.12.2, “Adding a Workspace Module Definition”.
Create a Product. See Section 3.11.2, “Adding a Product”.
Create Product Modules. See Section 3.11.7, “Adding a Product Module”.
Create Subtypes. See Section 3.13.6, “Adding a Subtype”.
Create a Workspace. See Section 4.2.4, “Adding a Workspace”.
Associate Products with the Workspace. See Section 4.5.2, “Adding a Workspace Source”.
Back up your Roundtable database (rtb.db). Do this so that you can easily change your mind about the previous configuration steps, and then re-run the steps that follow.
Create a Task for loading schema. See Section 5.3.4, “Adding a Task”.
Create a PDBASE object. See Section 6.6.5.2, “Adding a PDBASE Object”.
Load the application database schema. See Section 4.9, “Load Schema”
Complete the Task. See Section 5.3.8, “Completing a Task”.
Create a Task for loading application source files.
Register objects using Module Load. See Section 7.5, “Module Load”.
Complete the Task.
Create a Release. See Section 4.12.2, “Adding a Release”.
The first and perhaps most difficult step in setting up the Roundtable system is defining your current configuration hierarchy. The configuration hierarchy is a map of the contents of your application and usually corresponds closely to the architecture of your system.
If you are building a system from scratch, then defining an application architecture that is intuitive and simple to manage in Roundtable can be accomplished by following these rules:
Divide your system into products that are more or less independent of one another. Often one central product provides general services to other products, which are dependent on those services, but the central product should not be dependent on any other product. For example, consider a suite of applications consisting of General Ledger (GL), Accounts Payable (AP), Accounts Receivable (AR), Pawnshop Point of Sale, and Furniture Store Management. All of these applications may need a set of general services, such as menu management, security, and telecommunications. An effective way of defining products is to group GL, AP, and AR into a product called Accounting. Make the Pawnshop Point of Sale and Furniture Store Management separate products and make the general services into a product called Core System. Because these products are defined separately, it will be easy to package them individually for deployment later.
Divide each product into Product Modules that are well-defined subsets of the functional content of the product. In the previous example, the Accounting product has at least three modules: GL, AP, and AR. Both the Pawnshop Point of Sale and the Furniture Store Management product may have many modules.
Associate a directory with each Product Module by assigning Workspace Modules.
Roundtable provides three logical levels of configuration hierarchy: product, Product Module, and object. If you have an existing physical configuration hierarchy expressed as a deep set of subdirectories, these can be mapped using Workspace Modules. Before loading an existing configuration hierarchy, you must understand it. Then you develop a strategy for mapping these subdirectories to Product Modules.
There are three common methods of organizing file systems to express a configuration hierarchy:
Application group directories
Directories by component type
Application group and component type
The most common way of organizing system components is to group source files by Product Module definitions. This is common because structured design methodologies involve the top-down decomposition of a software application by function. The functional hierarchy translates naturally into a hierarchical directory structure. For example, in an accounting package with an accounts payable Product Module and an accounts payable Workspace Module, your directory structure might look like this:
| Directory | Directory Content |
|---|---|
| /abc_system | ABC accounting and POS system directory |
| /abc_system/ar | Accounts Receivable |
| /abc_system/ap | Accounts Payable |
| /abc_system/gl | General Ledger |
| /abc_system/pos | Point of Sale |
This simple configuration hierarchy easily maps into the three-level configuration hierarchy provided by Roundtable. The /abc_system directory becomes the Workspace root path and each subdirectory is then mapped as shown below:
| Product | Prod Module | Workspace Module | Subdirectory |
|---|---|---|---|
| Accounting | AR | AR | ar |
| AP | AP | ap | |
| GL | GL | gl | |
| POS | POS | POS | pos |
Another common way to arrange directory structures is by the types of components found in the system. This organization is typical when many discrete components are reused across functional boundaries in a software application system. A directory structure organized by component type might look like this:
| Directory | Directory Content |
|---|---|
| /abc_system | ABC accounting and POS system directory |
| /abc_system/edit | Data entry procedures |
| /abc_system/rpt | Reporting procedures |
| /abc_system/batch | Batch procedures |
This configuration hierarchy maps into the product and Product Module configuration hierarchy provided by Roundtable, as shown below:
| Product | Prod Module | Workspace Module | Subdirectory |
|---|---|---|---|
| Accounting | AR-Edit | Edit | edit |
| AP-Edit | Edit | edit | |
| GL-Edit | Edit | edit | |
| AR-Rpt | Rpt | rpt | |
| AP-Rpt | Rpt | rpt | |
| GL-Rpt | Rpt | rpt | |
| AR-batch | Batch | batch | |
| AP-batch | Batch | batch | |
| GL-batch | Batch | batch | |
| POS | POS-Edit | Edit | edit |
| POS-Rpt | Rpt | rpt | |
| POS-batc | Batch | batch |
In this mapping, objects that belong to multiple Product Modules coexist in the same subdirectory. If you are developing your system from scratch, do not use this type of directory hierarchy in your application. Instead, use a functional hierarchy if possible.
It often makes sense to combine a functional hierarchical system architecture with one based on component types. A combined directory structure may look like this:
| Directory | Directory Content |
|---|---|
| /abc_system | ABC accounting and POS system directory |
| /abc_system/ar/edit | Accounts Receivable data entry procedures |
| /abc_system/ar/rpt | Accounts Receivable report procedures |
| /abc_system/ar/batch | Accounts Receivable batch procedures |
| /abc_system/ap/edit | Accounts Payable data entry procedures |
| /abc_system/ap/rpt | Accounts Payable report procedures |
| /abc_system/ap/batch | Accounts Payable batch procedures |
| /abc_system/gl/edit | General Ledger data entry procedures |
| /abc_system/gl/rpt | General Ledger report procedures |
| /abc_system/gl/batch | General Ledger batch procedures |
| /abc_system/pos/edit | Point of Sale data entry procedures |
| /abc_system/pos/rpt | Point of Sale report procedures |
| /abc_system/pos/batch | Point of Sale batch procedures |
This configuration hierarchy can be mapped into Roundtable as shown below:
| Product | Prod Module | Workspace Module | Subdirectory |
|---|---|---|---|
| Accounting | AR-Edit | AR-Edit | ar/edit |
| AP-Edit | AP-Edit | ap/edit | |
| GL-Edit | GL-Edit | gl/edit | |
| AR-Rpt | AR-Rpt | ar/rpt | |
| AP-Rpt | AP-Rpt | ap/rpt | |
| GL-Rpt | GL-Rpt | gl/rpt | |
| AR-batch | AR-Batch | ar/batch | |
| AP-batch | AP-Batch | ap/batch | |
| GL-batch | GL-Batch | gl/batch | |
| POS | POS-Edit | POS-Edit | pos/edit |
| POS-Rpt | POS-Rpt | pos/rpt | |
| POS-batc | POS-Batch | pos/batch |
If you have an especially complex configuration hierarchy, use Subtypes to model some subdirectory organization rules. You define Subtypes to ascribe attributes to PCODE objects. One of the attributes you can define is a subdirectory in which a file associated with the PCODE object will be stored.
Consider again the directory structure from the previous section:
| Directory | Directory Content |
|---|---|
| /abc_system | ABC accounting and POS system directory |
| /abc_system/ar/edit | Accounts Receivable data entry procedures |
| /abc_system/ar/rpt | Accounts Receivable report procedures |
| /abc_system/ar/batch | Accounts Receivable batch procedures |
| /abc_system/ap/edit | Accounts Payable data entry procedures |
| /abc_system/ap/rpt | Accounts Payable report procedures |
| /abc_system/ap/batch | Accounts Payable batch procedures |
| /abc_system/gl/edit | General Ledger data entry procedures |
| /abc_system/gl/rpt | General Ledger report procedures |
| /abc_system/gl/batch | General Ledger batch procedures |
| /abc_system/pos/edit | Point of Sale data entry procedures |
| /abc_system/pos/rpt | Point of Sale report procedures |
| /abc_system/pos/batch | Point of sale batch procedures |
This configuration hierarchy can be mapped into Roundtable more simply with the use of Subtypes as shown below:
| Product | Prod Module | Workspace Module | Sub-Directory |
|---|---|---|---|
| Accounting | AR | AR | ar |
| AP | AP | ap | |
| GL | GL | gl | |
| POS | POS | POS | pos |
| Subtype | Sub-Directory |
|---|---|
| EditProc | edit |
| EditIncld | edit |
| BatchProc | batch |
| BatchIncld | batch |
| RptProc | rpt |
| RptIncld | rpt |
When you create a new PCODE object in a module, Roundtable constructs part of the path to the object based on the Product Module assignment. It then constructs the rest of the path based on the Subtype you assigned to the object. For example, if you created a new data entry program called order.p for the AR Product Module and assigned it a Subtype of EditProc, Roundtable performs the following logic to decide what directory to put it in:
Given the assignment of the AR Product Module, Roundtable finds the AR Workspace Module.
The directory associated with the AR Product Module is "ar", so Roundtable adds this to the Workspace root path to create "/abc_system/ar".
Roundtable finds the Subtype EditProc and adds its associated directory, "edit", to the directory path to create "/abc_system/ar/edit".
Using Subtypes in this manner can be useful when it is necessary to map an existing configuration hierarchy. However, you should avoid this style of configuration hierarchy because it leads to duplication in the Subtypes. In the example above, there might be no difference between the EditProc and BatchProc Subtype specifications except for their associated subdirectories.
For more detailed information on Subtypes, see Section 3.13, “Subtypes”.
Once you have defined a strategy for mapping your existing or new system into Roundtable, you must create the necessary products and Product Modules. This section provides detailed instructions for adding this information to the Roundtable repository.
Products and Product Modules are managed in the Products window.
![[Note]](../images/admon/note.png) | |
| You must have Administrator privilege or be logged in as the sysop user to perform Product maintenance. |
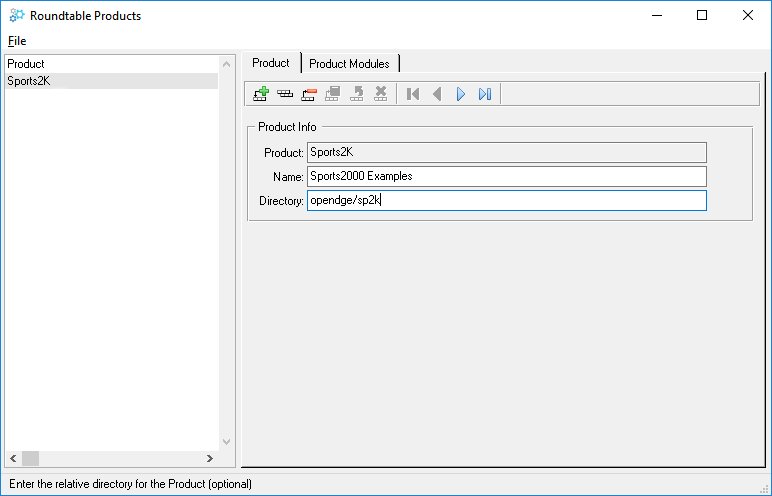 |
The following fields are found in the Products Window:
| Item | Description |
|---|---|
| Product Browse | A browse listing the currently defined Products. |
| Product ID | Unique Product ID. |
| Name | Product description. |
| Directory | Optional relative directory path that is appended to the Workspace root path. Objects in Product Modules belonging to the selected Product will be placed in a subdirectory relative to this directory according to their associated Workspace Module definitions. |
| Product Modules | A tab folder that displays each Product Module defined for the current product code. |
Follow these steps to add a new product:
Choose → from the Tabletop menu. The Roundtable Products window appears.
Choose the Add Record button.
Enter an ID for the product. If you are a partner site, you must enter the three-digit site number as a prefix for the ID.
Enter the name or a description of the product in the name field.
Enter a relative directory for the product (optional).
Choose the Save Record button. The new product appears in the Product browse in the Roundtable Products window.
Add Product Modules belonging to the new product. For information on how to add Product Modules, see Section 3.11.7, “Adding a Product Module”. You may add Product Modules at a later date if necessary.
Choose → to leave the window.
You can only change the product description field for a product. If you want to change the product code, delete the product and re-add it.
Follow these steps to edit a product description.
Choose → from the Tabletop menu. The Roundtable Products window appears.
From the Product browse, select the product that you want to edit.
Edit the Name of the product, and then choose the Save Record button.
Choose → to leave the window.
Follow these steps to delete a product.
Choose → from the Tabletop menu. The Roundtable Products window appears.
From the Product browse, select the product that you want to delete.
Choose the Delete Record button. A Warning dialog box appears.
Choose the Yes button to delete the product or the No button to cancel this operation.
Choose → to leave the window.
The Create Variant Product tool is used to easily create a new Product and Product Modules based upon the currently selected Product.
![[Note]](../images/admon/note.png) | |
| You must have Administrator privilege or be logged in as the sysop user to use the Create Variant Product tool. |
Follow these steps to create a variant Product.
Choose → from the Tabletop menu. The Roundtable Products window appears.
From the Product browse, select the Product that you want to use as the basis for the variant.
Choose → from the Products window menu. The Create Variant Product dialog appears.
Enter a name for the new Product.
To ensure uniqueness, enter a prefix that will be added to each Product Module name.
Choose the OK button to create the variant product or the Cancel button to cancel this operation.
The Product Report prints a list of the contents of the product.
Follow these steps to print the report:
Choose → → from the Tabletop menu. The Product Report window appears.
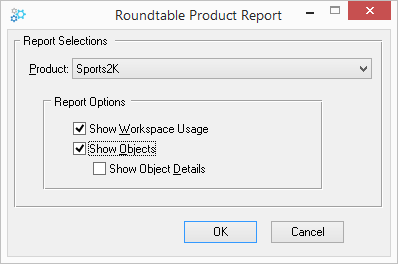
Select the report options that you want, and then choose the OK button.
The report appears in a text viewer window.
Close the text viewer window to close the report.
The following fields are found in the Product Report window:
| Field | Description |
|---|---|
| Product | A drop-down list to select the Product that you want to report on. |
| Show Workspace Usage | Prints a list of the workspaces that include the Product Modules in this product. |
| Show Objects | Prints the latest object version defined in each Product Module. |
| Show Object Details | Prints the object version description. |
After you create a product, follow these steps to add the Product Modules:
Choose → from the Tabletop menu. The Roundtable Products window appears.
From the Product browse, select the product that you want to add a Product Module to.
Select the Product Modules tab folder. The Product Modules form appears.
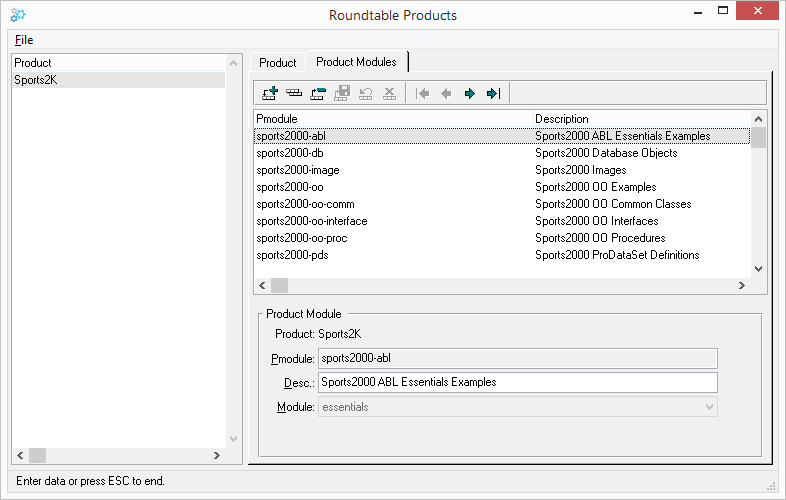
Choose the Add Record button.
Type the code for the new Product Module. This alphanumeric code should describe the function of the module. If your site number is not 0, you must enter the three-digit site number as a prefix for the Product Module. If your site number is 0, you cannot begin your code with a number.
Fill in the Product Module Description field for the Product Module.
Select an existing Workspace Module definition to associate with the new Product Module. If no existing Workspace Module definition is appropriate for the new Product Module you will first have to create one. For instructions on Workspace Module definitions, see Section 3.12, “Workspace Module Definitions”. The primary purpose of the Workspace Module definition is to specify the physical location of code belonging to the Product Module associated with the Workspace Module definition.
Choose the Save Record button. The new Product Module appears in the Product Modules browse on the folder.
Choose → to leave the window.
You can change the Product Module description field but not the Product Module code. To change a Product Module code, delete the Product Module and re-add it with the new code. You cannot delete a Product Module if any objects have been assigned to it.
Follow these steps to edit a Product Module description.
Choose → from the Tabletop menu. The Roundtable Products window appears.
From the Product browse, select the product that contains the Product Module that you want to edit.
Select the Product Modules tab folder. The Product Modules form appears.
From the Product Modules list, select the Product Module to edit.
Change the fields for the Product Module as necessary.
Choose the Save Record button.
Choose → to leave the window.
Follow these steps to delete a Product Module.
Choose → . The Roundtable Products window appears.
From the Product browse, select the product that contains the Product Module that you want to delete.
Select the Product Modules tab folder. The Product Modules form appears.
From the Product Modules list, select the Product Module to delete.
Choose the Delete button. A warning dialog box appears.
Choose the Yes button to delete the Product Module.
Choose → to leave the window.
![[Note]](../images/admon/note.png) | |
| A Product Module cannot be deleted once it contains objects that have been committed to the repository. |
Follow these steps to move a Product Module to a different Product.
Choose → . The Roundtable Products window appears.
From the Product browse, select the Product that contains the Product Module(s) that you want to move.
Select the Product Modules tab folder.
From the Product Modules list, select the Product Module(s) to move.
Right-click to display the popup context menu.
Choose from the context menu. The Roundtable Product Lookup dialog appears.
Select the target Product and choose the OK button.
The Product Module Report prints a detailed report of the objects in a Product Module, including the object code, description, version number, status, Subtype, and additional notes for each object.
Steps to print the Product Module Report:
Choose → → from the Tabletop menu. The Product Module Report window appears.
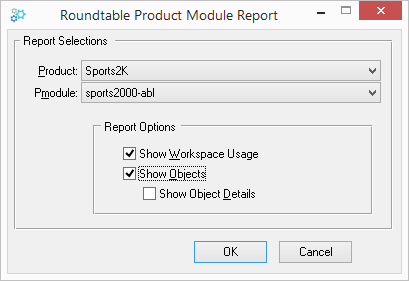
Select the report options that you want, and then choose the OK button.
The report appears in a text viewer window.
Close the text viewer window to close the report.
The following fields are found in the Product Report window:
| Field | Description |
|---|---|
| Product | The Product that contains the Product Module that you want to report on. |
| Pmodule | The Product Module that you want to report on. |
| Show Workspace Usage | Prints a list of the workspaces that include this Product Module. |
| Show Objects | Prints the latest object version defined in each Product Module. |
| Show Object Details | Prints the object version description. |
The primary purpose of Workspace Module definitions is to specify the physical location of code relative to the Workspace root directory. Essentially they contain a relative subdirectory that is concatenated to the Workspace root directory to render a full path to location of objects in the system. Workspace Module definitions allow you to map an arbitrarily deep level of directory structures to the two-level configuration hierarchy provided by Roundtable. While the Workspace root directory is always different among the workspaces managed by the system, Workspace Module definitions are consistent across all workspaces. Workspace Module definitions are associated with Product Modules in a one-to-many relationship. A single Workspace Module definition can be associated with zero or more Product Modules. Unassigned Workspace Module definitions are ignored by the system.
Workspace Module Definitions are maintained in the Workspace Module Definitions window.
![[Note]](../images/admon/note.png) | |
| You must have Administrator privilege or be logged in as the sysop user to perform Workspace Module Definitions maintenance. |
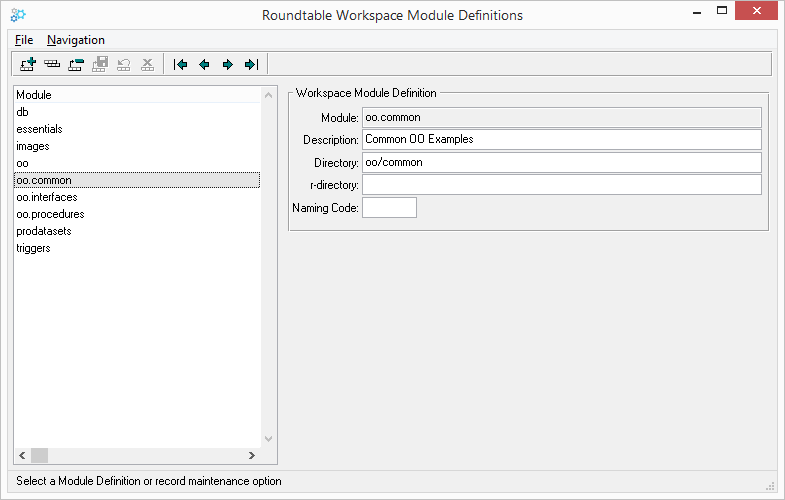 |
The following fields are found in the Workspace Modules Definition Window:
| Field | Description |
|---|---|
| Module | The Workspace Module name. |
| Description | This is a long description of the Workspace Module is used in reports. |
| Directory | This is a relative directory path that is appended to the Workspace root or Product path to specify a subdirectory in the Workspace in which objects are stored. The objects stored in this subdirectory are those that belong to Product Modules associated with the Workspace Module definition. |
| R-Directory | This is a relative directory path that is appended to the Workspace root path to specify a subdirectory in the Workspace in which compiled objects are stored. The compile objects stored in this subdirectory are those that belong to Product Modules associated with the Workspace Module definition. If this field is left blank, compiled objects will reside in the same directory as the source object. |
| Naming Code | This is an optional value that is used by a user-specified naming routine for Subtypes assigned to objects created in Product Modules associated with this Workspace Module definition. See Section 3.13.10, “Name Programs” for more information on naming programs. |
You can access the Workspace Module Definitions window using the following steps:
Choose → from the Tabletop menu. The Roundtable Workspace Module Definitions window appears.
Choose the Add Record button.
Enter values for the Name, Description, Source Directory, .r Code Directory, and Naming Code fields.
Choose the Save Record button.
Choose → to leave the window.
You may edit any of the fields in the Workspace Module definition except the name of the module. However, Roundtable will not rename directories or move objects to accommodate your changes. A Workspace Module definition defines the physical location of objects under the Workspace root or Product directory. If you change the source directory specification you will have to manually move any affected source code in each Workspace that contains a module defined by the Workspace Module definition. If you change the .r Code Directory you should delete the affected .r code and then re-compile the affected module. Use of the Naming Code field is optional and the affect of changing it application specific.
You may safely change the Description of the Workspace Module definition.
You may access the Workspace Module Definitions window by choosing the Maintenance button in the Products Window as shown in the following steps:
Choose → from the Tabletop menu. The Roundtable Workspace Module Definitions window appears.
Select a Workspace Module definition in the browse table.
Edit the Description, Source Directory, .r Code Directory, and Naming Code fields as necessary.
Choose the Save Record button.
Choose → to leave the window.
You can delete a Workspace Module definition that has not been assigned to any Product Module.
You can access the Workspace Module Definitions window by choosing the Maintenance button in the Products Window as shown in the following steps:
Choose → from the Tabletop menu. The Roundtable Workspace Module Definitions window appears.
Select a Workspace Module definition in the browse table.
Choose the Delete Record button. A warning box appears.
Choose the Yes button. The Workspace Module definition is deleted.
Choose → to leave the window.
Subtypes control the naming, management, creation, and storage of PCODE objects. Using Subtypes can help enforce coding standards and reduce the number of objects tracked in your system. They can also make training new programmers on your system much easier since Roundtable provides reminders about the requirements of each Subtype. By using Subtypes, you reduce the number of repetitive steps necessary for creating new PCODE objects. When creating a Subtype, you can:
Specify a naming program, which tests the naming convention of the object to ensure consistency.
Specify a build program to run when creating an object, like a screen generator.
Specify a template to use when Roundtable builds an object.
Specify up to nine parts (individual files), related by a predefined naming convention, that Roundtable will treat as one object. Then, when checking out objects, you check out only one object instead of nine. This ensures that an object with multiple parts is treated as a single entity.
Code Subtypes are maintained in the Code Subtypes window.
![[Note]](../images/admon/note.png) | |
| You must have Administrator privilege or be logged in as the sysop user to perform Subtype maintenance. |
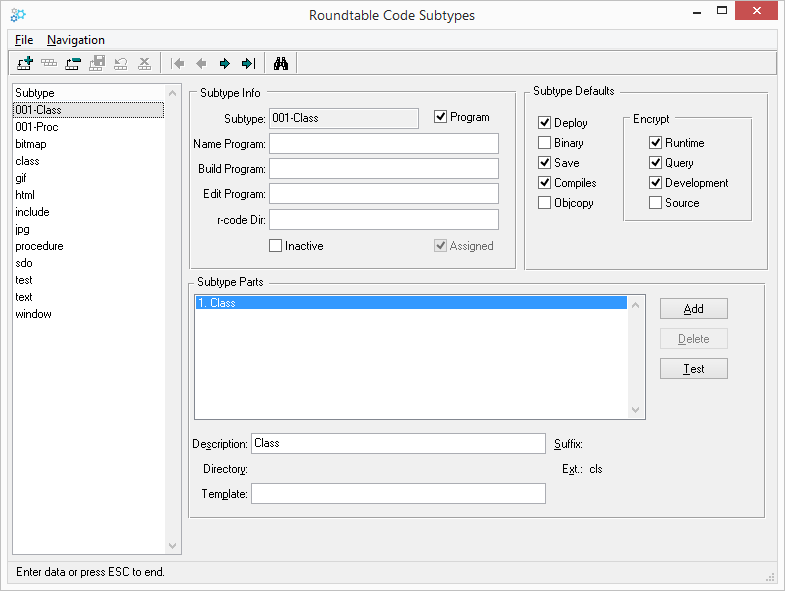 |
The following fields are found in the Subtype Window:
| Field | Description | |||
|---|---|---|---|---|
Subtype | The Code Subtype name. | |||
Assigned | A toggle box that indicates whether an object with the currently selected Subtype exists. Once a Subtype has been assigned to an object, the Subtype cannot be deleted and some editing operations are disallowed. | |||
Inactive | A toggle box that indicates whether the selected Subtype is inactive. Inactive Subtypes can no longer be used as a Subtype when creating new Objects. | |||
Name Program | A fill-in for the pathname of a naming program. The use of a naming program is entirely optional. See Section 3.13.10, “Name Programs” for more information on naming programs. | |||
Build Program | A fill-in for the name of the build program that creates source files for objects of this Subtype. The build program can be simple or complex. For example, a build program can be a full-blown screen generator or it can copy a template into the source file. The use of a build program is entirely optional. See Section 3.13.11, “Build Programs” for more information on build programs. | |||
Edit Program | A fill-in for the name of the edit program. For example, if objects of this Subtype are to have a specific format, the edit program can be a custom editor. See Section A.2, “Edit Program: rtb/p/rtb_open.p” for an example of an edit program. See Section A.3, “Managing Application Data with the Edit Program” for a full description of the edit program. | |||
Program | A toggle box that indicates whether objects of this Subtype are OpenEdge-compilable programs (Include files are not considered programs). | |||
r-code Dir | The relative r-code directory for the Subtype. The path for r-code is determined as follows:
| |||
Subtype Parts | A Subtype may be comprised of up to ten system files. The first nine of these files are called parts and are user-defined. The tenth file is used for the .wrx generated by the OpenEdge AppBuilder for window procedures that use OCX controls. | |||
Description | A fill-in for the description of the Subtype part. | |||
Directory | A fill-in for the directory, relative to the Workspace Module directory, where the part file is stored. Leave this field blank if the part is stored directly in the Workspace Module directory. | |||
Template | A fill-in for the full path and filename of a template file used to build the part file. This optional field is used only in conjunction with the build program. See Section 3.13.11, “Build Programs” for more information on build programs. | |||
Suffix | A fill-in for the suffix added to the end of the part filename (prior to the extension). If left blank, no suffix is added to the object's name. | |||
Extension | A fill-in for the extension of the part (for example, "p" for a program). This optional field is commonly used to enforce a naming convention. For instance, a .p extension is used for most OpenEdge procedures created with the Procedure Editor and a .w extension is used for most procedures generated by AppBuilder. | |||
Defaults | These toggle-boxes correspond to the object properties on the Config tab of the Object Properties window. When new objects of the Subtype are created, the object's properties will default to the properties defined here For more detailed information, see Section 6.4.1, “Config Folder Description”. |
In pre-version 9 OpenEdge programming environments, multiple code parts are not commonly used. Typically, you define Subtypes with only one part each. Possible Subtype definitions Include:
| Subtype | Program | Part |
|---|---|---|
| Window | Yes | w |
| Program | Yes | p |
| Include | No | i |
![[Note]](../images/admon/note.png) | |
| It is not necessary to define a secondary Subtype part to store WRX files as part of your windows programs. Roundtable can automatically find and store WRX files as a part of your PCODE object without requiring you to define a multi-part Subtype. See Section 6.4.10, “WRX Files” for a more complete description of how this works. |
OpenEdge code (PCODE) objects are assigned a user-defined Subtype that controls the naming, management, creation, and storage of one to nine text files (parts) belonging to the object. Consider the following simple Subtype definition:
- Subtype:
Program
- Program:
Yes
| Part # | Description | Suffix | Ext. |
|---|---|---|---|
| 1 | Simple program | p |
This Subtype describes programs that consist of a single text file with a ".p" extension.
In the following example, a simple include file Subtype is defined:
- Subtype:
Include
- Program:
No
| Part # | Description | Suffix | Ext. |
|---|---|---|---|
| 1 | Simple include | i |
Multi-part objects require a bit more complex definition. In this example, an ADM2 SmartDataObject is defined:
- Subtype:
SDO
- Program:
Yes
| Part # | Description | Suffix | Ext. |
|---|---|---|---|
| 1 | Main program | w | |
| 2 | Field definitions include | i | |
| 3 | Client Proxy | _cl | w |
Without the SDO Subtype, the three files that comprise an SDO would have to be separate objects, making them cumbersome to manage. By formalizing the relationship among these text files, Roundtable can treat them as a single object.
Using Code Subtypes can help enforce coding standards and vastly reduce the number of objects tracked in your system. They can also make training new programmers on your system much easier because Roundtable reminds them of the requirements of each Subtype.
Suffix naming is less flexible than extension naming because the length of the suffix may reduce the length of the base name usable by the programmer. For example, a two-character suffix of "-d" leaves only six characters available for the base name if you want to conform to the eight-character DOS naming convention.
When you add a PCODE object, Roundtable tests the naming conventions based on these fields. For example, if you designate ".p" as the extension for the program Subtype part, you cannot create a Program part with a suffix of ".u". Roundtable displays an error message until you enter the correct suffix.
Code Subtypes should be created before you set up the Workspace sources or add PCODE objects to your OpenEdge application. After creating the Code Subtypes, use them to create PCODE objects. You can also edit and delete Subtypes (until assigned) and print the Code Subtypes Report.
First, follow these steps to enter the basic information for the Subtype.
Choose → from the Tabletop menu. The Roundtable Code Subtypes window appears.
Choose the Add Record button.
Enter the new alphanumeric Subtype code. If your site number is not 0, you must enter the three-digit site number as a prefix for the code. If your site number is 0, you cannot begin your code with a number.
Fill in the information in the Subtype Info panel.
Choose the Save Record button.
Next, enter the information required for Subtype parts.
Choose the Add button.
In the Subtype Parts panel, edit the parts information for the Subtype part.
Choose the Save Record button.
Repeat these steps for each part required in the Subtype.
Optionally, edit the Subtype Defaults as required. Choose → to close the window.
You can edit some of the fields of a Subtype after it has been created.
Follow these steps to edit a Subtype.
Choose → from the Tabletop menu. The Roundtable Code Subtypes window appears.
From the Subtype list, select the Subtype you want to edit.
When you begin to make changes, the Save Record and Cancel Record buttons are enabled.
Choose the Save Record button to complete your changes.
Choose → to close the window.
Note that you cannot delete a Subtype after it has been assigned to one or more objects. The Assigned toggle box at the top of the Subtypes window indicates whether the Subtype has been assigned.
Follow these steps to delete a Subtype:
Choose → from the Tabletop menu. The Roundtable Code Subtypes window appears.
From the Subtype list, select the Subtype to delete.
Choose the Delete Record button. A warning box appears.
Choose the Yes button to delete the Subtype or the No button to cancel this operation.
Choose → to close the window.
The Code Subtypes Report provides a detailed review of each Code Subtype. The report includes all the fields listed on the Roundtable Code Subtypes window.
Follow these steps to print a Code Subtypes report:
Choose → → from the Tabletop menu. The Code Subtypes Report window appears.
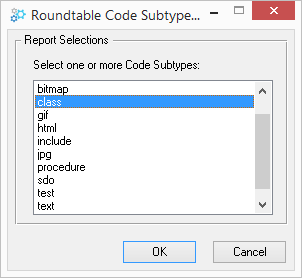
Select one or more Code Subtypes from the list. Use Control-Click to select multiple items.
Choose the OK button to run the report.
The report appears in a text viewer window.
Close the text viewer window to close the report.
A specialized naming program can be associated with a Subtype. The sample program below takes the naming code defined in the module definition and appends a four-digit number to it.
For example, if the module naming code was ord then the default names for objects created in the module would be ord0001.p, ord0002.p, etc. Naming programs provide only default names; the user always gets a chance to modify the object name. The sample program works by finding the object with the highest value, then increments that value by one. This is helpful if you want to leave gaps in the number scheme. For example, if you manually named an object ord0100.p, the next object name supplied by the naming program would be ord0101.p.
Any name program that you use must define the input and output parameters illustrated in the sample program below.
/*
Sample Name Program --
 Generate new object name using module counter
Input Parameters:
 pcPmod - Product module.
 pcObjectType - Object type (PCODE).

Output Parameters:
 pcObject - Object name generated by build program.
 pcError - Non-blank on error.
*/

DEFINE INPUT PARAMETER pcPmod AS CHARACTER NO-UNDO.
DEFINE INPUT PARAMETER pcObjectType AS CHARACTER NO-UNDO.
DEFINE OUTPUT PARAMETER pcObject AS CHARACTER NO-UNDO.
DEFINE OUTPUT PARAMETER pcError AS CHARACTER NO-UNDO.

DEFINE VARIABLE iNum AS INTEGER NO-UNDO.
DEFINE VARIABLE iIdx AS INTEGER NO-UNDO.
DEFINE VARIABLE cLastObject AS CHARACTER NO-UNDO.
DEFINE VARIABLE lNoCount AS LOGICAL NO-UNDO.
DEFINE VARIABLE cName AS CHARACTER NO-UNDO.

FIND rtb.rtb_pmod
 WHERE rtb.rtb_pmod.pmod = pcPmod NO-LOCK.

FIND FIRST rtb.rtb_moddef
 WHERE rtb.rtb_moddef.module = rtb.rtb_pmod.module NO-LOCK.

FIND FIRST rtb.rtb_ver
 WHERE rtb.rtb_ver.obj-type = pcObjectType
  AND rtb.rtb_ver.object BEGINS rtb.rtb_moddef.naming-code
 NO-LOCK NO-ERROR.
 ASSIGN iNum = 0
  cLastObject = "".

OBJECT-PASS:
DO WHILE AVAILABLE rtb.rtb_ver:
 cLastObject = rtb.rtb_ver.object.
 cName = rtb.rtb_ver.object.
 cName = ENTRY(1,cName,"."). /* strip any extension */
 lNoCount = FALSE.
 DO iIdx = 4 TO LENGTH(cName):
  IF NOT CAN-DO("0,1,2,3,4,5,6,7,8,9",
	SUBSTRING(cName,iIdx,1)) THEN DO:
   lNoCount = TRUE.
   LEAVE.
  END.
 END.
 IF NOT lNoCount THEN iNum =
	MAX(INTEGER(SUBSTRING(cName,4)),iNum).
 FIND NEXT rtb.rtb_ver
  WHERE rtb.rtb_ver.obj-type = pcObjectType
   AND rtb.rtb_ver.object BEGINS rtb.rtb_moddef.naming-code
   AND rtb.rtb_ver.object <> cLastObject
  NO-LOCK NO-ERROR.
END. /* OBJECT-PASS */
iNum = iNum + 1.
pcObject = SUBSTRING(rtb.rtb_moddef.naming-code,1,3) +
	STRING(iNum,"9999").
IF iNum > 9999 THEN
 pcError = "Counter limit exceeded.".
ELSE
 pcError = "".
A specialized build program can be associated with a Subtype. A build program creates the source file parts of an object being created for the first time.
A simple build program can be commands that copy a template specified in a code Subtype into the new object part files. If you are ambitious, you could tie a build program to your own program generator.
Because a build program needs to know quite a bit about the Workspace, task, and specific object you are working with, Roundtable provides the following input parameters:
| Parameter | Data-Type | Description |
|---|---|---|
| Object Name | Character | The object name. |
| Parts List | Character | Comma-delimited list of part identifiers. |
| Part Descriptions | Character | Comma-delimited list of part descriptions. |
| Part Pathnames | Character | Comma-delimited list of full pathnames to parts. |
| Part Names | Character | Comma-delimited list of part names (no paths). |
| Part Templates | Character | Comma-delimited list of part templates. |
| Number of Parts | Integer | Number of parts for specified object. |
| Code Subtype | Character | Code Subtype of specified part. |
| User ID | Character | User ID of calling session. |
| Task Number | Integer | Selected task number. |
| Task Summary | Character | Summary of specified task. |
| Roundtable PROPATH | Character | Roundtable startup PROPATH. |
| Workspace Path | Character | Selected Workspace path. |
| Workspace Server Path | Character | Selected Workspace server path. |
| Workspace Module Directory | Character | Workspace module source directory. |
Optionally, if you have build programs that were developed for releases of Roundtable prior to 9.1D that use the Urtb* shared variables, you may use them by changing the LEGACY preprocessor value in rtb/p/rtb_runbuildprog.p. This procedure is used by Roundtable to run your build program(s) and is distributed as unencrypted source.
Roundtable provides a complete security framework to allocate responsibility for activities to different users of the system.
Roundtable security is managed via the following windows:
User Maintenance - Maintain user accounts.
Security Groups - Maintain security permssion groups.
Workspace User/Group Assignments - Associate users with Security Groups.
Roundtable users are maintained in the User Maintenance window.
![[Note]](../images/admon/note.png) | |
| You must be logged in as the sysop user, a Security Administrator or an Administrator to access User Maintenance. |
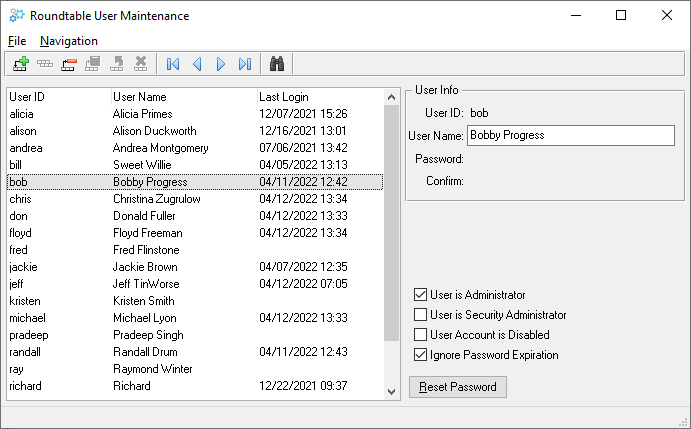 |
The following table describes the fields of the User Maintenance Window:
| Field | Description |
|---|---|
| User ID | Short user identifier. |
| User Name | User's name. |
| Last Login | Date and time of most recent login. |
| Password | User masked password. |
| Confirm Password | User password confirmation. |
| User is Administrator | Check this box to grant the user Administrator privilege. |
| User is Security Administrator | Check this box to grant the user Security Administrator privilege. |
| User Account is Disabled | Check this box to disable the user account. |
| Ignore Password Expiration | Check this box to ignore password expiration. |
| Reset Password | Choose the Reset Password to reset a user's password to blank. The user will be forced to create a new password the next time that they log in. |
The 'sysop' user has unlimited access to all system functions.
The 'sysop' user can grant Security Administrator privilege to other users. A user with the Security Administrator privilege can add, delete, and update user accounts, reset user passwords, set system password options, and enable/disable security auditing as well as grant the Security Administrator privilege to other users.
The 'sysop' user can grant Administrator privilege to other users. A user with Administrator privilege can access all application administration functions as well as grant the Administrator privilege to other users.
The 'sysop' user ignores the password expiration system setting.
![[Note]](../images/admon/note.png) | |
| When Roundtable is first installed, the 'sysop' user is automatically created. |
Follow these steps to add a user.
Choose → → from the Tabletop menu.
Choose the Add Record button.
Fill in the appropriate data for the new user.
Choose the Save Record button.
Choose → to close the window.
Follow these steps to edit a user.
Choose → → from the Tabletop menu.
Edit the user Name.
Choose the Save Record button.
Choose → to close the window.
Use this window to define permission groups that you will assign to one or more users in specified workspaces. Each permission group is identifed with a name that you provide and a list of allowable system activities.
The browse contains a single column displaying each of the currently defined group access codes. When you select a group access code, the data to the right of the selection list indicates the security privileges defined for that code.
![[Note]](../images/admon/note.png) | |
| You must be an Administrator or be logged in as the sysop user to perform Security Group maintenance. |
The following table describes the meaning of each toggle box:
Table 3.1. Workspace Permissions
| Field | Description |
|---|---|
| Properties | Users are allowed to modify Workspace properties. |
| User Assignments | Users are allowed to maintain Workspace User Group assignments. |
| Modules | Users are allowed to modify Workspace Module parameters. |
| Import | Users are allowed to perform the Workspace Import process. |
| Releases | Users are allowed to manage Workspace Releases. |
| Schema Update | Users are allowed to perform the schema update process. |
| Deployments | Users are allowed to manage Workspace Deployments. |
| Change Finder | Users are allowed access to Group Checkout and the Change Finder. |
| Sources | Users are allowed to maintain Workspace Sources. |
Table 3.2. Object Permissions
| Field | Description |
|---|---|
| PCODE Objects | Users are allowed to work on PCODE Objects. |
| PDBASE Objects | Users are allowed to work on PDBASE Objects. |
| PFILE Objects | Users are allowed to work on PFILE Objects. |
| PFIELD Objects | Users are allowed to work on PFIELD Objects. |
| DOC Objects | Users are allowed to work on DOC Objects. |
| Create Orphans | Users are allowed to create orphan versions. |
| Object Group | Users are allowed to edit object group and level. |
| Checkout Level | Users are allowed to change the default Checkout Level when checking out an Object. |
| Suppress Orphan Warning | Users will not receive a warning when creating an Orphan. |
| Variant Product Modules | Users can select any sourced Product Module for custom variants. |
| Empty Update Notes | Users are allowed to check-in Objects without entering a version update note. |
Table 3.3. Task Permissions
| Field | Description |
|---|---|
| Task Create | Users are allowed to create new Tasks. |
| Task Complete | Users are allowed to complete Tasks. |
| Task Reopen | Users are allowed to reopen Tasks. |
![[Note]](../images/admon/note.png) | |
| A "read-only" Security Group can be created by assigning no privileges to the group. |
Choose → → from the Tabletop menu. The Security Group window appears.
Choose the Add Record button. The following dialog box appears:
Enter a name for the Security Group and choose the OK button.
To edit allowed activities, see Section 3.14.2.3, “Editing a Security Group”.
Choose → to close the window.
Choose → → from the Tabletop menu. The Security Group window appears.
Select the Group that you want to edit from the list on the left side of the window.
Click the toggle boxes to indicate which activities users with that group permission can perform.
Choose the Save Record button.
Choose → to close the window.
Choose → → from the Tabletop menu. The Security Group window appears.
The Security Group window appears.
Select the Group that you want to delete from the list on the left side of the window.
Choose the Delete Record button. A warning box appears.
Choose the Yes button to delete the Securuity Group or the No button to cancel this operation.
Choose → to close the window.
Use the Workspace Security window to associate one or more users with one or more Security Groups in the selected Workspace. Users not associated with any security group will not be able to access the selected Workspace.
![[Note]](../images/admon/note.png) | |
| You must be an Administrator, have User Assignments privilege, or be logged in as the sysop user to perform Workspace User Group Assignment maintenance. |
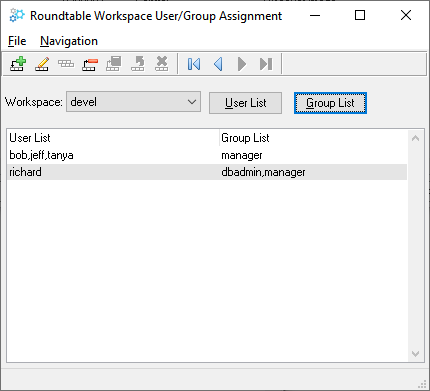 |
The first column contains a list of users, and the second column contains a list of security groups assocated with the user(s).
In the example window, the users bob, jeff, and tanya have the permissions granted by the Manager group. The user richard has the cumulative permissions granted by the Dbadmin and Manager groups.
Follow these steps to add a new Workspace user group assignment:
Choose → → from the Tabletop menu. The Workspace User/Group Assignment window appears.
Choose the Add Record button. The Add User Assignments dialog box appears.
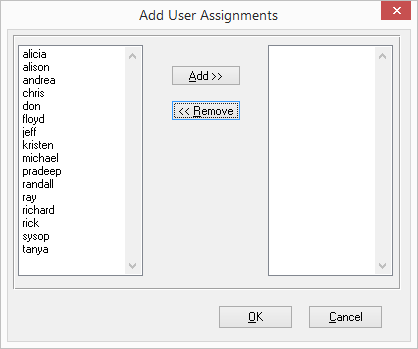
Select a user from the users selection list, and then choose the Add button to move the user into the user-list selection list.
Choose the OK button. In the Workspace User/Group Assignments window, a row containing the newly defined user list appears in the browse.
Choose the Group List button. The Add Group Assignments dialog box appears.
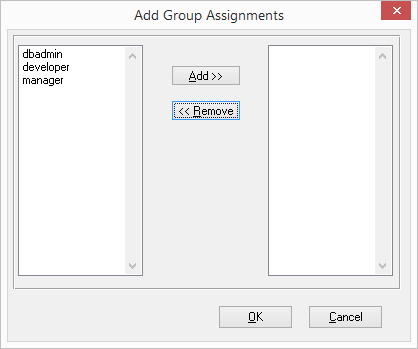
Select the Security Group to add from the groups selection list. Choose the Add to move the selected group into the group-list selection list.
Choose the OK button. In the Workspace User/Group Assignments window, the current row containing the Workspace user assignment is updated with the new group list.
Choose → to close the window.
Follow these steps to edit a new Workspace user group assignment:
Choose → → from the Tabletop menu. The Workspace User/Group Assignment window appears.
Select the Workspace user group assignment to edit from the browse.
To edit the user list, choose the User List button. The Add User Assignments dialog box appears.
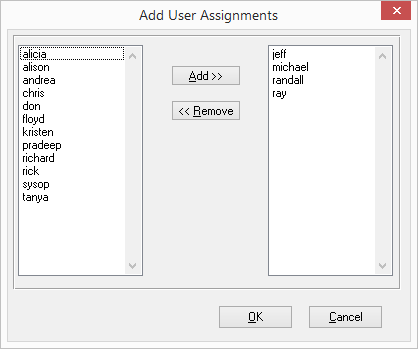
Select a user in the users selection list, and then choose the Add button to move the user into the user-list selection list.
OR
Select a user in the user-list selection list, and then choose the Remove button to remove the user from the user list.
Choose the OK button. In the Workspace User/Group Assignments window, the current row containing the Workspace user assignment is updated with the new user list.
To edit the Group list, choose the Group List button. The Add Group Assignments dialog box appears.
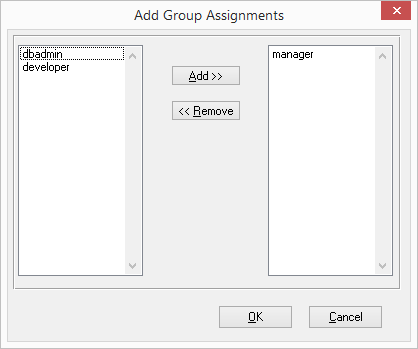
Select the group to add to the group list from the groups selection list, and then choose the Add button to move the group into the group-list selection list.
OR
Select the group to remove from the group-list selection list, and then choose the Remove button.
Choose the OK button. In the Workspace User/Group Assignments window, the current row containing the Workspace user assignment is updated with the new group list.
Choose → to close the window.
Follow these steps to delete a Workspace user group assignment.
Choose → → from the Tabletop menu. The Workspace User/Group Assignment window appears.
Select the Workspace user group assignment to delete in the selection list.
Choose the Delete Record button. A warning box appears.
Choose the Yes button to delete the user group assignment or the No button to cancel this operation.
Choose → to close the window.
You can only change your password if users have been defined in Roundtable. Follow these steps to change your password:
From the Tabletop menu, choose → → Password. The following dialog box appears:
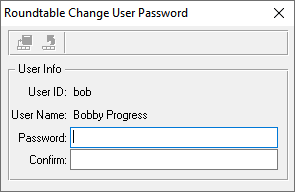
Type your new password in both the Password and Confirm fields. Your password does not show when you type it.
Choose the Save Record button to save your change.
![[Note]](../images/admon/note.png) | |
| Your new password must be different from your previous password. |
If you are logged into the system as anyone other than the sysop user you may view your access privileges for the currently selected Workspace by following these steps:
Choose → → . The User Privileges dialog box appears.
Choose the Close button to close the dialog box.
Use the Events Viewer to view all security and administrative events that have been logged.
![[Note]](../images/admon/note.png) | |
| You must be logged in as the sysop user or a Security Administrator access the Security Events Viewer. |
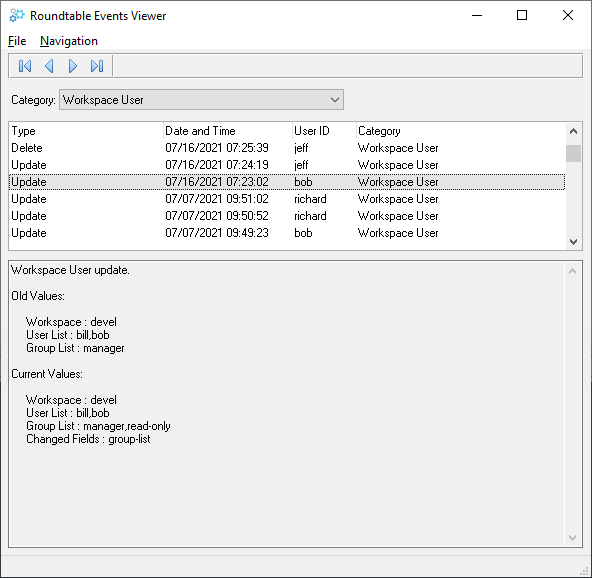 |
The following table describes the fields of the Security Events Viewer:
| Field | Description |
|---|---|
| Type | The type of security event. |
| Date and Time | The date and time that the security event occurred. |
| User ID | The user that performed the action. |
| Category | The category of the security event. |
| A text description of the security event showing before and after values (if applicable). |
Security events are categorized as follows:
| Category | Description |
|---|---|
| Session | Login/logout activity. |
| System | Create, delete, and update actions for system preferences. |
| User | Create, delete, and update actions for authorized users. |
| Workspace | Create, delete, and update actions for Workspaces. |
| Workspace User | Create, delete, and update actions for Workspace User Group assignments. |
Roundtable User reports allow you to print detailed information about each user, their current status, and their Workspace privileges.
User reports are available via → from the Tabletop menu.
![[Note]](../images/admon/note.png) | |
| You must be a Security Administrator or logged in as the sysop user to access user reports. |
The User Report provides a listing of all defined users and their current status. The following information is provided for each user:
User ID
User Name
Administrator
Security Adminstrator
Disabled
If you have a chain of existing workspaces, you might want to capture the status of each of the workspaces in Roundtable. Refer to the following diagram, which describes a typical development environment:
 |
Different versions of the application source and schema exist in each of these workspaces. Assume you want to capture the different object versions that exist in each Workspace. To do this, you define and load the contents of the Pre-Prod, Test, and Devel workspaces into Roundtable.
You start by loading the Pre-Prod Workspace first because it contains the earliest version of the system. Assuming that you have already defined your Subtypes, products, and Product Modules, follow these steps. See Section 3.9, “Defining Your Application”.
Create a Workspace named Pre-Prod.
From Workspace Sources, add the Pre-Prod Workspace as the primary Workspace source to itself for each product and Product Module.
Create a new task for loading your Pre-Prod schema.
For each of the databases in your Pre-Prod Workspace, create a new PDBASE object and run Load Schema.
Complete your task.
Create a new task for loading your Workspace source.
Run Module Load for each of the modules in your Pre-Prod Workspace.
Complete your task. If any of the programs in your task fail to compile, flip their compile flags to 'No'.
Create a Release in the Pre-Prod Workspace. This is Pre-Prod Release 1.
Follow these steps to create a Test Workspace in Roundtable and populate it:
Create a Workspace named Test. Specify R-code = 'No' and S-Code = 'No'.
Use Workspace Sources to specify Pre-Prod as a Workspace source for Test and then include all products and Product Modules available in the Pre-Prod Workspace.
Use the Import process to copy object definitions from Pre-Prod to Test. Note that you are only copying the definitions of the objects. You specified S-Code = 'No' for the Workspace, so no source will be copied into the Test Workspace directory. This is necessary so that you do not overwrite the source that is already in the Test Workspace.
Edit the Workspace definitions so that R-code = 'Yes' and S-code = 'Yes'.
Create a task for loading new and modified schema definitions.
For each of the databases in your Test Workspace, run the Load Schema process. This will find any new and modified schema, and bring your Roundtable schema object definitions in sync with your physical Test Workspace schema.
Complete your task.
Create a task for loading new and modified source.
Run the Global Change Finder to find all source files in the Test Workspace that are different from those you loaded into the repository for the Pre-Prod Workspace. The Global Change Finder works by comparing the source in the file system with the source registered in the Roundtable repository. The Global Change Finder allows you to create new object versions for each of the different source files found.
Run Module Load for each of the modules in the Test Workspace. This will find any new programs in the Test Workspace that do not exist in the Pre-Prod Workspace.
Complete your task. If any of the programs in your task fail to compile, flip their compile flags to 'No'.
Create a Release in the Test Workspace. This is Test release 1.
Follow the same steps as outlined in the Test Workspace, except that you copy object definitions from the Test Workspace into the Devel Workspace.
Now that you have the Devel, Test, and Pre-Prod workspaces registered into Roundtable's repository, you can specify the normal flow of system changes. This is done from Workspace Sources.
Add the Test Workspace as a source to the Pre-Prod Workspace. Include all products and Product Modules.
Delete any records specifying Pre-Prod as a primary source.
Add the Devel Workspace as a source to the Test Workspace. Include all products and Product Modules. It is not necessary to remove Pre-Prod as a source Workspace to the Test Workspace. It might be useful to have it as a source for Test if you want to have a quick way of moving patches made in Pre-Prod back into Test.
For each product and Product Module, add the Devel Workspace as the primary source to itself. It is not necessary to remove Test as a source Workspace to the Devel Workspace. It might be useful to have it as a source for Devel if you want to have a quick way of moving revisions made in Test back into Devel.
Table of Contents
- 4.1. Introduction
- 4.2. Workspace Maintenance
- 4.3. Viewing Workspace Event History
- 4.4. Workspace Reports
- 4.5. Workspace Sources
- 4.6. Editing Workspace Module Parameters
- 4.7. Object Variants
- 4.8. Database Schema Updates
- 4.8.1. Schema Update Window Description
- 4.8.2. Building the Schema Update List
- 4.8.3. Database Storage Areas
- 4.8.4. Toggle Index to Activate/Deactivate
- 4.8.5. Skipping a List Item
- 4.8.6. Applying a Table as New
- 4.8.7. Data Procedures
- 4.8.8. Updating Physical Schema
- 4.8.9. Deleting the Schema Update List
- 4.8.10. Logical and Physical Schema Synchronization
- 4.8.11. Database Integrity Check Report
- 4.9. Load Schema
- 4.10. Assign Schema
- 4.11. Remove Unused Schema
- 4.12. Releases
- 4.13. Imports
- 4.14. Deployments
- 4.14.1. Deployments Window Description
- 4.14.2. Deployments Folder
- 4.14.3. Adding a Remote Site
- 4.14.4. Editing a Remote Site
- 4.14.5. Deleting a Remote Site
- 4.14.6. Printing the Site Report
- 4.14.7. Adding a Deployment
- 4.14.8. Editing a Release Number and Directory
- 4.14.9. Deleting a Work-in-Process Deployment
- 4.14.10. Building a Schema Update List
- 4.14.11. Making an Update Directory
- 4.14.12. Updating at a Remote Site
- 4.14.13. The Update Process
- 4.14.14. Completing a Deployment
- 4.15. Procedure Updates and Compiles on Remote Sites
- 4.16. Database Schema Updates on Remote Sites
Roundtable provides a secure development and testing environment by managing configurations of your software application in Workspaces. A Workspace is a view of your application at a given point in the development lifecycle. A Workspace can contain an entire copy of your application or an independent subset of your application. The creation, deletion, and modification of objects (code, databases, tables, fields, and text) are managed within the Workspace.
This introduction to Workspaces presents detailed information about utilizing Workspaces in your development environment. Specifically, this chapter discusses:
Workspace Maintenance
Workspace Sources
Object Variants
Database Schema Updates
Load Database Schema
Assign Schema
Releases
Imports
Workspace Populate Process
Build Names Table
Deployments
Procedure Updates and Compiles on Remote Sites
Database Schema Updates on Remote Sites
As part of your software development process, Roundtable keeps copies of objects in isolated areas called Workspaces. You can have multiple Workspaces for a single development project, with each Workspace representing a different stage of development. Changes made within a Workspace do not affect other Workspaces. Typically, you create Workspaces that parallel the different development stages of your product, such as development, testing, and deployment.
When creating the first Workspace for a project, you develop the objects and databases from scratch. After that, you can create Workspaces by importing objects from other Workspaces. Roundtable compares the objects in the target and source Workspaces, and then imports the objects with differences into the target Workspace.
To help you understand how to use Workspaces, the following scenario describes four common Workspaces for one base product. Each description includes how to create the Workspace, what the Workspace includes, and what type of quality assurance testing is best for that Workspace. Remember, this is only one scenario; tailor Workspaces to your products and development cycle, as described in the Introduction section in Software Configuration Management.
Development Workspace: Use the development Workspace to create, modify, and delete new objects and data. Since this Workspace is volatile, it is only suitable for limited, informal testing, usually done by programmers.
Test Workspace: Create the application in the Test Workspace by importing objects and data from the Development Workspace. Although this Workspace changes less frequently than the Development Workspace, some changes are necessary to complete the testing process. This Workspace is stable enough for significant quality assurance Alpha testing.
Pre-production Workspace: After testing, objects and data are imported from the Test Workspace into the Pre-production Workspace. Since this Workspace should function with few or no major problems, you can release it to sophisticated users for Beta testing and evaluation. Typically, you should require approval to make changes in this Workspace.
Production Workspace: Import objects and data from the Pre-production Workspace into the Production Workspace. This Workspace is a "live" system that must function flawlessly under real-world conditions. You should typically require approval to make changes in this Workspace.
Roundtable can manage many Workspaces. For example, quality assurance, testing, and development should be done in different Workspaces. Multiple Workspaces can aid in the quality assurance strategy, but more is not necessarily better. Consider the timing impact of each additional Workspace when planning your overall development and quality assurance strategy. Use the following guidelines:
Organize your work into logical categories, such as research and development, product development, custom development, or maintenance.
Use a consistent naming convention. For example, always use the abbreviation DEV when referring to development Workspaces, such as BASEDEV, CUST1DEV, CUST2DEV, etc.
Do not create more Workspaces than you have resources to manage. In most circumstances, separate Test and Deployment Workspaces, along with the necessary development Workspaces, are sufficient to complete your product.
When running Roundtable in a distributed AppServer configuration, it is possible that the AppServer process in which the Roundtable server is running cannot access the physical Workspace directory via the same path as the Roundtable client.
For example, your physical Workspace directory may exist on a Unix
machine in /u2/devel that you access via a mapped
SMB share (//unixshare/devel) from your client
machine.
To run the Roundtable server in an AppServer session on the Unix
machine, the Roundtable server must be able to read from and write to
the physical Workspace directory. To accomplish this, Roundtable allows
you to override the default Workspace path and specify an alternate
server Workspace path. In the example above, the Roundtable client would
access the physical Workspace directory via the default path
(//unixshare/devel), while the Roundtable sever
would access the physical Workspace directory via the alternate server
path (/u2/devel).
Roundtable Workspaces are maintained in the Workspaces window.
![[Note]](../images/admon/note.png) | |
| You must be an Administrator or be logged in as the sysop user to perform all Workspace maintenance operations. Users with the Workspace Properties privilege are limited to editing Workspace properties. |
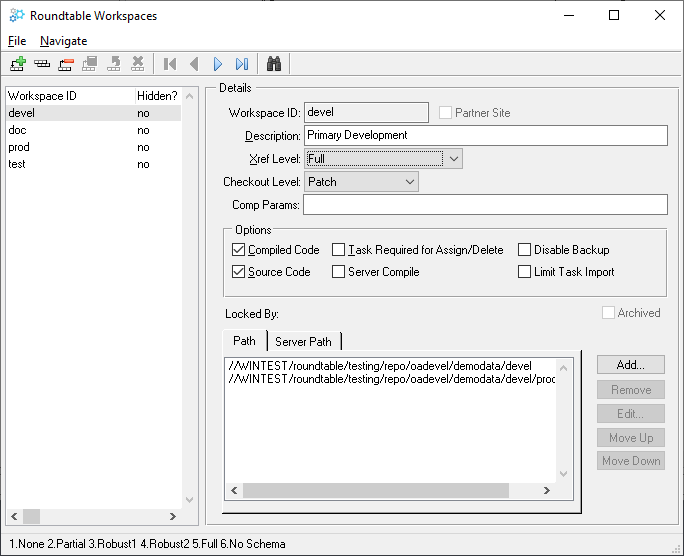 |
The following fields can be found in the Workspace Window:
| Field | Description |
|---|---|
| Workspace ID | A fill-in for the Workspace name. |
| Partner Site Workspace | A toggle-box indicating that the Workspace is a receipt Workspace for a Partner Site. |
| Description | A fill-in for the Workspace description, up to 40 characters. |
| Xref Level | A fill-in for the cross-reference level. Enter one of the
following five, depending on the amount of info needed:
|
| Checkout Level | A drop-down for the default checkout level to use when an
Object is checked-out in the Workspace.
|
| Compiled code | A toggle box that determines whether Roundtable keeps compiled R code in the Workspace. It has no effect on deployments made from this Workspace. Activate this box to keep R-code in the Workspace. |
| Source code | A toggle box that determines whether Roundtable keeps source code in the Workspace. It has no effect on deployments made from this Workspace. Activate the toggle box to keep source code in the Workspace. If you change the S-code value, you can use the Workspace populate option to move code into or out of the Workspace directories. |
| Task Required for Assign / Delete | A toggle box that determines whether an active Task is required to perform Assign or Delete actions on Workspace objects. |
| Server Compile | A toggle box that specifies whether or not compilations for objects assigned to this Workspace happen on the client or the server. Used when Running Roundtable in a distributed AppServer configuration. |
| Disable Backup | A toggle box that will override the System backup preference and disable automatic backups of WIP Objects in this Workspace. |
| Limit Task Import | A toggle box that limits Task imports into this Workspace. Activate this toggle box to limit Task imports from direct Workspace sources only. |
| Archived | A toggle box to indicate if the selected Workspace has been archived. |
| Locked By | A field that indicates the current lock status of the Workspace. A Workspace is locked when schema updates and other major Workspace management activities are performed. |
| Compile Parameters | Compile statement parameters for objects compiled in the Workspace. Normally, this field can be left blank. It is most often used for compiling modules with support for multiple languages. Module compile parameters or individual PCODE object compile parameters can override Workspace compile parameters. |
| Path | The pathing components which are added to the session PROPATH when the Workspace is selected. The first entry of the Workspace path should always be the physical root directory to the Workspace. When running in a distributed AppServer environment, the Roundtable client will always reference the physical Workspace directory via this path. It is recommended that no two Workspaces share the same root directory. |
| Server Path Override | A toggle box that specifies whether or not the Roundtable server should use an alternate path to the physical Workspace directory. Used when running Roundtable in a distributed AppServer configuration. |
| Server Path | Similar to the 'Path' specification, but an alternate path to the physical Workspace directory. Used when running Roundtable in a distributed AppServer configuration where the physical path to the Workspace directory cannot be accessed by the server via the 'Path' specification above. |
Follow these steps to create a new Workspace:
Choose → from the Tabletop menu. The Workspaces window appears.
Choose the Add Record button.
Fill-in the appropriate information for the new Workspace. Make sure the New Workspace ID describes the product and its stage of development. Try to name your Workspaces consistently. For example, if you have one base product and two custom products, name your Development Workspaces something like BASEDEV, CUST1DEV, and CUST2DEV. The Workspace ID can be up to 16 characters long. If your site number is not 0, then you must enter the three-digit number as a prefix for the Workspace name. If your site number is 0, you cannot begin your code with a numeric character. By default, your site number is zero. Only partner sites are normally assigned a site number.
Choose the Add button next to the Workspace Paths tab folder. The Add Workspace Path dialog box appears.

Enter the path required by your Workspace. The Workspace path tells Roundtable where to store the Workspace and its components. The first Workspace path should always be the root directory to your Workspace. No two Workspaces should share the same root directory. Roundtable uses the other specified paths to locate your source code.
![[Note]](../images/admon/note.png)
The UNIX-style forward slash ( / ) is used in Roundtable instead of the backward slash ( \ ) used in Windows. This is because the forward slash is portable in the OpenEdge environment, while the backward slash is not. You can use network drive mapping letters (e.g.: "W:/directory"), and you can also use Universal Naming Conventions (e.g.: "//computer/share/directory"). Choose the OK button.
Repeat steps 4-6 for each path required for the Workspace.
Choose the Save Record button.
Choose → to close the window.
![[Note]](../images/admon/note.png) | |
| To specify an alternate path to the physical Workspace directory, select the Server Path tab folder, check the 'Server Path Override' toggle and repeat the previous steps. |
You can change the description, Xref Level, R-code, or S-code fields for a Workspace at any time; however, you cannot change the Workspace ID.
![[Note]](../images/admon/note.png) | |
| Changing the Xref Level, R-code, or S-code after you have assigned and compiled an object has no immediate effect on objects in the Workspace. You must recompile for the Xref Level and R-code to take effect. |
Follow these steps to edit a Workspace:
Choose → from the Tabletop menu. The Workspaces window appears.
Select the Workspace to edit from the Workspace browse.
Edit the Description, Xref Level, R-code, and S-code fields for the Workspace and modify the Workspace Paths as necessary.
![[Note]](../images/admon/note.png)
Changing the Workspace root directory in this screen will not cause the contents of the physical directories to move. You are responsible for moving or renaming directory structures to match the specifications present in this window. Choose the Save Record button.
Choose → to close the window.
You can delete a Workspace if you have sufficient security access and no one else is currently working in the Workspace. Note that deleting a Workspace does not delete any completed objects from the repository. A Workspace is simply a list of object versions that defines a configuration of your software application and a related set of application components in the directories specified in the Workspace paths. However, once you delete the Workspace, the configuration is lost and cannot be reclaimed. Although tasks done under the Workspace are not deleted, they may be far less available for casual review if the Workspace to which they belong is deleted. In addition, all Release, deployment, and general histories of the Workspace are deleted.
![[Note]](../images/admon/note.png) | |
| Deleting a Workspace removes all source code at the operating system level. Work-in-process code may be deleted and will not be recoverable. |
Follow these steps to delete a Workspace.
Choose → from the Tabletop menu. The Workspaces window appears.
From the Workspaces browse, select the Workspace to delete.
Choose the Delete Record button. A confirmation dialog box appears with any warnings to consider.
Choose the Continue button to complete your Workspace delete.
Choose → to close the window.
Marking a Workspace as hidden removes it from the Workspace list on the Tabletop in GUI and the Workspace Selection screen in TTY.
Follow these steps to hide a Workspace:
Choose → from the Tabletop menu. The Workspaces window appears.
From the Workspaces browse, select the Workspace to hide.
Choose → from the Workspaces window menu. A warning dialog box appears.
Choose the Yes button to hide the selected Workspace. The menu item appears with a check mark to indicate that the Workspace is hidden.
Choose → to close the window.
Marking a Workspace as archived removes it from the Workspace list (hidden Workspace) and removes all source from the Workspace directory. Since the Workspace is archived and not deleted, all Xref information is retained in the repository.
Follow these steps to archive a Workspace:
Choose → from the Tabletop menu. The Workspaces window appears.
From the Workspaces browse, select the Workspace to archive.
Choose → from the Workspaces window menu. A warning dialog box appears.
Choose the Yes button to archive the selected Workspace. The menu item appears with a check mark to indicate that the Workspace is archived.
Choose → to close the window.
Use the Workspace populate process to restore or remove source from a Workspace directory. A Workspace is a configuration of object versions defined by the configuration list stored in the repository. This makes it possible to restore the source of a Workspace by extracting the appropriate object version's files from the repository.
There are two common situations where it is necessary to use the populate process. The first is disaster recovery. For example, if a Workspace directory was deleted, the populate process can be used to restore its contents. Only the latest completed version of each object is restored. If work-in-process objects existed and had a status of Central, this work would be lost. In fact, the populate process does not even try to restore work-in-process objects to ensure that they are not overwritten in the populate process.
The second situation involves the use of the Workspace and Workspace module S-code flag. This flag indicates whether source (and other object files as well) should be stored in the Workspace. Set this flag to No, then run the populate process to remove source from the Workspace. Set this flag to Yes, then run the populate process to restore source in the Workspace.
A short cut can remove the source from a Workspace if no work-in-process objects exist. Change the S-code flag to No, then delete the source manually. This is a quick way to free disk space when a Workspace has not been used for some time and you want to keep the configuration of the Workspace indefinitely.
Follow these steps to run the Workspace populate process:
Choose → from the Tabletop menu bar. The Workspace Maintenance window appears.
Choose → from the window's menu.
Choose the module to populate from the drop-down list or choose the special value of "All" to process all modules.
Use the Event History window to view all events that have occurred in a Workspace.
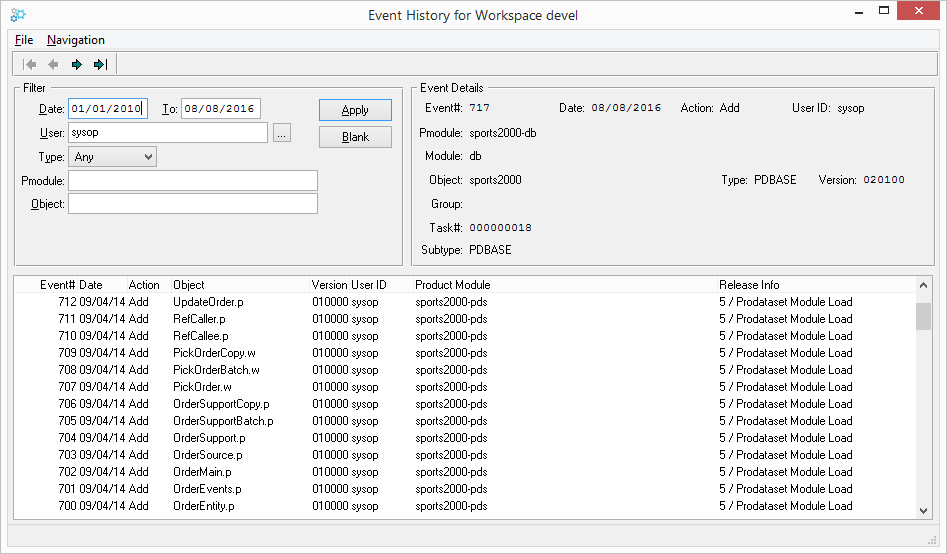 |
The following fields can be found in the Event History Window:
| Field | Description |
|---|---|
| Event Number | Event numbers for object that are checked out are always 99,999,999. When the object is checked in the final event number is assigned. |
| Date | The date on which the final event number is assigned. This is the date that the action was taken on the completed (checked in) object. |
| Action | The action code describes what action was taken on the object in the Workspace. Action codes include: Add - New object version was added. Delete - Object assignment was deleted. Assign - Object assignment was created. |
| Pmodule | The Product Module the affected object belongs to. |
| Module | The Workspace module the affected object appears in. |
| Object | The name of the object affected by the action. |
| Type | The type of object: PCODE, DOC, PDBASE, PFILE, PFIELD. |
| Group | The object group code assigned to the object assignment at the time of the action. |
| Version | The version of the object affected by the action. |
| Task# | The task number associated with the Workspace history event. |
| Subtype | The Subtype of the object affected by the action. |
| User ID | User that produced the event. |
Roundtable offers a number of reports about your Workspaces. The following table describes the Workspace reports:
| Report | Definition | Benefit |
|---|---|---|
| Changes Report | A list of the changes in a Workspace across a range of events. | Provides testers and/or customers with extensive information about what has changed in a Workspace between any two events. |
| Event History Report | The history of a Workspace between two events, sorted from newest to oldest event. | Traces the history of individual objects or groups of objects belonging to a Product Module. |
| Release Report | A detailed list of the changes in a Workspace between two releases. | Useful for testers and/or customers when receiving new releases. Use the Object Details and Show Update History fields for this purpose. |
| Workspace Report | A complete list of the objects in a Workspace ordered by Workspace module. | Provides a hard copy of the current Workspace configuration. |
| Workspace Differences Report | A list of the differences between the two Workspace configuration lists. | Useful when integrating a base Release to custom Workspaces. |
Follow these steps to print a Workspace report.
Choose → from the Tabletop menu.
From the → submenu, choose the report you want to print. Roundtable displays a report options window for many of the reports. These options are explained in the following sections.
If a report options window appears, choose the report options you require, then choose the OK button. The Print Destination dialog box appears.
The report appears in a text viewer window.
When finished viewing and/or printing the report, close the text viewer window.
The Workspaces Changes Report shows changes in a Workspace between to events (inclusive). The following window allows you to specify the information to include in the Report:
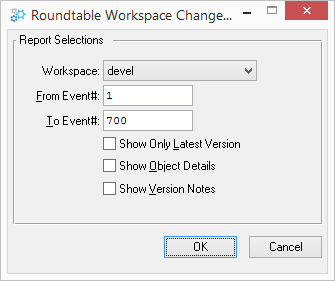 |
| Field | Description |
|---|---|
| Workspace | The Workspace to report on. |
| From Event# | Fill in the first event number to include in the report. |
| To Event# | Fill in the last event number to include in the report. |
| Show Only Latest Version | Toggle on to print only the latest changes to an object made between the two event numbers. |
| Show Object Details | Toggle on to print the object description. |
| Show Version Notes | Toggle on to print the programmer's notes. |
The Workspace Event History Report shows events that match the criteria that you specify in the following window:
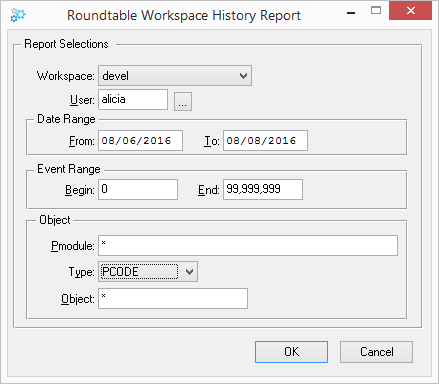 |
| Field | Description |
|---|---|
| Workspace | The Workspace to report on. |
| User | Fill-in a specific user or leave blank for all users. A Lookup button is provided to find a user by ID or name. |
| Date Range | Specify the From and To dates to include in the report. |
| Event Range | Fill in the beginning and ending event numbers to include in the report. |
| Pmodule | Fill in the Product Module number. Use an asterisk (*) to denote any Product Module number. |
| Object Type | Select the type of object (PCODE, PFILE, PDBASE, etc.). Use the asterisk (*) to denote any object type. |
| Object | Fill in the name of the object (menu.p, cust.p, etc.). Use an asterisk (*) to denote any object. |
The Workspace Report shows information about a Workspace and, optionally, objects assigned to the Workspace. The following window allows you to specify the information to include in the Report:
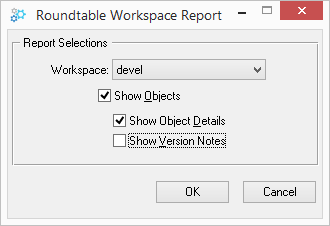 |
| Field | Description |
|---|---|
| Workspace | The Workspace to report on. |
| Show Objects | Toggle on to print the objects in the Workspace or off to print configuration information only. |
| Show Object Details | Toggle on to print the object description. |
| Show Version Notes | Toggle on to print the notes the programmer entered when changing the objects. |
The Workspace Differences Report shows the differences between the contents of any two Workspaces. The Workspace Difference Report window appears as follows:
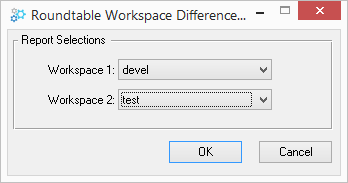 |
The following fields can be found in the Workspace Differences Report dialog box:
| Field | Description |
|---|---|
| Workspace 1 | Select the first Workspace to compare from the drop down list. |
| Workspace 2 | Select the second Workspace to compare from the drop down list. |
After you create a Workspace, you define its contents by assigning product modules to it. This assignment of product modules is the configuration hierarchy of the software system managed in the Workspace.
After you assign product modules to the Workspace configuration, you can create new objects in the Workspace, each of which belongs to one of the product modules. When you are loading objects into the system for the first time, you can use the Module Load utility to create many new objects quickly. For a detailed description of this utility, see Section 7.5, “Module Load”.
You can also assign existing objects from the Roundtable repository to the new Workspace. This assignment is done one object at a time or by using the Roundtable import process.
The import process examines a source Workspace to determine what objects need to be assigned to or deleted from a target Workspace to make the Workspaces' configurations, where these configurations coincide, as similar as possible. The following simplified explanation of the import process shows why Workspace sources are necessary and useful:
The import process compares the configuration hierarchy of each Workspace. When the source Workspace contains a Product Module that is also contained in the target Workspace, it does an object-by-object comparison within that Product Module to see if objects in the target Workspace have the same object versions as objects in the source Workspace. If they are different, the import process places a reference to the object version found in the source Workspace in the import control table with an action code of Assign.
If a Product Module in the source Workspace contains objects that do not exist in the corresponding Product Module in the target Workspace, references to these new objects are placed in the import control table with an action code of Assign.
If an object has been deleted from the source Workspace, but still appears in the target Workspace, a reference to the deleted object is placed in the import control table with an action code of Delete. With your permission, the import process can remove the object from the target Workspace.
If you accept the suggestions supplied by the import process, it assigns the specified object versions from the Roundtable repository to the target Workspace. It is important to remember that these object versions are being extracted out of the repository, not simply copied from the source Workspace(s) to the target Workspace. One reason for this is that the import process considers only the latest completed objects in the source Workspace(s). If the import process copied from the source Workspace(s) to the target Workspace, it might copy a work-in-process version of the object.
The import process is actually more sophisticated than the example implies. For more detail on the import process, see Section 4.13, “Imports”.
When assigning product modules to Workspaces, it is necessary to specify a source Workspace. When there is no source Workspace, such as when you assign Workspace modules to your first Workspace, specify the name of the current Workspace as the source Workspace. Roundtable automatically marks each Product Module assigned in this way as PRIMARY to the current Workspace. This is a way of saying that the current Workspace is the headwater of the flow of objects for the specified Product Module.
Refer to the following example:
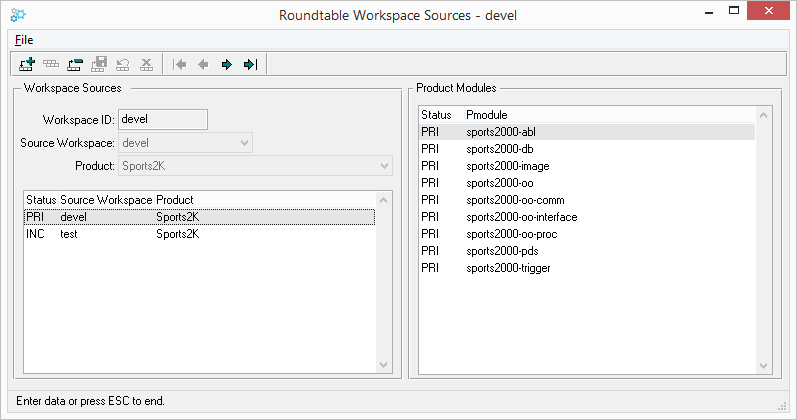 |
The first two columns contain the names of each Workspace and its Workspace sources. The Devel1 and Devel2 Workspaces are primary Workspaces because their Workspaces are identical to their sources. The third and fourth columns list the products and the product modules (within those products) that are assigned to the Workspace.
The Testing Workspace has Devel1 and Devel2 designated as its Workspace sources. Unless specifically excluded, Roundtable imports all objects belonging to the products and product modules assigned to Devel1 and Devel2 into the Testing Workspace.
The Videostore defines Testing as its source Workspace. Note that another product, Video, has been added to the Videostore Workspace. Therefore, objects in this Workspace are both created and imported. The import process imports all objects in the Testing Workspace unless otherwise specified or blocked by object variants belonging to the Video product. For more information on object variants, see Section 4.7, “Object Variants”.
After you create a Workspace, you define its contents by assigning Products and Product Modules using the Workspace Sources window.
![[Note]](../images/admon/note.png) | |
| You must be an Administrator, have Workspace Sources privilege, or be logged in as the sysop user to perform Workspace Sources maintenance. |
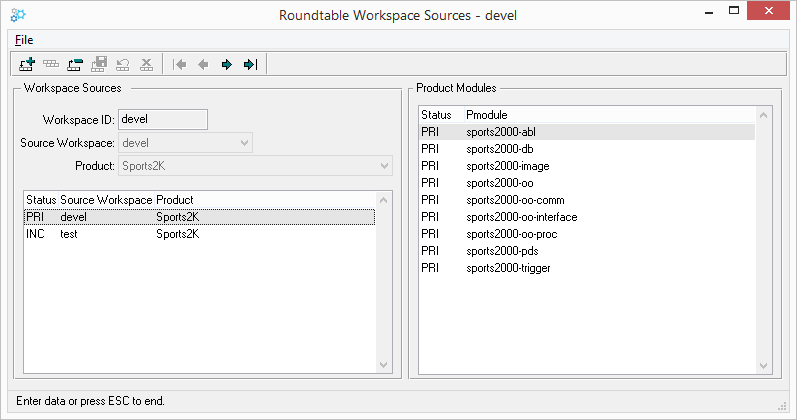 |
The following fields can be found in the Workspace Sources window:
| Field or Menu Item | Description |
|---|---|
| Status (for Product) | Contains one of the following values: PRI - Source Workspace is the current Workspace. INC - Product will be included in imports. EXC - Product will be excluded from imports. |
| Source Workspace | Contains the name of a source Workspace |
| Product | Contains the Product-ID belonging to the source Workspace. |
| Source Workspace | Workspace ID for the Workspace Source. |
| Add Source | Add a Workspace Source. |
| Delete Source | Delete a Workspace Source. |
| Include Source | Toggle the status from EXC to INC. This button has no effect on PRI status. |
| Exclude Source | Toggle the status from INC to EXC. This button has no effect on PRI status. |
| Status (for Product Module) | Contains one of the following values: PRI - Source for Product Module is the current Workspace. NEW - Newly assigned. User must change to INC or EXC. INC - Product Module will be included in imports. EXC - Product Module will be excluded from imports. |
| Pmodule | Contains the Product Module code. |
| Description | Contains the description of Product Module. |
| Include Product Module | Toggle the status of the currently selected Product Module from EXC to INC, or from EXC to PRI (for primary Workspace sources). |
| Exclude Product Module | Toggle the status of the currently selected Product Module from INC to EXC, or from PRI to EXC (for primary Workspace sources). |
Follow these steps to add a Workspace source.
On the Tabletop, select the Workspace for which you want to configure Workspace sources.
Choose → . The Workspace Sources window appears.
Choose the Add Record button.
In the Source Workspace drop-down list, select the source Workspace.
In the Product drop-down list, select the source product.
![[Note]](../images/admon/note.png)
To add sources for all the products sourced as Primary or Include in the selected Workspace, select 'All' in the Product drop-down list. Choose the Save Record button. Roundtable adds the source Workspace/Product. Each Product Module that belongs to the specified source is inserted into the Product Modules for Source Workspace table with a status of INC (or PRI if the current and source Workspace are the same).
If you want to exclude a Product Module, select the appropriate Product Module, and the either double-click the entry, or choose → from the window menu. The Product Module status changes to EXC. Repeat this step as necessary.
Choose → to close the window.
Follow these steps to delete a Workspace source.
On the Tabletop, select the Workspace for which you want to configure Workspace sources.
Choose → . The Workspace Sources window appears.
From the Workspace Sources browse, select the Workspace/Product source to delete.
Choose the Delete button to delete the Workspace source.
![[Note]](../images/admon/note.png)
Roundtable deletes Workspace/Product source and all entries in the Product Modules table for the source. It does not remove the objects from the Workspace. Choose → to close the window.
Compiled code, Source code, Server Compile, Xref Level, and Compile Parameter values may be set for each Workspace module independently. These Workspace module values override the Workspace level specifications for these values you have entered in the Workspaces window. See Section 4.2.3, “Workspace Window Description” for a detailed description of the Compile code, Source code, Xref level, Server Compile and Compile Parameters fields.
![[Note]](../images/admon/note.png) | |
| Changing these values after you have assigned and compiled an object has no effect on the object. You must recompile for the new values take effect. |
Follow these steps to edit Workspace module values:
On the Tabletop, select the Workspace for which you want to configure Workspace Modules.
Choose → . The Workspace Modules window appears.
Select the Workspace module to edit in the browse table.
Set the Xref column to 0 to default to the Workspace's Xref level, or set it to another number to override the Workspace Xref level.
Enter Yes or No in the Rcode column to specify whether .r code is stored in the module, or set this field to ? (question mark) to default to the Workspace R-code value.
Enter Yes or No in the Scode column to specify whether source code is stored in the module, or set this field to ? (question mark) to default to the Workspace S-code value.
Enter Yes or No in the Server Comp column to specify if compilations happen on the server, or set this field to ? (question mark) to default to the Workspace Server Compile value.
In the Comp Params column, enter any compile syntax parameters to be used when compiling objects in this Workspace module. Normally, this column can be left blank. It is most often used for compiling modules with support for multiple languages. If you enter compile parameters for a module, then the Workspace compile parameters are ignored. Leave column field blank to default to the Workspace's compile parameters.
![[Note]](../images/admon/note.png) | |
| You must be an Administrator, have Workspace Modules privilege, or be logged in as the sysop user to perform Workspace Modules maintenance. |
Roundtable allows you to create more than one variation of the same object called variants. Variants have the same name and type but belong to different product modules. Unlike identically-named objects however, object variants share a common lineage. You use variants when you need support for:
Custom system development
Vertical markets
Different hardware platforms
See Section 6.7.4, “Creating an Object Variant” for instructions on creating an object variant.
Roundtable keeps objects in the Roundtable repository. The repository stores all of the objects in the system and their definitions. The unique key for the object definition includes the following fields:
Object type (PDBASE, PFILE, PFIELD, PCODE, or DOC)
Product module (Pmodule) code (base_ap, cust_ap)
Object name (menu.p, cust.p, etc.)
Version code (01.00.00, 01.01.00, etc.)
The object definition allows an object of the same type, name, and version to exist in two different product modules, creating an object variant. Although Roundtable stores all object variants in the repository and objects can exist in more than one Product Module, only one variation of an object can be assigned to any given Workspace when the Allow Non-Unique system flag is set to No. Each Workspace represents a collection of object versions. Roundtable manages a table of these object versions called the configuration list. The following fields define the unique key for objects in this table:
Workspace ID (Wspace-id)
Object type (PDBASE, PFILE, PFIELD, PCODE, or DOC)
Object name
The difference between versions and object variants can be confusing at first. Consider the table below:
| Object Type | Product Module | Object Name | Version |
|---|---|---|---|
| PCODE | core_ap | menu.p | 01.00.00 |
| PCODE | core_ap | menu.p | 01.01.00 |
| PCODE | cust1_ap | menu.p | 01.00.00 |
All of the objects in this table are stored together in the object repository. The first two show two versions of an object named menu.p. Remember that the unique key on objects stored in the repository includes the object type, Product Module, object name and version code. The last object is an object variant that belongs to a Product Module named cust1_ap. You must always remember to consider the Product Module when looking at an object version.
This example shows how you can use object variants. Assume you are creating an invoice-printing program for many different types of businesses. Most of these businesses can use your core (or generic) program, but the Videostore application needs a special variation. To handle this, you need to create two variations of the same program.
You begin by creating the core program, invprnt.p, in the development Workspace (refer to line 1, below). Then, import the core program into the Testing Workspace (line 2). After testing, import the program into two Workspaces, a core pre-production Workspace (line 3) and a Videostore Workspace (line 4). In the Videostore Workspace, you can create a custom variant of invprnt.p using the video_ap Product Module. You now have two variations of the same program (lines 3 and 4).
| # | Object Type | Workspace | Product Module | Object Name | Version |
|---|---|---|---|---|---|
| 1 | PCODE | Devel | core_ap | invprnt.p | 01.00.00 |
| 2 | PCODE | Testing | core_ap | invprnt.p | 01.00.00 |
| 3 | PCODE | Preprod | core_ap | invprnt.p | 01.00.00 |
| 4 | PCODE | Video | video_ap | invprnt.p | 01.00.00 |
Relational database schemas are defined by PDBASE, PFILE, and PFIELD objects in the Roundtable repository - the schema objects assigned to a Workspace are called the logical schema. The OpenEdge databases managed by a Workspace also contain schema definitions - these are called the physical schema. When you modify the logical schema objects, Roundtable does not immediately update the physical schema. This allows you to make extensive changes to the database schema definitions while others continue to use the databases managed by the Workspace. You run the update schema process to post changes to the OpenEdge schema when it is convenient for all users of the Workspace.
A complete on-line history is kept of every change made to the logical schema. This allows the update schema process to determine which changes must be made in the physical schema due to changes in the logical schema. Because the system tracks both the committed and edited state of the logical schema it is not necessary to check in schema objects after each update schema process. Instead you can edit the logical schema and update these changes to the physical schema many times before completing the schema objects.
Roundtable provides data preservation capabilities for schema operations that would normally delete data from the database. For instance, Roundtable allows you to specify a change of data type for a field. The only way to post a change of this nature to the physical schema is to delete the fields and then add it back with a new data type. Using Roundtable, you specify a data transformation routine to convert the old data to the new data type. The data transformation will occur as part of the update schema process. See Section 4.8.7, “Data Procedures”.
Follow these steps to update the schema objects:
Build the Schema Update List. See Section 4.8.2, “Building the Schema Update List”.
Set the Deactivate Indexes flag where necessary. See Section 4.8.4, “Toggle Index to Activate/Deactivate”.
Create and Edit Data Procedures. See Section 4.8.7, “Data Procedures”.
Update Physical Schema. See Section 4.8.8, “Updating Physical Schema”.
Delete the Schema Update List. See Section 4.8.9, “Deleting the Schema Update List”.
The Schema Update window is used to manage the schema update process - that is, the application of changes made to the logical schema to the physical Workspace database(s). From this window, you can initiate a build of an update list, maintain an existing update list, or delete an existing update list.
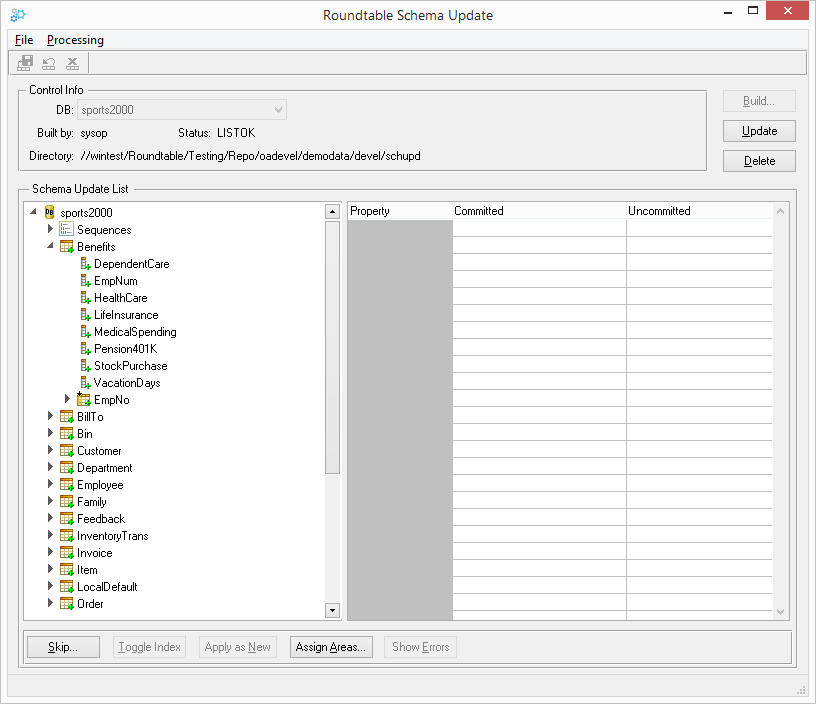 |
Pending changes to each physical database (the schema update list) are displayed in a treeview grouped first by database, sequences, then table changes. Each node in the treeview has a decorator to indicate the pending action to be taken (Add, Update, or Delete). The properties table allows you to view the committed and pending changes for each item in the treeview.
The following table describes the controls on the Schema Update Window:
| Control | Description |
|---|---|
| DB drop-down list | Selects the Workspace database to update. |
| Build... button | Builds a Schema Update List. (See Section 4.8.2, “Building the Schema Update List”). |
| Update button | Applies the Schema Update List to the selected database(s). (See Section 4.8.8, “Updating Physical Schema”). |
| Delete button | Deletes the Schema Update List. (See Section 4.8.9, “Deleting the Schema Update List”). |
| Skip... button | Skips the update one or more list items. (See Section 4.8.5, “Skipping a List Item”). |
| Toggle Index button | Toggles indices for selected table between Active and Inactive. (See Section 4.8.4, “Toggle Index to Activate/Deactivate”). |
| Apply as New button | Causes the selected table to be applied as "New", resulting in a drop and add of the table. (See Section 4.8.6, “Applying a Table as New”). |
| Assign Areas button | Used to assign storage areas for new tables, indices, and LOB fields. |
| Show Errors button | Displays any errors that occurred while building or applying the Schema Update List. |
The first step in updating the physical schema is to build the schema update list. The Build function locates all logical schema objects that have changed since the last time that the schema was updated and creates the schema update list.
Because a PFIELD can be assigned to several PFILE objects, a change to a single PFIELD object might affect the update of multiple tables.
After Roundtable generates the list of database tables and sequences that must be updated, it checks schema integrity. The integrity check looks for missing information such as a missing dump-name or primary index. It also checks for missing objects and other problems that would cause the table definition update to fail.
Follow these steps to build the schema update list:
Choose → . The Schema Update window appears.
Choose the Build button.
You can choose to assign new tables or indexes to existing storage areas in the physical database by selecting the Assign Areas button. This button is only available when a new table, index, or LOB field is being added to the database.
Follow these steps to assign the target storage area for new tables and indices:
Select the Assign Areas button. The storage areas folder appears.
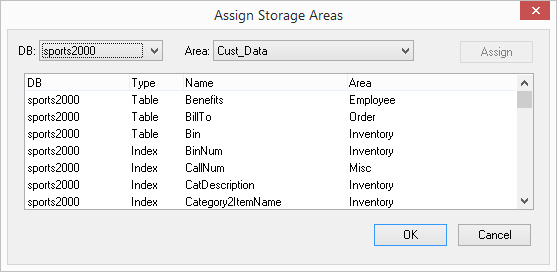
Select the appropriate database in the DB drop-down list. New tables and indices for the selected database appear in the browse.
Select the target storage area in the Area drop-down list.
Select one or more objects in the browse that you want to store in that area.
Choose the Assign button to assign the select area to the selected objects.
Repeat these steps as required.
Choose the OK button when finished.
Choose the Save Record button to save the changes.
You can choose to deactivate the indexes on a table during the update schema process.
Follow these steps to toggle indices:
Select the table or index to deactivate in the treeview.
Choose the Toggle Index button.
The Index node is decorated as inactive.
Choose the Save Record button to save the changes.
![[Important]](../images/admon/important.png) | |
You must manually re-activate the indexes which have been deactivated after the schema update process. Use OpenEdge utilities to re-activate the affected tables. |
You can skip the update of one or all of the items on your schema update list. This is useful if the database schema has already been updated in some other manner. When skipping a table, the status of the list item becomes Compl. Once skipped, the changes are assumed to have been made in the physical schema by some other means than the schema update process. Skipped tables and sequences will not show up on a subsequent build.
After skipping the update of one or more tables, choose the Update Schema button for final processing to occur.
Follow these steps to skip the update of a table in the schema update list:
Select the table to skip in the schema update list.
Choose the Skip button. The Skip Table Update Option dialog box appears.
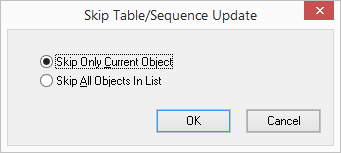
Select the skip option. Choose Skip Only Current Object to skip the highlighted item or choose Skip All Objects in List.
Choose the OK button. The skipped item is decorated as Complete.
Choose the Save Record button to save changes.
Remember to choose the Update Schema button even if all tables and sequences are skipped.
When a table appears with an "Update" action in the schema update list, you can change the action to "New", causing the table to be dropped from the physical database and re-added. This can be useful if a previous "New" table update was skipped, causing the physical Workspace database to be out of synchronization with the logical Workspace schema.
Follow these steps to set the action of a table in the schema update list to "New":
Select the appropriate table in the treeview.
Choose the Apply as New button.
Choose the Save Record button to save changes.
When you apply the update, the table will be dropped from the database and re-added. If you need to preserve data in the Workspace database, define the appropriate data procedures before updating the schema Also, with the table's action set to "New", you will be able to assign storage areas for the table's indices and LOB fields.
The update schema process performs three functions:
Run pre-Schema Update Data Procedure(s)
Update Physical Schema
Run post-Schema Update Data Procedure(s)
The first and third processes are optional and performed only if those procedures have been assigned. These procedures can be used to preserve data across data type or extent changes, to a field definition, or when unique indexes are changed.
For example, if modifying the extent of a field, the pre-Schema Update Data Procedure is used to dump the data from the field and the record ID of each record in the table being updated. This is necessary because OpenEdge forces the deletion of the field when an extent change is performed during the Update Physical Schema step. The post-Schema Update Data Procedure is used to read the dump file and import the dumped data back into the table.
When modifying a unique index, you can use the pre and post Schema Update Data Procedures to ensure that unique records exist in the database after the update. The pre-Schema Update Data Procedure can save the record ID of each record in the table. During the schema update the index can be deactivated. The post-Schema Update Data Procedure can find the records that the pre-Schema Update Data Procedure saved and delete or modify those records to meet the requirements of the modified index.
Data procedures should be objects that are maintained by Roundtable and assigned to the Workspace in which the Schema Update process is being performed. These objects can then be assigned to run either before or after the physical database update occurs and in any order that you choose.
Both pre and post Schema Update procedures must have the following input parameter:
DEFINE INPUT PARAMETER pcPath AS CHARACTER NO-UNDO.
This input parameter is the path to the schema update working directory.
Follow these steps to assign data procedures:
Choose either → or → from the Schema Update menu.
Depending on your selection, the pre or post Update Procedures dialog appears.
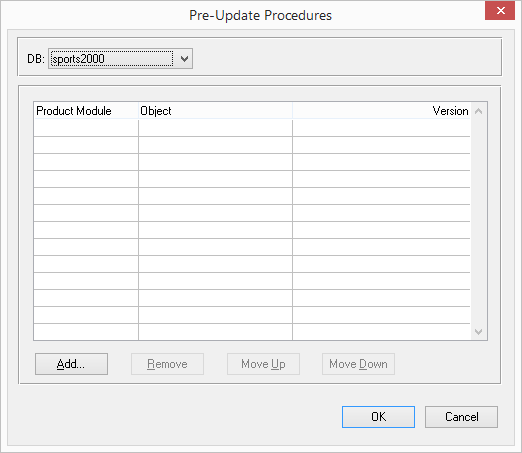
Choose Add button to launch the Procedure Lookup dialog box.
Choose the Move Up button and Move Down button to set the order that the procedures should run.
Chose the Remove button to remove any procedures that you do not wish to run.
Choose the OK button to close the dialog.
Choose the Save Record button to save changes.
Follow these steps to update the physical schemas of the application databases managed in the Workspace:
Choose the Update button.
Upon a successful schema update, the schema update list is deleted and the treeview cleared.
If any errors occurred during the update process, chose the Show Errors button to display the error details.
If after building a schema update list you do not wish to apply it, you can simply delete it.
Follow these steps to delete the schema update list:
Choose the Delete button. A warning dialog box asks you to confirm list deletion.
Choose the Yes button.
If you find that the physical schema of a database is no longer synchronized with the Roundtable logical schema, you should resolve the differences as quickly as possible. This can be done in one of two ways.
If the changes in the physical schema are ones you want to keep, run Load Schema (see Section 4.9, “Load Schema”). This process will load the physical schema differences into Roundtable, and bring Roundtable's schema object definitions in sync with your physical Workspace database schema.
If the changes in the physical schema are not correct or will conflict with changes already made in the logical schema but not yet updated to the physical schema, then edit the physical schema using the OpenEdge Data Dictionary to remove the differences. Ensure that you have removed all of the differences by running the Integrity Check Report again.
If changes are made to a physical database schema outside of Roundtable, difficulties may arise. Check that the physical database schema matches the definition managed by Roundtable by performing the Database Integrity Check Report. You do not need to run this report often. However, if you have any reason to believe that someone may have made changes to a database managed in a Roundtable Workspace directly, then you should run this report. The report lists all differences between what Roundtable believes the physical schema should be and what it actually is.
Follow these steps to run the Database Integrity Check Report:
Select the PDBASE object associated with the database you want to check in the object browse in the Tabletop.
Choose → → . The Database Integrity Check Report window appears.
Verify that the Workspace and PDBASE object values are correct, and then choose the OK button.
Choose → → .
The report appears in a text viewer window.
When finished viewing and/or printing the report, close the text viewer window
The Load OpenEdge Schema utility loads the schema of an existing database into Roundtable. This utility creates PFILE and PFIELD objects for each of the file and field definitions found in the OpenEdge database.
Load Schema can load changes made to the OpenEdge database schema. If changes were made to the physical database schema by some tool other than Roundtable (such as the OpenEdge Data Dictionary), then you can use Load Schema to bring Roundtable's logical schema object definitions in sync with the physical OpenEdge database schema.
When you run Load Schema, the following window appears:
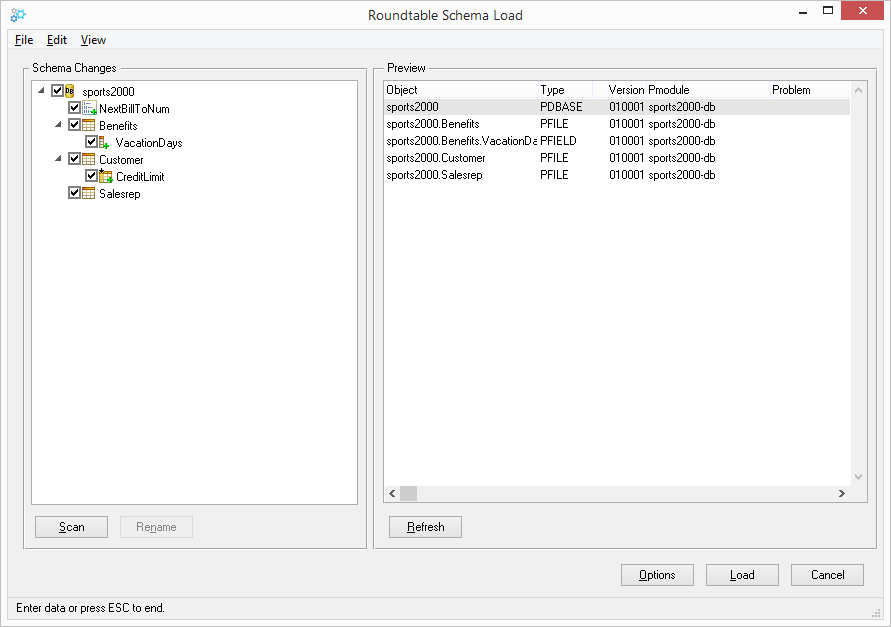 |
The following table lists the controls on the Schema Load window:
| Control | Description |
|---|---|
| Schema Changes TreeView | Displays schema changes identified in the selected database in a hierarchical tree. |
| Scan Button | Scans the selected database for schema changes. |
| Rename Button | When one added item and one deleted item of the same type and parent are selected in the Schema Changes TreeView, identifies that the added item is a new name for the deleted item, rather than a deletion of one item and the addition of another. |
| Preview Browse | Displays the Workspace object versions that will result when the selected change(s) is/are loaded. |
| Refresh Button | Refreshes the Preview Browse. |
| Options Button | Opens the Schema Load Options dialog (See description below). |
| Load Button | Load the selected schema changes into the Workspace. |
| Cancel Button | Closes the Schema Load window. |
The options for a schema load can be set at any time prior to choosing the Load button.
The following table lists the fields in the Schema Load Options dialog box:
| Field | Description |
|---|---|
| Fully Qualify Names | Causes new schema objects to be created with fully-qualified names, such that PFILE objects will be named using the format database.table, and PFIELD objects will be named using the format database.table.field. If you do not choose this option, then new PFILE object names will contain only the name of the corresponding table, and new PFIELD objects will be named using the format table.field. |
| Product Module | Selects the Product Module for new schema objects. Normally, this should not be changed. If you select a specific Product Module, then new schema objects are created in that Product Module. Modified schema objects that already exist in the Product Module that you specified are checked out normally. Modified schema objects that already exist, but in a different Product Module than the one you specified, are replaced by an object variant with the product module that you specified. See Section 4.7, “Object Variants” for a complete description of object variants. |
| Checkout Level | Sets checkout level (Version, Revision, or Patch) for modified schema objects. |
| Automatic Check-In | Causes modified objects to be automatically checked-in after the load is complete. |
| Automatic Notes | Causes version notes to automatically be added for modified schema objects. Example: Added field Customer.LastContact. |
| Automatic Delete | Automatically deletes unused schema objects (such as a dropped table) after the load is complete. |
Follow these steps to run the Load Schema function:
Create and select a Task.
Make sure that there are no WIP schema objects in the Workspace belonging to another Task. (The Load Schema process performs this check for you before it gets started.)
The Load Schema process locks the Workspace while it is running. Nobody can modify objects in the Workspace while you are running Load Schema.
Find and select the PDBASE object whose schema you want to load.
From the Tabletop menu, choose → . The Schema Load window appears.
Choose the Scan button. If changes are found, they appear in the Schema Changes TreeView, and pending object versions are displayed in the Preview browse.
Make any necessary modifications to the change selections:
To deselect changes, choose from the context menu. If changes are not selected, they will not be loaded, and the Workspace schema will not match the database schema.
![[Important]](../images/admon/important.png)
Deselecting a field that participates in an index will automatically deselect the index that it participates in.
To identify a renamed item, select the added item, and choose from the context menu. Select the corresponding deleted item, and choose from the context menu. Choose the Rename button to apply the rename. The tree changes to show an update of the previously deleted item. If a table or field was chosen as a rename, the object version preview will change accordingly.
![[Important]](../images/admon/important.png)
If you choose to rename any tables or fields, then only the "local" table or field name is changed in the Roundtable schema object assignment records. The name of the Roundtable object does not change. This can cause some minor confusion, because the PFILE or PFIELD object name will not match the physical name of the corresponding table or field. For example, if you rename a table from "Cust" to "Customer", then you will still have a PFILE object named "Cust", but it will be represented as a table with the name "Customer" in the physical database schema.
This is not a problem for sequences or indices, because sequences are represented as attributes of the PDBASE object; and indices as attributes of the PFILE object. There is no such thing as a "sequence" object, nor an "index" object in Roundtable. If data loss in target workspaces or deployment sites is not an issue, or the version history of the object is not essential, you can ignore the rename option. The original PFILE or PFIELD will be dropped, and a new one added. The new object name will match the physical table or field name.
![[Caution]](../images/admon/caution.png)
If tables, fields or sequences have been renamed in the physical database, but they are not identified as renames during the load, objects with the old names will be deleted from the logical schema and new objects added. Consequently, when the logical schema is applied to other physical databases through a schema update, the physical items with the old names will be dropped from the database and new items added, potentially resulting in data loss - unless you define data transformation procedures for the schema update.
Once the Load Schema is done and your Task is completed, check the following:
The Section 6.6.5.15, “Integrity Check Report” should indicate no differences, if all changes were selected for the load.
The Section 4.8.2, “Building the Schema Update List” should not find any schema that requires updating.
If the Load Schema process is interrupted, you have one of two options:
Simply re-run Load Schema to complete the partially loaded schema, or
Remove the partially loaded schema, and then re-run Load Schema.
How to Remove Partially-loaded Schema. To remove partially-loaded schema, use the Remove Unused Schema utility to remove the partially-loaded PDBASE and all of its child objects (PFILE objects and PFIELD objects). For instructions on using the Remove Unused Schema utility, see Section 4.11, “Remove Unused Schema”.
Re-running Load Schema. Once you have corrected the error(s) that interrupted the Load Schema process, follow these steps to complete the process:
Select the Task created for Load Schema.
From the Tabletop menu, choose → .
![[Note]](../images/admon/note.png)
A lock warning may appear. Make sure that no one else is running Load Schema in the Workspace, and then choose the Yes button to continue.
Load Schema only reads one physical database, and it makes changes to logical object definitions as appropriate. Table and field domains present potential problems. However, with a little care, these problems can be avoided entirely.
If a PFIELD object definition is used more than once within a database, then Load Schema sets the attributes of the PFIELD object based on the last physical field definition that it looks at. This means that you are not guaranteed that your field domains will all be in sync by just running the Load Schema process.
If you use field domains and changed your schema outside of Roundtable, make sure you run the Database Integrity Check Report after running Load Schema. You will have to manually re-synchronize any fields that fell out of step.
To avoid this problem, do not make changes to field domains outside of Roundtable's schema management.
If a PFILE or PFIELD object definition is used in more than one database, Roundtable and your schema might fall out of step if you make changes to one of those databases outside of Roundtable's schema management.
The following steps might cause this problem:
Use a PFIELD or PFILE object definition in more than one of your Workspace databases. (Call the databases "A" and "B".)
Use a tool other than Roundtable (for example: OpenEdge Data Dictionary) to change the related object's definition in just one of the databases (database "A").
Run Load Schema against database "A".
Database "A" and Roundtable are in sync, but database "B" and Roundtable are now out of sync.
If you use field or table domains, and have changed your schema outside of Roundtable, be sure to run the Database Integrity Check Report on all of your databases after running Load Schema. You will have to manually re-synchronize any fields or tables that fell out of step. Depending on the number of schema objects that are out of sync, it might be easier to use the OpenEdge Data Administration tools to dump a .df between the two databases, and then apply the necessary parts of the .df file to the database to bring it back in step.
To avoid this problem, do not make changes to field domains or table domains outside of Roundtable's schema management.
The Assign Schema window enables you to assign a PDBASE object or PFILE object from the repository to a Workspace and to automatically assign its associated PFILE and/or PFIELD objects. This functionality can be useful for Workspaces where Importing by Release is impractical or as a means to easily revert to a previous version of a PDBASE or PFILE, while ensuring that the required child objects are also assigned.
Follow these steps to assign a PDBASE or PFILE object along with its associated PFILE and/or PFIELD objects to the current Workspace:
Choose → from the Tabletop menu. The Assign Schema window appears.
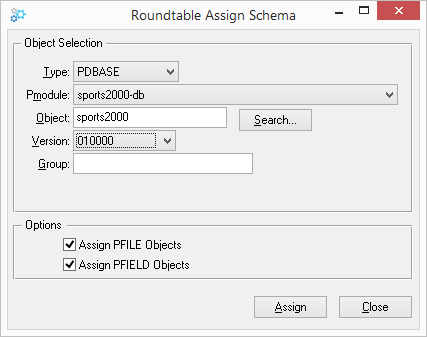
![[Note]](../images/admon/note.png)
The screen values will default to the currently selected PDBASE or PFILE object. Select the object type (PDBASE or PFIELD) and fill in the values to specify the object version to assign. To lookup an object, choose the Search button.
Check the desired options. If Assign PFILE Objects is checked then the PFILE objects associated with the selected PDBASE version will also be assigned. If Assign PFIELD Objects is checked then the PFIELD objects associated with the selected PDBASE or PFILE version will also be assigned.
Choose the Assign button to assign the selected object(s). If Roundtable is unable to assign one or more of the selected objects, a message and log will appear for viewing.
![[Important]](../images/admon/important.png) | |
Since PFILE-to-PDBASE assignments and PFIELD-to-PFILE assignments are neither Product Module nor version specific (See Section 6.6, “Schema Objects”), the Assign Schema process will consider Workspace history to select the appropriate child objects. If there is no related history for the current Workspace, Roundtable will search for the latest version of the PFILE of PFIELD object belonging to the selected Product Module. |
The Remove Unused Schema utility enables you to remove unused schema objects from a Workspace. This functionality can be useful for backing out WIP schema objects from a failed load, or as a means to easily remove an unused PDBASE or PFILE, while ensuring that the associated child objects are also removed.
Follow these steps to remove a PDBASE or PFILE object along with its associated PFILE and/or PFIELD objects from the current Workspace:
Select the PDBASE or PFILE object from the Tabletop object browse.
Choose → from the Tabletop menu. The Remove Unused Schema dialog box appears.
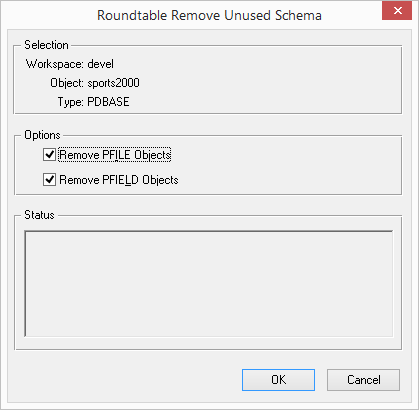
Check the desired options. If Remove PFILE Objects is checked then the PFILE objects assigned to the selected PDBASE will also be removed. If Remove PFIELD Objects is checked then the PFIELD objects associated with the selected PDBASE or PFILE object will also be removed.
Choose the OK button to remove the selected object's schema from the Workspace. The selected PDBASE or PFILE object and the optionally checked objects are removed from the Workspace.
![[Note]](../images/admon/note.png) | |
| This utility will only remove unused schema objects. If any of the selected schema objects is referenced by another object (such as a procedure) then an error will be displayed and the schema object(s) will not be removed. |
A Workspace is a collection of object versions that define a configuration of the application. Roundtable tracks each change as an event and assigns a sequential event number to it. These events are collectively known as the event history of the Workspace. The actions that create events include:
The assignment of an existing object version to the Workspace. This is commonly done by the Workspace import process. The Workspace import process quickly moves many object versions from a source Workspace into a target Workspace according to Workspace update rules. Object versions can also be individually assigned to the Workspace.
The deletion of an object version from the Workspace configuration. This is commonly done by the Workspace import process, but can also be done individually.
The check-in of an object. This results in a new object version in the Workspace.
A Release is a record of a specific event number in a Workspace. It can be used to re-create the exact contents of the Workspace configuration that existed as of that event.
Each Release record has a sequential Release number that uniquely identifies it in the Workspace. Release records also contain a text label that describes the configuration of the system at the time the Release record was created. For example, Release number 23 from the Test Workspace might have a descriptive label like "Beta Release 2.1a".
Release records are used by the Workspace import process to control what can be pulled from a Workspace. See Section 4.13, “Imports”.
Release records are used to control the content of deployments created by the system. See Section 4.14, “Deployments”.
The Release Window contains a list of each Release that has been created in the current Workspace. A Release is a label identifying the state of the Workspace as of the latest event count.
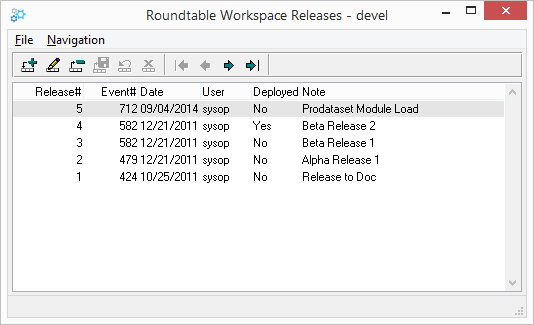 |
The following fields can be found in the Releases Window:
| Field or Button | Description |
|---|---|
| Release# | The Release number is generated automatically. |
| Event# | The latest Workspace event number when Release was added. |
| Date | The date the Release record was created. |
| User | The user who created the Release. |
| Deployed | Indicator if the Release has been used in a Deployment. |
| Note | A user specified description of the currently selected Release. |
Follow these steps to add a Release:
Choose → from the Tabletop. The Releases window appears.
Choose the Add Record button. A new Release is inserted into the browse.
Enter a note in the Note column. Use this note field to describe the current configuration of the application in the Workspace (for example, 4.0a).
Choose the Save Record button.
Choose → to close the window.
![[Note]](../images/admon/note.png) | |
| When you create a Release record in a Workspace that has work-in-process object versions, the configuration represented by the Release includes the last completed object version of each work-in-process object. Work-in-process objects are never included in a configuration identified by a Release record. |
![[Note]](../images/admon/note.png) | |
| When no changes have been made to the Workspace since the latest Release, Roundtable disallows creation of a new Release. |
Once a Release is created, only the Note field can be changed.
Follow these steps to edit a Release:
Choose → . The Releases window appears.
Select the Release.
Change the text in the Note column as necessary.
Choose the Save Record button.
Choose → to close the window.
Roundtable only allows the deletion of a Release record if it is not referenced by a completed deployment and if it is the last Release created for the Workspace.
Follow these steps to delete a Release.
Choose → . The Releases window appears.
Select the Release.
Choose the Delete Record button. A warning dialog box appears.
Choose the Yes button.
Choose → to close the window.
The Release Report provides a detailed list of the changes that have occurred in a Workspace between any two releases. Roundtable allows a comparison between specified releases.
Follow these steps to print the report:
Select a Workspace on the Tabletop.
Choose → → from the Tabletop menu. The Release Report window appears.
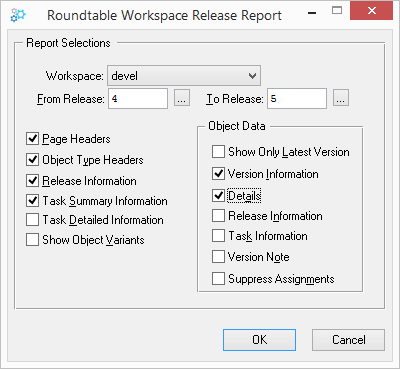
Enter the report options.
The following table describes the fields in the Release Report Submission dialog box:
| Field | Description |
|---|---|
| From Release | Type the Release number to report from, or type 0 to report on all releases. |
| To Release | Type the Release number to report to, or type 0 to include the current Workspace contents. |
| Page Headers | Use this toggle box to print a report header at the top of each page. |
| Object Type Headers | Use this toggle box to show an object type header at the beginning of each object type. |
| Release Information | Use this toggle box to show Release information at the top of the report. |
| Task Summary Information | Use this toggle box to show summary task information at the top of the report. |
| Task Detailed Information | Use this toggle box to show detailed task information at the top of the report. |
| Show Only Latest Version | Use this toggle box to show only the latest version of each modified object. |
| Version Information | Use this toggle box to show the object version information (version and product module). |
| Details | Use this toggle box to show a detailed description of the latest object version. |
| Release Information | Use this toggle box to show the Release number that the object version was first included in. |
| Task Information | Use this toggle box to show the task number that the object version was created in. |
| Version Note | Use this toggle box to show the version note for each object. |
To synchronize the currently selected Workspace configuration with the configurations of one or more source Workspaces, use the import process. This process is the primary means of managing the flow of object versions among Workspaces. See Section 1.1, “Introduction” for an overview of how these Workspaces allow the management of various development cycles.
The import process reads the latest Release configurations of one or more source Workspaces and compares the object versions found in those source Workspace configurations with the current configuration of the currently selected (target) Workspace. Where the object versions in the source Workspaces differ from those in the target Workspace, the object versions are added to an import control list with an appropriate action code.
Optionally, objects can be filtered by Task Number, or by Workspace/Release across all or selected Workspaces when building the import control list.
Optionally, objects can be filtered by Task Number, by Workspace/Release, or by Product Module across all or selected Workspaces when building the import control list.
You then review the import control list and manually exclude or include items as necessary. Usually it is not necessary to do more than a quick review of this import control list. The Sort feature allows users to sort objects listed by Status, Object, Product Module, Module, Object Group, or Task Number. The list can be sorted by clicking on the column titles.
After reviewing the import control list, you launch the import process. The import process assigns objects from the repository to the target Workspace to bring the configuration of the target Workspace into agreement with the list of object versions included in the import control list. This import process might also remove objects from the Workspace if necessary.
Follow these steps to perform an import:
Build the import control table. See Section 4.13.1, “Building the Import Control Table”.
Edit the contents of the import control list, if necessary. See Section 4.13.3, “Toggling the Import Status”.
Perform the import processing to assign or delete objects in the target Workspace. See Section 4.13.5, “Import”.
Delete the import control list. See Section 4.13.6, “Deleting the Import Control Table”.
Perform the update schema process if any schema object versions have changed. See Section 4.8, “Database Schema Updates”.
Perform a selective compile on the Workspace. See Section 7.4.5, “Selective Compiles”.
Setup the source Workspaces prior to building the Import Control Table. See Section 4.5, “Workspace Sources”.
Once the Import Control Table is built, Roundtable locks the Workspace and will not allow others to work in the Workspace. If other users are working in the Workspace when Roundtable tries to lock it, the build process stops. Once the import process is complete and the Import Control Table is deleted, Roundtable removes the lock. This Workspace lock is not a OpenEdge record lock and survives system shutdown and restart.
Follow these steps to build the contents of the import control table:
Choose → . The Roundtable Import window appears.
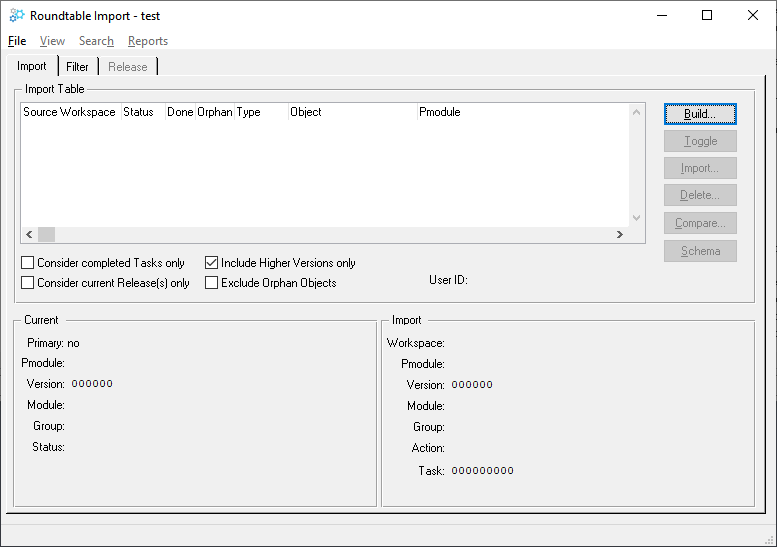
To use filtering when building the import control list, select the Filter tab. The Filter folder appears. Select the type of Filter (Task or Workspace/Release), then select the desired items from the list(s) presented.
By default the "Higher versions only" toggle box is checked. This means that if the version of an object in the source Workspace(s) is lower (earlier) than the version already assigned to the target Workspace, it will be given a status of EXC (Exclude). If you wish to consider earlier versions for import, then uncheck the toggle box.
By default, the "Current Release(s) only" toggle box is not checked. This means that all differences between the current Workspace configuration and the source Workspace(s) will be considered for import. When this toggle box is checked, only those objects in the latest (or filter-selected) Release(s) will be considered for import.
By default, the "Completed Tasks Only" toggle box is not checked. This means that completed objects belonging to WIP Tasks will be included in the import list. However, when this toggle box is checked, then only completed objects belonging to completed Tasks will be included in the import list.
By default, the "Exclude Orphan Objects" toggle box is not checked. When this toggle box is checked, import list items whose target objects are ophans will be given a status of EXC (Exclude).
Choose the Build button. A warning dialog asks if you want to build the list based upon you selection(s). Choose the Yes button to build the list.
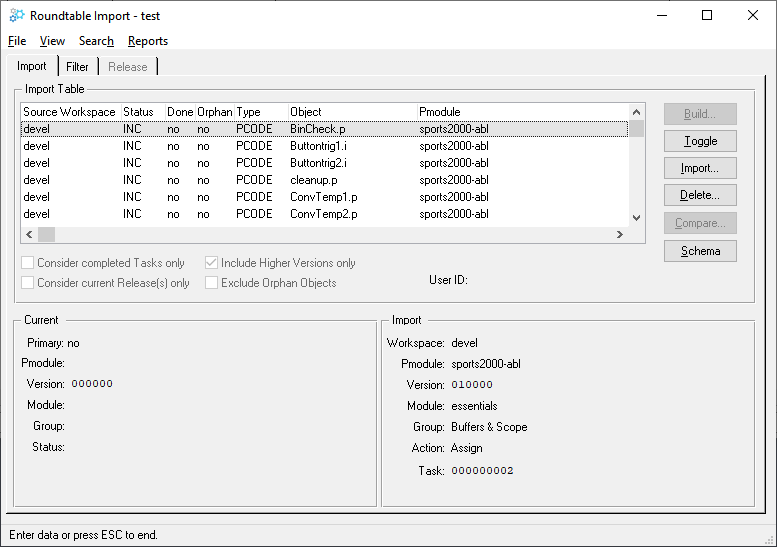
You can sort the import control by clicking on the column headings.
The Import Analysis Report lists all of the import objects found during the build process along with information on each object currently in the Workspace.
Follow this step to print the report:
Choose → from the Import Control window's menu bar.
The status of the objects in the Import Control Table can be either INC (Include) or EXC (Exclude). Only object versions with the INC status are processed during the import process. Use the Toggle button to change the status of any object. If you wish to include all of the objects, choose → . To exclude all the objects, choose → .
Follow these steps to selectively toggle an object's import status:
Select the object version in the import control list.
Choose the Toggle button. The status changes to either EXC or INC, depending on the previous status.
Repeat Steps 1 and 2 for each object you want to change.
When you are not certain whether to include or exclude an object, you have the option of visually comparing the version selected in the import list with the version currently assigned to the Workspace using the Compare button.
Clicking on the Compare button opens the visual difference tool specified in User Preferences.
The import process assigns or deletes objects in the current Workspace that appear in the import control list with a status of INC (Include). The assign process first removes any source code belonging to an existing object version and then exports the source from the repository for the new object version. As each object is successfully assigned, its Done field value is changed to Yes.
If the import process is interrupted, it can be restarted. If uncertain of a PCODE object due to an interruption, you can manually assign it to the Workspace. This forces the system to update the source code in the Workspace from the Roundtable repository. See Section 6.7.1, “Assigning an Object” for more information.
After importing an object, Roundtable sets the object's update status in the Workspace to New. This ensures the object is processed in the next update schema or selective compile process.
Follow these steps to import the contents of the import control table:
Choose the Import button. A warning dialog box appears.
Choose the Yes button. Roundtable assigns objects to the Workspace.
When Roundtable built the import control table, it placed a lock on the Workspace to prevent others from working in the Workspace during the import process. To remove the lock, you delete the import control table.
Follow these steps to delete the import control table:
Choose the Delete button. A warning dialog box appears.
Choose the Yes button to delete the import control table contents.
Choose → to close the Workspace Import window.
Deployments provide a mechanism for packaging software changes for delivery to remote sites. It is not necessary for these remote sites to be running Roundtable to receive updates, but some Roundtable utility procedures must be delivered with your update. Sites that have the Roundtable system can be updated with information directly from the repository if desired. Sites that receive updates packaged by Roundtable are called remote sites. Sites having the Roundtable system and receiving repository information are called partner sites. Each site is designated to be of one of the following types:
R: Runtime License
Q: Runtime Query License
D: Development License
S: Source License
P: Partner License
Roundtable automatically encrypts source files based on the type of site and the content of the Encrypt field in each object record. Roundtable automatically includes repository information in export format for partner sites.
To create an encrypted-source deployment, xcodproc.dll must be in your DOS PATH or in DLC\BIN. The xcodproc.dll dynamic link library comes with OpenEdge Software's Toolkit product, and it is normally installed into the DLC\BIN directory. If you do not have the Toolkit from OpenEdge Software, you will only be able to create deployments where the deployment's Type field (license type) is set to Source or Partner.
Each Workspace can own one or more remote sites. Each of these sites has one or more sequential deployments. Each deployment, except for the first, is packaged as an incremental update of just the changes made in the system since the previous deployment to the site.
Each deployment record is numbered sequentially by site. Each deployment contains a Release number field into which the Workspace Release number to be deployed is entered. A Release number defines a specific configuration of the Workspace. See Section 4.12, “Releases”.
The content of a deployment is determined by comparing the Release number of the current deployment with the Release number in the previous deployment. Given these two Release numbers, Roundtable can use the event history of the Workspace to find the changes that occurred in the Workspace between the two releases. These changes are packaged as the incremental update.
Roundtable creates incremental updates for both the source files and database schema content of your application. Roundtable utilities for the update or creation of the application databases and for the compilation of procedures are supplied in source form and can be customized and delivered with your application.
Deployments can be made from any Workspace. Usually, you deploy from the last Workspace in the quality assurance cycle. Follow these steps to deploy to a remote site:
Ensure the correct Release is available.
Select or add a remote site.
Add a deployment for that remote site.
Build a schema control table list.
Create schema data procedures as required.
Make update directories.
Package and deliver the contents of the update directories to the remote site.
Install the deployment at the remote site.
Complete the deployment.
Remote sites receive packaged updates of the application system. Each site can receive multiple sequential deployments. Each deployment is a software update consisting of the incremental changes in the software system since the previous deployment to the site. Remote sites and deployments are managed in the Roundtable Deployments window shown.
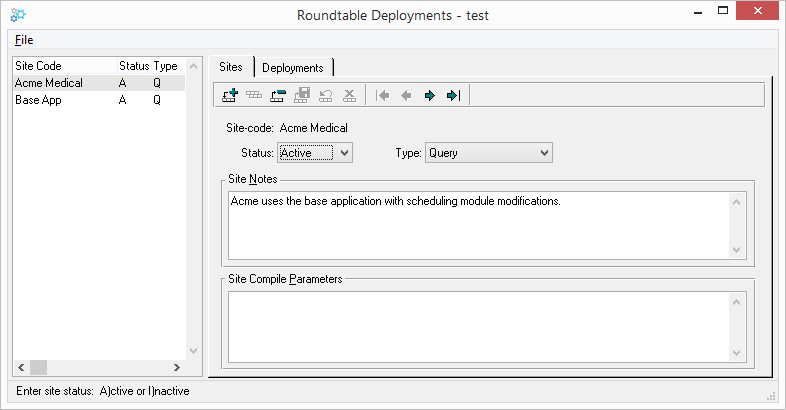 |
This window contains a browse table that lists remote sites and two tab folders.
The Site folder contains general information about the site selected in the browse table.
| Field or Button | Description |
|---|---|
| Site-code | Deployment site identifier. |
| Status | The status of a site can be active or inactive. The status is shown in both the Site table and Site folder. |
| Type | Type of deployment: Runtime, Development, Query, Source, or Partner. The type of deployment determines the content of the deployment, including whether or not the source is encrypted. |
| Site Notes | User notes about the site. |
| Site Compile Parameters | This editor contains one or more compile parameters that should be added to the compile statements for procedures compiled at the remote site. Workspace and module compile parameters are ignored when building a deployment. You cannot have module-by-module control of your site's compile parameters. If a PCODE object's compile parameters are set to override the Workspace compile parameters, then they also override the site compile parameters. The site compile parameters are ignored. Otherwise, the PCODE object's compile parameters are used in addition to the site compile parameters. |
The Deployments folder contains information about each sequential deployment made to the remote site.
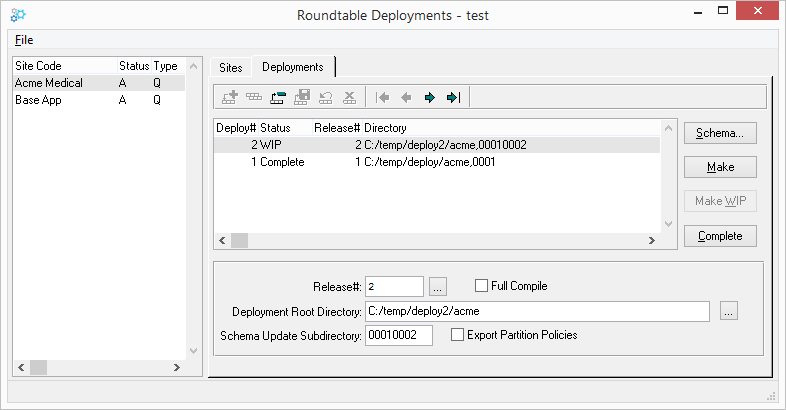 |
| Field or Button | Description |
|---|---|
| Deploy# | You make one or more sequential deployments to each site. Each of these is identified by a sequential number starting at a value of 1 and incrementing with each deployment by 1. |
| Status | The Status of the deployment is either WIP (Work In Process) or Complete. |
| Release# | Each deployment is associated with a Release number. Release numbers identify a particular state of the Workspace. You can deploy any Release level. |
| Full Compile | This toggle-box controls whether a full compilation is performed at the remote site when the deployment is received. If it is not selected then only those routines that need to be compiled because of the newly delivered system components are compiled. |
| Deployment Root Directory | The root directory to build your deployment in. |
| Schema Update Subdirectory | The name of the subdirectory that will contain the
deployment's schema information. This subdirectory will reside
under the rtb_dbup subdirectory of your
deployment root directory. The name of this subdirectory is
important as it represents your 4-digit schema version number,
or an 8-digit incremental schema update number. See Section 4.16.3, “Schema Release Rules” for details. |
| Export Partition Policies | This toggle-box controls whether the Workspace database(s) partition policies for any database schema being deployed are exported with the deployment. |
| Schema button | Choose the Schema button to generate the schema information for the deployment. |
| Make button | Choose the Make button to generate the deployment package. |
| Edit Before Process or Complete button | Choose this button to toggle the status of the deployment between Complete and WIP. A Complete deployment record cannot be modified or deleted. Also, a new deployment record cannot be added until the latest one has its status set to Complete. |
Follow these steps to add a remote site:
Choose → . The Roundtable Deployments window appears.
Choose the Add Record button.
Enter the new site code and select the license type. Site codes must be unique throughout the system. The same site code cannot be defined under two different Workspaces. Roundtable matches the license type against the Encrypt field in the PCODE object definition to determine whether it should encrypt the PCODE objects being deployed. The Encrypt field defaults to a value of "RQD", which means that if the license type is Run-time, Query, or Development, Roundtable should encrypt the PCODE object.
Edit the fields in the site folder as necessary. The Status is either A (Active) or I (Inactive).
Choose the Save Record button.
Choose → to close the window.
OR
Choose the Deployments tab and create a deployment. See Section 4.14.7, “Adding a Deployment”.
Once the remote site is created, the site notes and status of the site can be changed.
Follow these steps to edit a remote site:
Choose → from the Tabletop menu. The Roundtable Deployments window appears.
Select the site to edit from the Site browse.
Choose the Site tab. The Site folder displays.
Edit the site folder.
Choose the Save Record button to complete the edit.
Choose → to close the window.
Once a remote site is no longer in use, it can be deleted.
Follow these steps to delete a remote site:
Choose → from the Tabletop menu. The Roundtable Deployments window appears.
Choose the site to delete from the Site browse.
Choose the Delete Record button. A warning dialog box appears. Choose the Yes button to delete the site.
Choose → to close the window.
The Site Report gives site information, including the site notes and status, for each remote site.
Follow these steps to print the report:
Choose → → from the Tabletop menu. The Sites Report window appears.
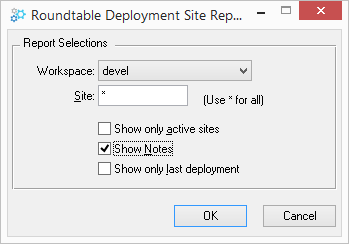
Specify the report selections, and then choose the OK button.
Once a remote site is created and set up, the software can be deployed. See Section 4.14.3, “Adding a Remote Site”. When creating a deployment, Roundtable determines what the last update to the remote site was, then determines what needs to be deployed.
After adding a deployment, you can change both the release number and deployment directory. See Section 4.14.8, “Editing a Release Number and Directory”.
Follow these steps to add a deployment:
Choose → . The Roundtable Deployments window appears.
Choose the Site to deploy from the Site browse.
Choose the Deployments tab. The Deployments folder opens.
Choose the Add Record button.
To select the release used, choose the Release# field's Lookup button. The Release Lookup dialog box appears. Select the release number to use and choose the OK button. The Release Lookup dialog box closes.
Choose the Save Record button to save the deployment.
Choose → to exit the window.
OR
Continue with other steps in the deployment process:
See Section 4.14.8, “Editing a Release Number and Directory”.
See Section 4.14.10, “Building a Schema Update List”.
See Section 4.14.11, “Making an Update Directory”.
After creating a deployment, you can change the Release number or deployment directory. The deployment directory is where Roundtable writes the update package for the deployment.
Follow these steps to edit the Release number and directory.
Choose → from the Tabletop menu. The Roundtable Deployments window appears.
Choose the site from the Site browse.
Choose the Deployments tab. The Deployments folder appears.
Select the deployment to change (only WIP deployments can be altered).
Choose the Release field's Lookup button. The Release Lookup dialog box appears.
Select Release, and then choose the OK button.
Change the directory, if necessary, in the Directory field.
Choose the Save Record button to save the changes.
Choose → to exit the window.
OR
Continue with other steps in the deployment process:
See Section 4.14.10, “Building a Schema Update List”.
See Section 4.14.11, “Making an Update Directory”.
Once a deployment is created, it has a work-in-process (WIP) status. Change this status to complete after confirming that the deployment is successful. Roundtable ensures that only WIP deployments can be deleted.
Follow these steps to delete a WIP deployment.
Choose → from the Tabletop menu. The Roundtable Deployments window appears.
Choose the site from the Site table.
Choose the Deployments tab. The Deployments folder opens.
Select the deployment to delete.
Choose the Delete Record button. A warning dialog box appears. Choose the Yes button to delete the deployment.
Choose the Done button to close the window.
A schema update list is similar to the one used when updating schema objects. To build the list for regular schema updates, Roundtable examines all of the changes made to schema objects in the system and determines their impact on the physical schema tables in the OpenEdge Data Dictionary. To build the schema update list for a deployment, Roundtable compares the schema objects in the Workspace with the last version of the schema objects delivered to the remote site. After Roundtable builds a list of tables changes to be delivered to the remote site, it performs an integrity check on these tables. The integrity check ensures that all PFILE and PDBASE relationships are valid.
Follow these steps to build the schema update list:
Choose → from the Tabletop menu. The Roundtable Deployments window displays.
Choose the site from the Sites browse.
Choose the Deployments tab. The Deployments folder opens.
Choose the Schema button. The Update Schema window displays.
Choose the Build button to generate the schema update list.
Review the schema update table to see which tables will be dropped. If any of the tables being dropped or dropped and re-added contain data that you will need later, then be sure that their data has been saved or that you are using some update processing to preserve their data. See Section 4.8.7, “Data Procedures” for a description of Roundtable's data preservation hooks.
Close the Schema Update window.
Continue with other steps in the deployment process: See Section 4.14.11, “Making an Update Directory”, Section 4.14.12, “Updating at a Remote Site” and Section 4.14.14, “Completing a Deployment”.
The make update process writes the contents of the deployment into a directory of your choice. Install support tools are also placed in the directory automatically. These support tools are discussed in the next section.
Follow these steps to create an update directory:
Choose → from the Tabletop menu. The Roundtable Deployments window appears.
Choose the site from the Sites browse.
Choose the Deployments tab. The Deployments folder opens.
Choose a WIP deployment.
Choose the Make button to generate the deployment directory.
Choose the Done button to exit the window.
OR
Continue with other steps in the deployment process:
Roundtable provides a set of OpenEdge-specific utilities necessary for installing the software at a remote site. These utilities do not include a packaging utility to create installation packages or utilities to automate the installation from distribution media onto a computer.
The utilities provided by Roundtable perform:
Schema update processing
Incremental and full compile processing
When Roundtable creates a deployment directory, it also creates
three subdirectories to support the install utilities. These are the
rtb_inst, rtb_idat and
rtb_dbup directories. The following tables describe
the content of these directories:
| Directory | Directory Description | ||||||||||||||||||
|---|---|---|---|---|---|---|---|---|---|---|---|---|---|---|---|---|---|---|---|
rtb_inst | Contains the generic utility programs and data files for the installation and compilation of the changes copied to the remote site. This directory should remain on the remote site permanently to support future incremental updates. | ||||||||||||||||||
|
| Directory | Directory Description | ||||||||||
|---|---|---|---|---|---|---|---|---|---|---|---|
rtb_dbup\dbver | Contains the database schema update files required to
update the application databases at the site. During the update
schema process, the files in this directory are copied into
rtb_idat where they are processed. The
dbver subdirectory name is usually generated by
Roundtable. | ||||||||||
|
To provide install support for Roundtable deployments into your
application, take a copy of the _update.w procedure
supplied within the top Roundtable source directory and modify it to
suit your needs. The _update.w procedure should
become part of your application and be located in the root directory of
your application. This will ensure that the
rtb_inst, rtb_idat and
rtb_dbup directories will be immediately below the
directory where _update.w is stored. Additionally,
_update.w calls the DB Areas function that allows
you to assign new tables and indices, during the product installation,
to existing storage areas in the physical database.
The following files are created at the remote site by the installation control procedure or manually by the user. These files are not automatically created by the installation support procedures supplied by Roundtable.
| File | Description |
|---|---|
schema.pf | A OpenEdge parameters file contains the database
connection parameters used during the remote site schema update
process. This file must connect all of the databases to be
updated at the remote site. See Section 4.16, “Database Schema Updates on Remote Sites” for more
information on how this parameter file is processed. The
_update.w procedure has support for
creating and maintaining the schema.pf
file. |
compile.pf | A OpenEdge parameters file contains the database
connection parameters to be used during the compile process. The
_update.w procedure has support for
creating and maintaining the compile.pf
file. |
During execution of _update.w, various log
and error files are created in a directory called
rtb_ilog. Normally, these files can be
ignored.
The following log files are created in the
rtb_ilog directory when the schema update
procedures are compiled:
| File | Description |
|---|---|
schcomp.srt | Created by _update.w during the
OS-COMMAND when executing schcomp.p. From
this file you can determine if execution of
schcomp.p began. |
schcomp.log | Created by schcomp.p. Contains the
names of the schema update files being compiled. |
schcomp.err | Created by schcomp.p. Contains any
compile errors that occur during the compile of the schema
update programs. This file is empty if no compile errors
occur. |
The following log files are created in the
rtb_ilog directory during the pre-schema and schema
update:
| File | Description |
|---|---|
schupd.srt | Created during the OS-COMMAND when executing
schupd.p. From this you can determine if
schupd.p execution began. |
schupd.log | Created by schupd.p. Contains
information about what table is being updated in the pre-schema
and schema update. |
schupd.err | Created by schupd.p. Contains any
errors that occur during pre-schema and schema update. |
schema.log | Created by schupd.p. Contains
detailed log information about the pre-schema and schema
update. |
The following log files are created in the
rtb_ilog directory during the post-schema
update:
| File | Description |
|---|---|
schupdp2.srt | Created during the OS-COMMAND when executing
schupdp2.p. From this you can determine if
schupdp2.p execution began. |
schupdp2.log | Created by schupdp2.p. Contains
information about what table is being processed by the
post-schema update. |
schupdp2.err | Created by schupdp2.p. Contains any
errors that occur during post-schema update. |
The following error file is created in the
rtb_ilog directory when updating the
compctrl file:
| File | Description |
|---|---|
objctrl.err | Created by _update.w when updating
the compctrl file. If any errors occur
during the creation of the comctrl file,
they appear here. |
Follow these steps to perform a sample update process:
Shut down databases if this is not a first time installation.
Back up the databases and application directories if this is not a first-time installation.
Copy the installation package into the application directories. This means that the
rtb_inst,rtb_idat, andrtb_dbupdirectories will exist in your application's root directory. The use of a windows install utility is highly recommended.Place an icon in the application's program group to launch
_update.w. Ensure that the working directory is your application root directory. The_update.wprocedure is your own copy of Roundtable's_update.wprocedure, which we supply with Roundtable to manage the Roundtable compilation and installation process. You should modify_update.wto reflect your own application's installation requirements. At the very least, you should change it so that it displays your own application's name, rather than "Roundtable". For a more detailed discussion of the schema update process and the options available to you, see Section 4.16, “Database Schema Updates on Remote Sites”.After completing the remote site update process you should complete the deployment. See Section 4.14.14, “Completing a Deployment”.
Before you complete a deployment, it is good practice to confirm that the remote site successfully received and installed that deployment. That way, if the remote site update did not work properly, you can modify the Workspace and restart the deployment process. Once the deployment is complete, the Status field toggles between WIP and Complete.
Follow these steps to complete a deployment:
Choose → from the Tabletop menu. The Roundtable Deployments window appears.
Choose the Site in the Site browse.
Choose the Deployments tab. The Deployments folder opens.
Choose the Complete button.
Choose → to close the window.
A new deployment cannot be created until the last deployment has been completed.
Procedure updates and compiles are performed by the
_update.w procedure. This procedure performs
maintenance on the rtb_inst/compctrl file. The
compctrl file contains a list of each application
procedure that can be compiled by your application.
_update.w updates the compctrl
file when a new update package is received by reading the contents of the
rtb_idat/objctrl file and inserting and deleting
items from compctrl.
The _update.w procedure deletes unused
application files by reading the list of files to be deleted from the
rtb_idat/delctrl file.
Use the R-code directory fill-in in the
_update.w procedure to specify the destination root
directory of the R-code in the application. Make this field blank if your
R-code will remain in the same directory as the source. If an
rtb_idat/objcopy file exists, items specified in it
are copied into the R-code destination as well. This is very useful if you
have bitmaps and other files that must be in your application R-code
directory structure.
Remote site database schemas are updated by the
_update.w procedure with calls to the
rtb_inst/schupd.p,
rtb_inst/schupd2.p and
rtb_inst/schupd2p.p procedures. These procedures read
information in a OpenEdge database parameters file.
_update.w finds and connects to one or more databases
that will be updated with the schema update package delivered in the
rtb_dbup directory.
If the databases specified in the schema.pf
file are local to the client running _update.w, the
databases can be connected in single user mode for the update. This is the
preferred connection mode for schema update processing. If the databases
do not yet exist but can be created by the OpenEdge client session with
the DATABASE CREATE statement, _update.w can create
the databases for you. See your OpenEdge documentation to determine if
your OpenEdge client software can create a database. If the OpenEdge
client can access the platform providing database server services and the
platform is also available as a file server, it might be possible to
connect in either a database server or single user mode.
If the databases have not yet been created and the OpenEdge client
cannot create them, you must create the database manually from the
empty[n].db supplied with the server platform's copy
of OpenEdge before updating its schema from the client running
_update.w.
A OpenEdge client running _update.w can update
the schema of a database connected by a networking protocol. However, you
must start the database servers before running the
_update.w procedure on the client machine. The
schema.pf file should contain all of the required
connection information for the client.
The _update.w procedure uses the
schema.pf file to manage the client connection to the
databases when these databases are located on database servers. The
creation, startup and shutdown of the database servers cannot be managed
by the OpenEdge client running the _update.w
procedure. Again, if you are installing in a client/server environment,
you must ensure that the database servers are available for connection by
the OpenEdge client running the _update.w
procedure.
Because it is important that the OpenEdge client running
_update.w have uncontested access to database servers
during a schema update, please ensure that the servers are started with a
-n 1 argument to allow only a single client connection.
The schema update process is the most complex process performed during the update at the remote site. It performs the following functions:
Runs any Before Schema Update Procedures to dump selected data from the database that would otherwise be destroyed by the schema change.
Applies the schema updates contained in the
*.dffiles delivered with the deployment.Runs any After Schema Update Procedures to restore data into the database that was dumped in the first stage of update processing.
The schema update process reads a control file, called schctrl, to
manage the update of each of the connected databases. As the operations
specified in the schctrl file are completed, the
schctrl file is modified to record these completed
steps. This allows the update schema process to be restarted if it is
interrupted.
The schctrl file is a simple text file with
one line per database table to be updated. Each line in the
schctrl file contains the following fields in
OpenEdge export format:
Control flag: A single character representing the status of the schema update. The value is either Y or N, indicating whether the operation has been completed.
Database name: The name of the logical database in which the file being updated is located.
Tablename: The name of the table to update.
Deactivate indexes?: The option for deactivating the indexes, either Yes or No.
File reference number: A four-digit number used to identify the
*.dffile to use during the schema update process.
Here is a sample line from a schctrl
file:
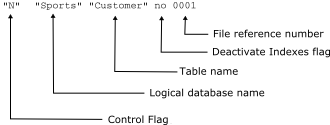 |
Because the control flag for the sample line above is "N", schema
update processing actions are taken on the file. The file will be named
0001.df. This file contains OpenEdge data
definition language statements describing the schema update to be
performed on the table.
The procctrl file is a simple text file with
one line per processing procedure to execute. This file will exist in
both the ./pre and ./post
subdirectories when data processing procedures have been deployed with
the schema. Each line in the procctrl file contains
the following fields in OpenEdge export format:
Control flag: A single character representing the status of the procedure. The value is either Y or N, indicating whether the operation has been completed.
Database name: The name of the logical database in which the file being updated is located.
Processing Procedure: The procedure to run before or after the schema update process.
Here is a sample line from a ./post/procctrl
file:
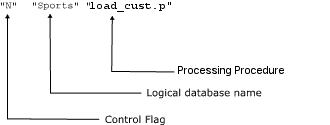 |
This indicates that load_cust.p is a
procedure will be run after all schema for the Sports database has been
updated. Because the value of the control flag is "N", this indicates
that the procedure has not yet executed.
The schema.pf file is a OpenEdge parameters
file containing the startup parameters necessary to connect to the
application databases being updated. In addition to the normal database
connection parameters, the schema.pf file must
contain a comment line with a Release number that indicates the Release
level of the current database schemas. Here is a sample
schema.pf file:
#Schema.pf file -used for the update of database schema
#release=0021
-db sports.db -ld sports -1 -U "" -P ""
OpenEdge considers lines beginning with # in a parameters file to
be comments. The _update.w procedure uses the
#release= token to establish the current Release level of the database
so it can select the correct database update package from the
rtb_dbup directory.
If the schema.pf file is created by the
_update.w procedure, it contains the following
default values:
#Schema.pf file -used for the update of database schema
#release=empty
Enter the database connection parameters manually or choose the pf Entry button. The pf Entry button presents a series of dialog boxes that construct database connection parameters for you and write the parameters into the editor widget containing the parameters file. After creating the database connection parameters, the contents of the editor widget should resemble the following example:
#Schema.pf file -used for the update of database schema
#release=empty
-db sports.db -ld sports -1 -U "" -P ""
The "#release=empty" line indicates that the database has not yet been updated with any schema. As part of the schema update process the "#release=empty" line is replaced with a line containing the Release level of the update. For example:
#Schema.pf file -used for the update of database schema
#release=empty
-db sports.db -ld sports -1 -U "" -P ""
The release name specified on the #release line in the
schema.pf file is derived from the name of the
subdirectory in rtb_dbup that was used to process
the schema update. The rules governing the selection of the subdirectory
to use in the update are simple:
If #release=empty, then find and use the subdirectory in
rtb_dbupthat has a name four characters long. If more than one such directory exists, use the one with the highest value. The new #release=value line contains the name of the directory selected.If #release=xxxx, then find a subdirectory in
rtb_dbupthat is eight characters long and begins with the value "xxxx". If more than one such subdirectory exists, then select the one with the highest value. The new #release=value line contains the last four characters of the eight-character subdirectory name selected.
By default, the subdirectories created in the
rtb_dbup directory are named using the Release
number associated with the deployment being made and the previous
Release. Consider the following example:
| Deploy | Rel | Schema Changes? | rtb_dbup/subdir | Before install #release= | After install #release= |
|---|---|---|---|---|---|
| 1 | 12 | Yes-full schema | 0012 | empty | 0012 |
| 2 | 13 | Yes | 00120013 | 0012 | 0013 |
| 3 | 14 | No | 0013 | 0013 | |
| 4 | 15 | Yes | 00130015 | 0013 | 0015 |
When no schema updates are included in a deployment, no schema
update package directory is created as is shown in deployment 3 above.
Then the _update.w program can determine that no
update was delivered and skip the schema update process.
You override the naming of the schema update package directory created during a deployment by specifying it in the deployment directory fill-in in the Roundtable Deployments window. Remember that these schema update directories must be either four or eight characters long and have collation values that follow the rules stated above to participate in the update process.
When you update the schema of a database at a remote site, the Updating Database Schemas dialog box appears. This dialog box contains an editor widget in which each step of the database schema processing is displayed.
Each possible step in the processing is audited by this dialog box. The steps include:
Scanning the rtb_dbup directory for schema update packages. The Release number in the
schema.pffile is used to identify which schema update package should be used in the update process. The contents of the selected schema update directory are copied intortb_idat. This step is skipped if anrtb_idat/schlockfile exists (see step 3).Expanding the
rtb_idat/schctrlfile for database "copies" identified in theschema.pffile. See Section 4.16.5, “Database Copies”. This step is skipped if anrtb_idat/schlockfile exists.Writing a process lock file named
rtb_idat/schlock.Compiling the schema update subroutine procedures.
Running the database dump procedures to preserve the data that would be lost because of the schema updates.
Updating the schema for each database.
Running the database load procedures to restore dumped data.
Removing the process lock file
rtb_idat/schlock.Removing the temporary files copied from the schema update package directory into
rtb_idat.
In many OpenEdge applications, it is useful to create copies of the application database. For example, each department in a company might have a separate application database but use the same application code. Each of these database copies must have the same cyclical redundancy check (CRC) stamp to use the same compiled application code. The update process can keep the CRC in each of these databases in sync by applying schema updates against each database in exactly the same order.
To update these database copies, the installation process must
know about each database copy created at the site. This is done by
adding a line in the schema.pf file that identifies
the database copy. Consider this schema.pf example:
#Schema.pf file -used for the update of database schema
#release=0004
-db sports.db -ld sports -1 -U "" -P ""

#dbcopy=sports sports2 sports2
-db sports2.db -ld sports2 -1 -U  "" -P ""
This schema.pf file contains two database
connections and a special #dbcopy= line that instructs the schema update
process to treat the sports2 database as if it has the same schema as
the sports database. When the two databases start out with the same CRC
stamp, the install process keeps them CRC compatible by applying schema
updates to each in exactly the same order.
The #dbcopy= line requires three values.
First, the logical database name of the database whose schema is duplicated in the database copy.
Second, the logical name of the database copy.
Third, the name of a temporary directory into which data dumped from the dbcopy database should be placed in stage one update schema processing. This prevents the data dumped from the first database and that dumped from the second database from being confused.
The schema update process performs an additional step when
multiple database copies exist. This additional process expands the
content of the rtb_idat/schctrl file to include
entries for each of the files requiring update in each database copy. An
additional line is added to the top of the rtb_idat/schctrl
file with the token EXPANDED so that the
rtb_idat/schctrl file never expands twice. This
makes it important to register all database copies in the
schema.pf file before running the update schema
process.
If the database copy is created sometime after the first installation of your application, the new copy must be created from a copy of an existing database. There are strategies for accomplishing this:
Maintain at least one copy of the application database at each site that is never populated with data. This database can be used as the source database when creating a new database.
Make a copy of an existing database and then purge data from it. This is generally a bad idea because OpenEdge does not shrink the footprint of a database on disk. This can be circumvented by a dump and reload of data for the source database.
A single schema update package directory is created when you
create a deployment. However, the _update.w process
can recognize and process more than one database update package
directory if they exist. This allows the user to assemble a
multi-release deployment.
A multi-release deployment is useful if you must send a deployment to sites that may be at different Release levels of your software. You create a multi-release deployment by combining the contents of one or more deployments into a single deployment package.
For example, if the latest release of your system is 9.1A and you want to distribute the same package to both existing 9.0C clients and completely new clients, you would need to create a multi-release deployment.
Follow these steps to create a multi-release deployment containing the full source and schema for the latest release level, as well as the schema update information to bring an existing application database from a previous schema release level to the latest schema release level.
Create a new site.
Create a deployment in your new site using the desired release level. Name the schema update directory with the four-character name of the latest schema release level.
Build the schema update table and make the deployment directory.
Create a second new site.
Create a deployment in the second new site with the release level from which you want this package to upgrade existing clients.
Complete the deployment described in the previous step. It is not necessary to build that deployment.
Create a second new deployment in the second new site. The schema update directory must have an eight-character name. The first four characters must be the name of the previous schema release level. The last four characters must be the name of the latest schema release level.
Build the schema update table and make the deployment directory.
Copy the eight-character schema update subdirectory from the second deployment's
rtb_dbupdirectory. Copy that directory into thertb_dbupsubdirectory of the first deployment.
The first deployment directory is now a multi-release deployment
directory. The rtb_dbup directory contains a
four-character subdirectory named with a complete definition of the
latest schema release level. The rtb_dbup directory
also contains a subdirectory with an eight-character name, which
contains the schema update information necessary to update an existing
application database from the previous schema release level to the
latest schema release level.
It is not necessary to retain the Roundtable site records created in these steps. Also, it is not necessary to keep the second deployment directory on disk. It was only created so that you could copy the incremental schema update directory from it.
Table of Contents
- 5.1. Introduction
- 5.2. What Is Task Management?
- 5.3. Task Maintenance
- 5.4. Task Reports
- 5.5. Task Activities
- 5.5.1. Finding a Task
- 5.5.2. Listing Versions in a Task
- 5.5.3. Comparing a Task Version with Its Previous Version
- 5.5.4. Moving a WIP Object to Another Task
- 5.5.5. Updating Version Notes
- 5.5.6. Changing the Share Status of Objects
- 5.5.7. Refreshing Group/Public Source of Task Objects
- 5.5.8. Listing Lab Objects
- 5.6. Task Labs
- 5.7. Task Groups Maintenance
- 5.8. Task Notations
After you set up your system and create your products, Product Modules, and workspaces, you should be ready to begin programming. The first step is to create Tasks. A Task defines work to be done in a Workspace.
An object is a component of your OpenEdge application: a piece of code, a file, a field, a piece of text, or a part of your database schema definition. Objects are created and modified under the current Task. This chapter explains both Tasks and objects in depth.
Task management is the process of changing or adding objects. The following flow chart illustrates the Task management process:
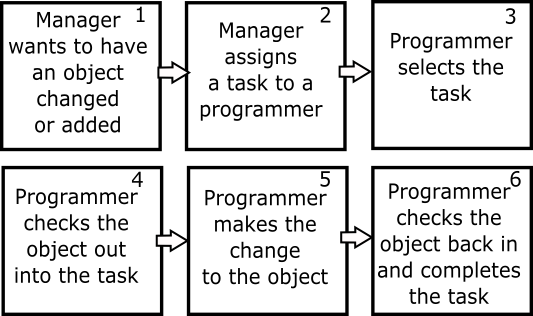 |
Task management is useful because it:
Helps programmers track work done in logical units (Tasks)
Facilitates check-in of many objects at once
Gives managers access to important information about the work being performed in the Workspace
Allows the programmer to keep track of many concurrent Tasks
Allows programmers and managers to see quickly what others are doing in the Workspace
You can add different types of objects to your Workspace and use different views to show the objects assigned to your Workspace and how they interrelate. For example, the Modules view shows which objects are assigned to your Product Module, and the Task view shows which of those objects are checked out into your Task. You can see where and how an object is used in your system and print several object reports.
After you set up your Roundtable system, you are ready to begin work. If you have many programmers working on one project, control and track this work by dividing it into Tasks. Task maintenance covers adding Tasks, editing Tasks, deleting Tasks, selecting Tasks, completing Tasks, and printing Task reports.
The Tasks window displays a selection list showing all the Tasks. The selection list shows the Task number, status, and summary of each Task. Each Task has a status of either W (work-in-process) or C (complete). You can filter the Tasks by selecting options in the Browse By panel.
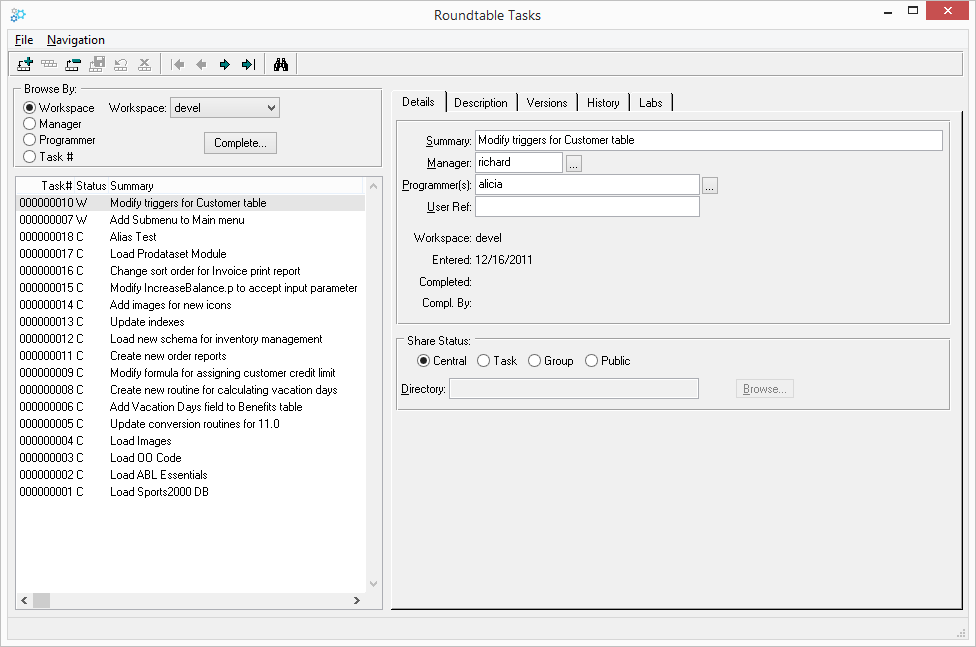 |
| Field | Description |
|---|---|
| Browse By | Selects the display filter (Workspace, Manager, Programmer) for the Tasks list below. |
| Task # | Displays the Task number assigned to each Task by the system. |
| Status | Displays each Task's status: Work-In-Process (W) or Completed (C). |
| Summary | A fill-in for the Task's description. |
| Manager | A single User ID or a semi-colon delimited list of User IDs. |
| Programmer | A single User ID or a semi-colon delimited list of User IDs. |
| User Ref | A fill-in for your own use. This field is indexed, but unused by Roundtable. You can build your own reports to get information from the repository quickly using your own key values. |
| Workspace | Displays the Workspace ID code. |
| Entered | Displays the date the Task was created. |
| Completed | Displays the date the Task was completed. |
| Compl. By | Displays the ID of the person who completed the Task. |
| Share Status | A radio button set that allows you to choose the Share Status for the Task. See Section 5.3.2, “Share Status” below for an explanation of this field. |
| Directory | A fill-in for the full path to a Task directory. See Section 5.3.3, “Task Directory” for an explanation of this field. |
| Description tab | Notes on why selected Task was created. |
| Versions tab | Object versions created in the Task. |
| History tab | Workspace history events associated with the Task. History events are associated with a Task when a version created under the Task is checked-in to the repository, and - if the Workspace is configured to require a Task for Assign and Delete actions - when an object version is assigned to or deleted from the Workspace. Actions performed with Roundtable versions prior to 10.1C will not have Task-associated history events. |
| Labs tab | Objects added to the Lab under the selected Task. See Section 5.6, “Task Labs” for an explanation of Task Labs. |
The Roundtable Share Status feature allows multiple programmers to work in the same Workspace, isolating each programmer's work so that other programmers are not affected. Depending on the Share Status, the other programmers might see objects that are currently being worked on. The Share Status determines the location of the source files modified under the Task.
Roundtable automatically modifies the OpenEdge PROPATH so that directories are always searched in this order:
Task directory (if one is defined for the current Task)
Group directories (if the current Task belongs to any groups)
Workspace directory
You can change the Share Status of a WIP object or a Task at any time. When you change the Share Status of WIP objects, Roundtable moves the objects to and from the Workspace directory as required. It is possible to have some objects in a Task with a different Share Status than that of the Task. However, if a Task has no Task directory assigned, then all objects in that Task must have a Share Status of Central.
The Share Status of the Task dictates the Share Status for objects when they are checked-out to the Task. As objects are checked out under a Task, they are given the Share Status specified for the Task by default.
Central: Programmer modifies objects in the Workspace directory. Others can see changes made immediately. No Task directory is necessary if all objects under a Task have this status.
Task: Roundtable checks out objects to a Task directory where the programmer modifies them. Others do not see the changes. The last completed version of the checked-out object remains in the Workspace directory for others to use.
Group: Roundtable checks out objects to a Task directory where the programmer modifies them. Others do not see the changes until the programmer executes the Update Group/Public Source option, which copies the modified objects into a group directory. Other programmers can choose to execute the changes by attaching one of their Tasks to the group. The last completed versions of the objects remain in the Workspace directory.
Public: Roundtable checks out objects to a Task directory where the programmer modifies them. The changes are not viewed or executed by others until the programmer executes the Update Group/Public Source option, which copies the changes into the Workspace directories.
If you specify a Share Status other than Central you must supply a full path to a Task directory. Objects from the Workspace, checked-out under the Task, populate this directory structure. In the Task directory, Roundtable creates the portion of the Workspace directory hierarchy in which the object is stored. For example, if an object is stored in a subdirectory named .\ar in the Workspace, then the .\ar subdirectory is created in your Task directory when you check out the object under the Task.
The same Task directory can be used by more than one Task, so that the changes made in one of those Tasks will be available to all of the other Tasks sharing that directory. For example, you could modify an include file in one Task and modify different procedures referencing that include file in the other Tasks. It is not recommended, however, for multiple programmers to share the same Task directory.
![[Note]](../images/admon/note.png) | |
Task Groups provide a more organized way of sharing changes in multiple Tasks within a consolidated environment, such as for simultaneously testing changes from multiple programmers. |
In your role of manager, you parcel out work by assigning Tasks to programmers. Each Task is specific to a Workspace.
Follow these steps to add a Task in Roundtable:
Choose → from the Tabletop menu. The Tasks window appears.
Choose the Add Record button. You must be browsing Tasks by Workspace in order to add a new Task.
Enter a brief description of the Task in the Summary field.
Enter a single User ID or semi-colon delimited list of User IDs for the Manager and Programmer fields. Use the Lookup button to search for valid User IDs.
OPTIONAL. Fill in the User Ref field. The User Ref field is an indexed field. Roundtable does not use this field. It is for your reference only and can be used to tie Tasks to other tools and systems.
Change the Share Status if necessary. If the Share Status is Task, Group, or Public, you must assign a Task directory in the Directory field.
Choose the Save Record button. The Task is created.
Select the Description tab to enter a more detailed description of the Task. Choose the Save Record button when finished entering the description.
Choose → to exit this window.
Although you can never change the Task number, you can change the Summary, Manager, Programmer, Share Status, and User Ref fields, and the notes for a Task you manage.
Choose → from the Tabletop menu. The Tasks window appears.
Select the Task that you want to edit in the browse table.
Edit the Task information.
Choose the Save Record button to complete your update.
Choose → to exit this window.
You cannot delete a Task if objects are checked out or have been checked in under the Task.
Choose → from the Tabletop menu. The Tasks window appears.
Select the Task that you want to delete in the browse table.
Choose the Delete Record button. A warning dialog box appears.
Choose the Yes button to delete the Task.
Choose → to exit this window.
Once a Task has been assigned to you as a programmer, you must select it before you can add or edit objects in the Workspace.
To select a Task, choose it from the Task drop-down list on the left side of the Tabletop:
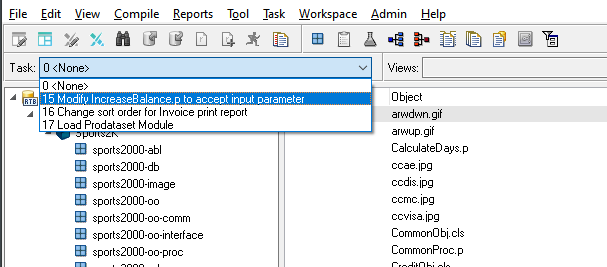 |
After you have made all the necessary changes, you can complete the Task. Completing the Task gives all objects in the Task a C (complete) status. Before completing the Task, ensure that:
All objects have a Share Status of Central
The schema changes are updated to the databases
All objects compile correctly
If Roundtable finds an object with a Share Status other than Central, use the Versions tab folder to change the Share Status to Central. See Section 5.5.6, “Changing the Share Status of Objects”. If Roundtable finds an object that does not compile, you must fix the problem before completing the Task.
Choose → from the Tabletop menu. The Tasks window appears.
Select the Task to complete in the selection list.
Choose the Complete button. The Complete Task dialog box appears.
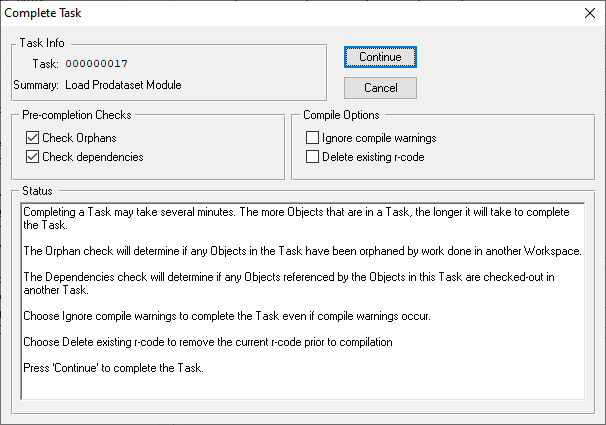
By default, the Orphans and Dependencies toggle boxes are checked. Leave these Pre-compilation checks enabled unless you have a specific reason to disable them.
Choose the Continue button to complete the Task.
![[Note]](../images/admon/note.png)
If Roundtable cannot compile one or more of the objects, an error occurs. The errors are detailed in the status area of the Complete Task dialog.
Choose → to exit the Tasks window.
When a completed Task is selected in the Tasks Window, it may be reopened by the manager or programmer of the Task with Task Reopen permission in the Task's Workspace.
To reopen a selected Task, perform the following steps:
Choose → from the Tabletop menu. The Tasks window appears.
Locate and select the completed Task to be reopened.
Choose the Reopen on the Tasks Window.
When prompted, choose Yes to reopen the selected Task.
The Task Report option provides information on each of the object versions created under the selected Task. This report groups the objects by object type and provides the following information for each object:
Object name
Description of the object
Version number
Current status
Subtype (for PCODE objects)
For PFIELD objects, the report also lists the type, extent, number of decimals, label, location, format, initial value, and other field information.
Follow these steps to print the Task report:
Choose → → from the Tabletop menu. The Task Report window appears.
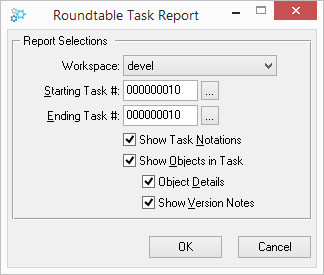
Select the desired report options:
This report can be based on a range of Tasks. Enter the starting Task number on which to report.
Enter the ending Task number on which to report.
Enter the Workspace ID to report on, or enter "*" to report on Tasks from all workspaces.
Select Show Task Notations to print the Task notations. Task notations are not available in the GUI version of Roundtable, but if you print a Task created with the character mode client, you can print them under the GUI version.
Select Show Objects in Task to print all the object versions created by this Task.
Select Object Details to print details about the object.
Select Show Version Notes to print the programmer's notes.
Choose the OK button.
The Task Dependencies Report shows dependencies for Objects in the given Task that are WIP in a Task(s) other than the one provided by the user.
Follow these steps to print the Task Dependencies Report:
Choose → → from the Tabletop menu.
Verify the Task number for the report and choose the OK button.
The Object Orphans in Task Report gives you the name and number of any orphan records relating to objects under the Task. Follow these steps to print the Object Orphans in Task Report:
Choose → → in Task Report from the Tabletop menu.
Verify the Task number for the report and choose the OK button.
Now that you know the basic procedures for working with Tasks, you can explore more ways to work with Tasks.
If you know a Task number or a Task Summary or a User Reference number, you can use the Find feature on the Tasks window to select the Task quickly.
Choose → from the Tabletop menu. The Tasks window appears.
Choose Search button. The Task Search dialog box appears.
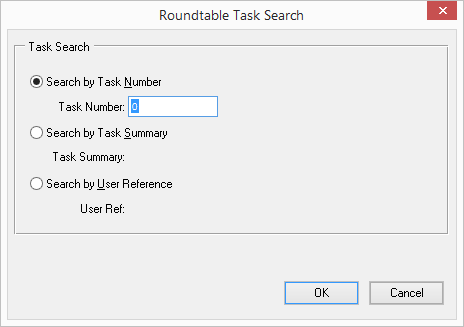
Select to search by Task Number or by Task Summary or by User Reference.
Enter the desired search value and choose the OK button. If searching by Task Number, and the Task is found, Roundtable selects the Task in the Tasks browse table. If searching by Task Summary, the Tasks browse will only show those Tasks with a summary including your search word(s). If no Tasks match your search word(s), no Tasks are displayed. If searching by User Reference, the Tasks browse will show those Tasks where the User Reference field matches the value you entered.
![[Note]](../images/admon/note.png) | |
To refresh the Tasks browse, re-select the "Browse By" value. |
Each time an object is checked out from the Workspace into a Task, it is assigned a new version number. The Versions folder of the Tasks window displays a table that lists all the versions created in a Task. The table displays the object name, object type, version number, and status for each object version created under the specified Task.
From this window, you can also:
Change the Share Status of one of the object versions
Change the Share Status of all of the object versions
Refresh all object versions with a Share Status of Group from the Task directory to the group directory of each Task group that the selected Task belongs to.
Refresh all object versions with a Share Status of Public from the Task directory to the Workspace directory
Follow these steps to display the object versions created under a Task:
Choose → from the Tabletop menu. The Tasks window appears. Select the Versions tab.
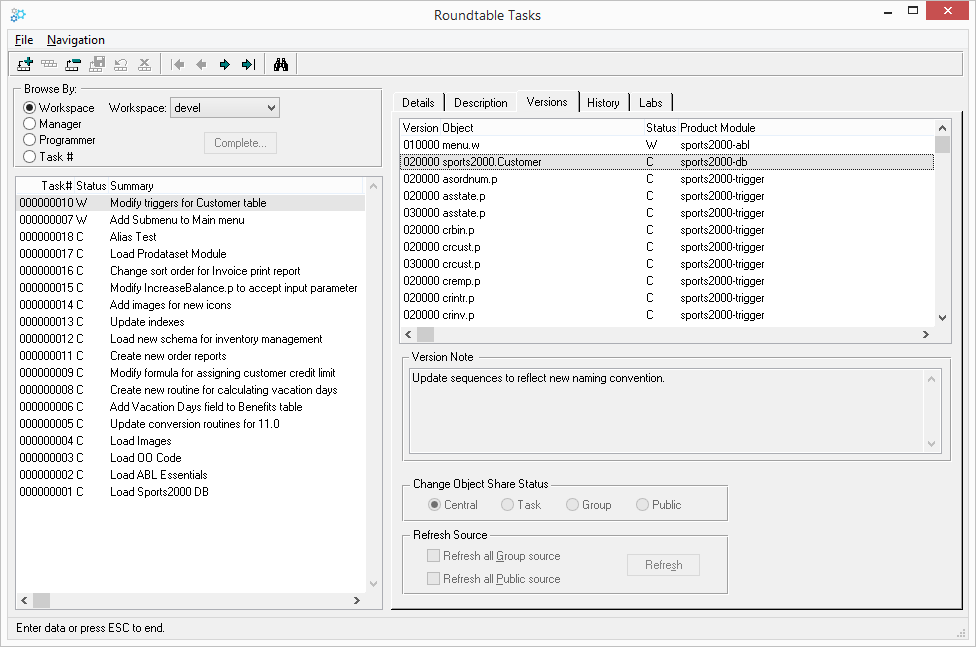
This folder contains all the object versions created under this Task. For each object version, the table lists the Version, Object, Status, Product Module and Type. The radio buttons below the list show the Share Status for the selected object version.
You can quickly compare an object version created in the selected Task with its immediately previous version using the configured visual difference application. Follow these steps to visually compare the Task version with the immediately previous version:
Choose a version in the browse on the Versions folder of the Task window.
the browse to show the context menu.
Choose from the context menu. If the object has more than 1 part, you are prompted for the part that you want to compare.
![[Note]](../images/admon/note.png) | |
For details on configuring the visual difference application, see Section 7.7, “Visual Difference”. |
If you have checked-out an object to the incorrect Task, or decide that work begun in one Task should be moved to another, you can move a WIP object version from one Task to another WIP Task in the same Workspace - as long as you are a member (Manager or Programmer) of both Tasks.
Follow these steps to move a WIP object from one Task to another WIP Task in the same Workspace:
Choose → from the Tabletop menu. The Tasks window appears. Select the Versions tab.
Select the WIP object version to move.
to display the popup context menu.
Choose from the context menu. The Roundtable Task Lookup dialog appears.
Select the target Task and choose the OK button.
The version note for one or more WIP task objects can be updated all at once.
Follow these steps to update the version note for one or more task objects:
Choose → from the Tabletop menu. The Tasks window appears. Select the Versions tab.
Select one or more WIP object versions.
to display the popup context menu.
Choose from the context menu. A Version Note dialog box appears.
Update the Version Note and choose the OK button.
Follow these steps to change the Share Status of WIP objects in a Task.
![[Note]](../images/admon/note.png) | |
If you want to change the Share Status of an object in the Task to something other than Central, the Task must have a Task directory defined. |
Choose → from the Tabletop menu. The Tasks window appears. Select the Versions tab.
Select one or more (using Ctrl-) object versions for which to change the Share Status.
Choose one of the Share Status radio buttons: Central, Task, Group, or Public. A warning dialog box appears.
Choose the Yes button to confirm the operation.
Choose → to close the window.
When an object has a Share Status of Group or Public, the work performed on the object is visible only in the Task directory until the group or public copy is refreshed. The refresh process copies the source files of the object to group and/or Workspace directories as necessary. You choose when this refresh occurs. This intermittent update of the shared group directories or Workspace directories can be very helpful when you have not finished working on a given object, but it is necessary for others to use or review that work.
The source for Group and Public shared objects can be refreshed on an object-by-object basis from the Tabletop, or several objects at a time using the Tasks window.
Follow these steps to refresh the Group/Public source of an object from the Tabletop:
Select an object with a Share Status of Group or Public in the Task view.
![[Note]](../images/admon/note.png)
A WIP Task must be selected.
the object to show the context menu.
Choose
Choose → from the Tabletop menu. The Tasks window appears.
Select the Versions tab.
Check the Refresh all Group Source and/or Refresh all Public Source toggle box(es).
Choose the Refresh button. A warning dialog appears.
Choose Yes to refresh the Public/Group source.
Choose → to close the window.
Follow these steps to display a list of the Lab objects for a Task:
Choose → from the Tabletop menu. The Tasks window appears.
Using the appropriate filter, locate and select the desired Task from the Tasks list on the left side of the Tasks window.
Select the Labs tab.
See Section 5.6, “Task Labs” for an explanation of Task Labs.
Task Labs allows developers to perform private, parallel development on PCODE and DOC objects within the context of a Workspace, while not impacting other developers with their changes. Objects can be added to a Lab for Tasks with a Share Status other than Central. Objects added to a Lab are be placed into the Task directory of the Task, where they can be modified, compiled and tested without affecting the Workspace baseline or locking the object, allowing the Workspace object to be checked-out by another team member. When an Object is added to a Lab, it is not checked-out -- a copy of the latest complete (not WIP) version of that object assigned to the Workspace is added to the Task directory; consequently, the Workspace object status on which the Lab object is based is not affected. See Section 6.8, “Lab Objects” for details on working with Lab objects.
As with WIP objects in the Workspace, the changed source of Lab objects is not stored in the repository. The repository stores which objects belong to a Task Lab, as well as their Dirty and Reviewed status, along with any Update Notes as described below.
While an object remains in a Lab, a synchronization status (a "Dirty" flag) is maintained for the Lab object, indicating whether or not the corresponding object in the Workspace has changed (including deleted) since the object was added to the Lab. The Dirty flag assists the developer in synchronizing changes made to the Workspace object with the Lab object.
The Dirty flag's value will be Yes if the version upon which the Lab object is based is different than the version in the Workspace, and No if the Lab Object's version is the same as the Workspace version. If the version in the Workspace is WIP when the object is added to a user's Lab, the Lab object will be immediately Dirty because the previously assigned version of the Object is used as the Lab Object's initial source, and it is possible that the WIP version will never be committed to the repository. If the WIP version in the Workspace is deleted and the Workspace object reverts to the previously assigned version, the Lab Object will become "clean" by setting its Dirty flag to No.
When a Lab object becomes Dirty it must be flagged as Reviewed before the object can be checked-out to the Workspace. This encourages the developer to review and merge applicable changes into the Lab object before placing it into the Workspace via checkout. Because the Workspace object is maintained independently of Lab objects, It is possible for the Lab object to again become Dirty after it has been reviewed, but before checking-out the Lab object, requiring the develop to again review the object prior to checkout.
Task Groups allow the changes in one or more Tasks to be seen at the same time. For example, use Task Groups when two programmers are working on different Tasks but must see each other's work.
Task Groups are useful only with Tasks that do not have a Central Share Status because work done under a Task with a Central Share Status is visible to all users of the Workspace. Remember that Roundtable sets the PROPATH so that code is seen first in any local Task directory, then in any group directories, and finally in the Workspace directory.
Task Group directories must reside on the same drive as the Workspace and use the same drive mappings as the Workspace to which they belong.
A Task Group is assigned a group directory, which is never accessed directly by a programmer. Instead, the Task promotion process copies the source from the Task directories into the group directory at the request of the programmer owning the Task.
A Task assignment associates a Task with a group. A Task can be associated with up to nine Task Groups. All of these Task Groups are updated when the Task promotion process is executed.
This window contains two lists: Task Groups and Assigned Tasks. Select a Task Group to see the Tasks assigned to it.
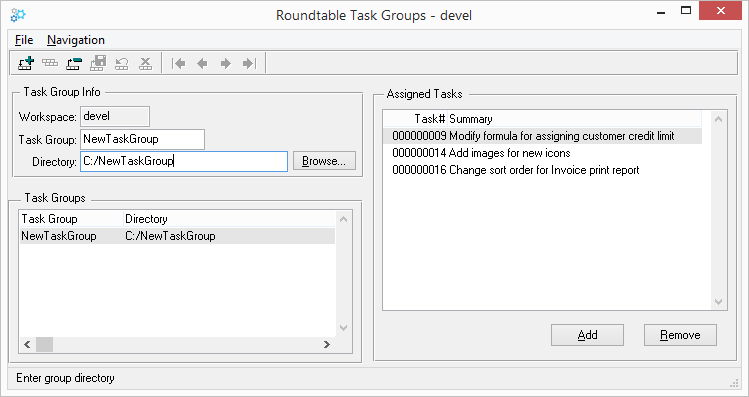 |
The following table describes the fields and buttons in the Task Groups panel:
| Field or Button | Description |
|---|---|
| Workspace | The Workspace that the Task Groups belong to. |
| Task Group | You supply a Task Group code when you add a new Task Group. |
| Directory | This is the path to the directory under which code from Tasks belonging to the Task Group will be placed when refreshed by the owners of the Tasks. |
The following table describes the fields and buttons in the Assigned Tasks panel:
| Field or Button | Description |
|---|---|
| Task# | The Task number of a Task associated with the group. |
| Summary | The summary description of the Task. |
| Add button | Choose this button to add a Task to the Task Group. |
| Remove button | Choose this button to remove a Task from the Task Group. |
Follow these steps to add a new Task Group:
Choose → from the Tabletop menu. The Task Groups window appears.
Choose the Add Record button. Fill in the Task Group and Directory fields, and then choose the Save Record button.
Add one or more Task Group assignments in the Assigned Tasks panel. For detailed instructions, see Section 5.7.5, “Adding a Task Group Assignment”.
Choose → to close this window.
When you edit a Task Group directory, the files in the old directory are moved to the new directory.
Follow these steps to edit a Task Group directory:
Choose → from the Tabletop menu. The Task Groups window appears.
You must have Administrator privilege or be logged in as the sysop user to perform Task Groups maintenance.
From the selection list in the Task Groups panel, select the Task Group to edit.
Edit the Task Group Directory field, and then choose the Save Record button.
Choose → to close this window.
Before you can delete a Task Group, you must delete each Task that is assigned to it. Deleting Task assignments does not affect the associated Tasks in any way.
Follow these steps to delete a Task Group:
Choose → from the Tabletop menu. The Task Groups window appears.
You must have Administrator privilege or be logged in as the sysop user to perform Task Groups maintenance.
From the selection list in the Task Groups panel, select the Task Group to delete.
Choose the Remove button in the Assigned Tasks panel if any Task assignment exists. A warning dialog box appears. Choose the Yes button.
Repeat step 3 for each Task assigned to the selected Task Group.
Choose the Delete Record button. A warning dialog box appears. Choose the Yes button.
Choose → to close this window.
Follow these steps to add a Task Group assignment:
Choose → from the Tabletop menu. The Task Groups window appears.
You must have Administrator privilege or be logged in as the sysop user to perform Task Groups maintenance.
From the selection list in the Task Groups panel, select the Task Group to which assignments are to be added.
Choose the Add button in the Assigned Tasks panel. The Select Tasks Assignment dialog box appears.
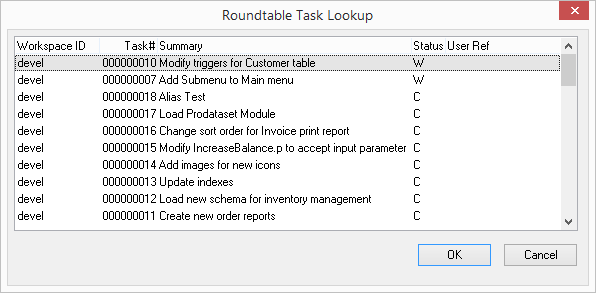
Select one or more tasks, and then choose the OK button. In the Assigned Tasks panel, the Task appears as a new Task assignment.
Choose → to close this window.
Follow these steps to delete a Task Group assignment.
Choose → from the Tabletop menu. The Task Groups window appears.
You must have Administrator privilege or be logged in as the sysop user to perform Task Groups maintenance.
From the selection list in the Task Groups panel, select the Task Group from which an assignment is to be deleted.
Select the Task assignment to delete in the Assigned Tasks panel.
Choose the Remove button in the Assigned Tasks panel to delete the Task assignment. A warning dialog box appears. Choose the Yes button.
Repeat steps 3-4 for each Task assignment to delete.
Choose → to close this window.
Roundtable provides a simple screen in source form (rtb/w/rtb_tnot.w) for maintaining additional Task information. The table maintained by this screen is called rtb_tnot (Task Notes). Any number of rtb_tnot records can be related to a Task. This table includes a number of free-form fields, and fields for tracking such things as estimated and actual hours.
rtb_tnot.w is intended to be modified to fit your own Task information needs. How you use the fields in the rtb_tnot table is entirely up to you.
Roundtable does not use the rtb_tnot table except in these three places:
rtb_tnot.w - Task Notes maintenance screen.
The Task report. It shows Task notations for the Tasks being reported on.
When a WIP Task is deleted, any rtb_tnot records associated with it are deleted.
This is what the Task Notations screen looks like as provided with Roundtable:
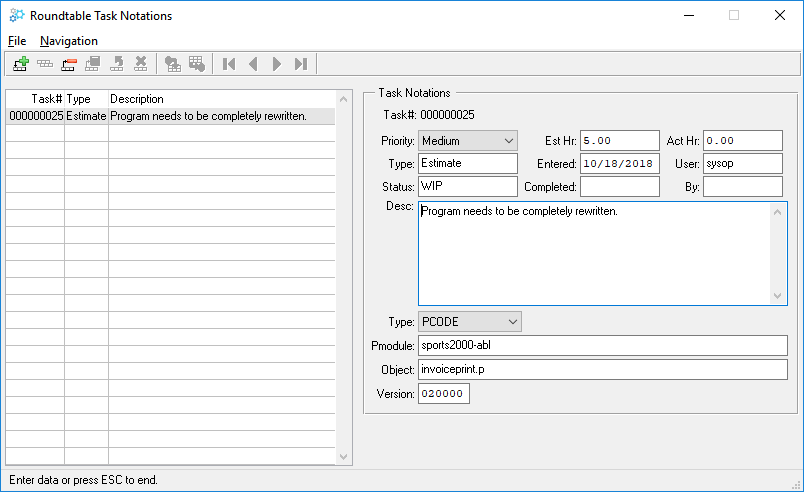 |
To access Task notations for your current Task, choose → from the Tabletop menu.
Table of Contents
- 6.1. Introduction
- 6.2. The Repository
- 6.3. Object Properties Window Folders
- 6.4. PCODE Objects
- 6.4.1. Config Folder Description
- 6.4.2. Adding a PCODE Object
- 6.4.3. Object Name Aliasing
- 6.4.4. Editing the Config Folder
- 6.4.5. Editing a PCODE Object
- 6.4.6. Unlocking Objects
- 6.4.7. Changing the Subtype of an Object
- 6.4.8. Changing the Product Module of an Object
- 6.4.9. Renaming an Object
- 6.4.10. WRX Files
- 6.4.11. Object Xref Level
- 6.4.12. Object Version Blame
- 6.5. DOC Objects
- 6.6. Schema Objects
- 6.7. Object Actions
- 6.8. Lab Objects
- 6.9. Object Reports
- 6.9.1. Versions in Product Module Report
- 6.9.2. Versions in Product Module Report Window
- 6.9.3. Printing the Versions in Product Module Report
- 6.9.4. Versions in Workspace Report
- 6.9.5. Versions in Workspace Report Dialog Box Description
- 6.9.6. Printing the Versions in Workspace Report
- 6.9.7. Xref Report
- 6.9.8. Where Used Report
- 6.9.9. Object Usage Report
- 6.9.10. Call Diagram Report
- 6.9.11. Unused Objects Report
- 6.9.12. External Objects Report
- 6.9.13. Index Usage Report
- 6.9.14. Class Details Report
- 6.10. Object Backups
All workspaces are comprised of collections of Roundtable objects. These objects are of one of the following types:
PCODE: A collection of up to 10 files that define a component of the software application
PFIELD: A database schema definition for a field
PFILE: A database schema definition for a table
PDBASE: A database schema definition for a database
DOC: A special type used for documentation objects
Objects are stored in the Roundtable repository. The Roundtable repository can store many different versions of the same object. When you add a new object, you create the first version of that object, which is numbered 01.00.00. This version code has three parts: Version Level, Revision Level, and Patch Level. All objects are created in a Workspace with an initial status of Work-In-Process (WIP). When you create an object, you assign it a Name, Type, and Product Module. The Product Module, Type, Name, and Version Code constitute the unique key of the object in the repository.
An object does not become a permanent part of the repository until you check it in. Checking it in changes the object's status from WIP to Complete. It is not possible to delete an object from the Roundtable repository once it has been completed. However, you can remove the object from the Workspace. Remember that a Workspace is a collection of objects that represents a configuration of your software application. Deleting an object removes the object version from this configuration.
One last point about deleting object versions: if you delete the first version of an object while it still has a WIP status it does not become a permanent object in the repository. So, if you inadvertently create an object that you really do not want, you can delete it.
You may assign any object version available in the repository to any Workspace. Since the object already exists, such assignments are not considered part of your current task.
Before you can create or modify any object you must have a current task . It is not unusual to create or modify multiple objects under the same task. The task number, under which the object version was created, is stored in the object. This provides traceability between the object version and the task. For information on using tasks, see Section 5.2, “What Is Task Management?”.
When you want to modify an existing object, you must check out the object under a task. This creates a new version of the object and gives the object a work-in-process (WIP) status (checked-out). While you have the object checked out, no other programmer, in the current Workspace, can check it out. If the object is subsequently checked out in some other Workspace, Roundtable warns the user that an object orphan condition exists.
When you check out the object, you choose whether to increment the Version Level, Revision Level, or Patch Level of the version code. The new object version becomes a permanent resident of the repository, and the object's status changes to complete (checked-in).
Each object type is associated with one or more folders of information. These folders are displayed in the Object Properties window, which is viewed by choosing → from the Tabletop menu. Alternately, you can view the Object Properties window by right-clicking on an object displayed in the Object browse, and then selecting Properties from the popup menu. This chapter describes how to add each object type and the contents of their folders.
All objects share the Spec, Task, and Note folders.
The Spec folder displays general repository information about the currently selected object.
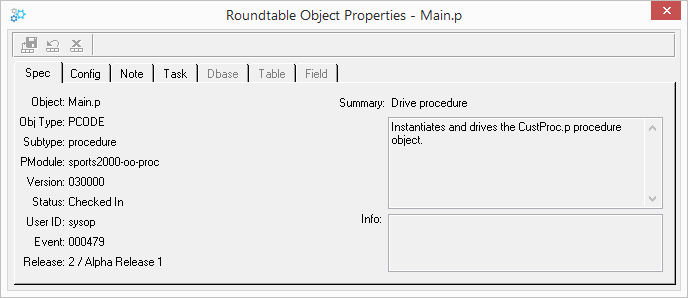 |
| Field | Description |
|---|---|
| Obj Type | The Object type selected when creating the Object. |
| Subtype | The PCODE Subtype used when creating the Object. |
| Pmodule | The Product Module selected when creating the Object. |
| Version | The version of the selected Object. |
| Status | The Object status as either Checked-in or Checked-out. A note will also be here displayed if the Object needs to be compiled or updated. |
| User ID | The user who checked-in the selected Object version. |
| Event | The Workspace Event History number for the latest action taken on the selected Object. |
| Release | The first Release in which the this Object event appeared. |
| Summary | Displays a brief description of the Object. |
| Synopsis (no label) | A synopsis can be entered describing the function of the Object. |
| Info | Area for notification of later versions. |
This folder displays a brief description of the task under which the currently selected object was created.
 |
| Field | Description |
|---|---|
| Task# | Displays the task number. |
| Manager | Displays the user who assigned the task. |
| Programmer | Displays the programmer who performed the task. |
| User Ref | Displays a user-defined reference value associated with the task. This field is indexed but is not used for any purpose by Roundtable. |
| Workspace ID | Displays the Workspace where the task was performed. |
| Completed | Displays the date on which the task was completed. |
| Summary | Displays a short description of the purpose of the task. |
| Synopsis (Below Summary) | A more detailed description of the work done under the task. |
The Note folder contains comments that the programmer entered when working on the object version. This note should explain why the changes were made to the object to create this object version.
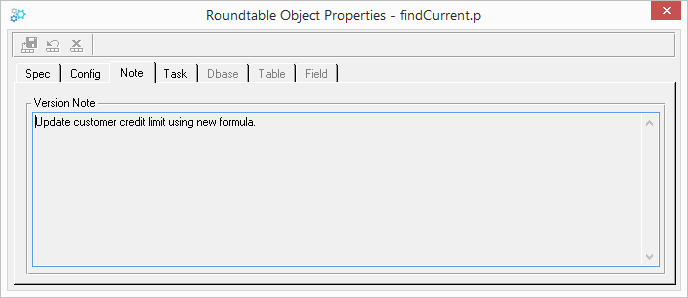 |
Each time you make an edit to any object in the system you are presented with the Version Note dialog after you complete your edit (unless disabled in Preferences). The entries you make in this dialog are an important tool in communicating with other team members about the changes you have made in the object. The information you enter in this dialog appears in the Note folder. Later you will find it helpful to scroll through object versions and see the progression of changes made in each version without having to dig into the code. Use these notes to summarize the changes you have made.
Enter notes about your changes in the Version Notes dialog box:
 |
You can use PCODE objects to store almost any kind of data in the Roundtable repository by defining custom Code Subtypes that tell Roundtable how to process the data when it is stored into and retrieved from the repository.
PCODE objects are maintained in the Config folder. You can run the procedure editor from Roundtable to edit a PCODE object.
PCODE objects store program or include files and, if necessary, other text files such as shell scripts. PCODE objects can also store binary data like bitmaps. The PCODE definition records the:
Compile time parameters of programs
Deployment options
Documentation entered by the programmer about the purpose of the object
You must assign a Subtype to each PCODE you create. The Subtype defines the type of source the PCODE object represents (window, program, form, etc.). Subtypes allow you to track up to nine related text files as a single object. For more information on subtypes, see Section 3.13, “Subtypes”.
The Config Folder contains information about how Roundtable should process the object in the Workspace configuration.
 |
The Config folder contains the following fields:
| Field & Buttons | Description |
|---|---|
| Encryption | A set of toggle boxes that designate which type of remote sites should receive encrypted code. The type of remote site is determined when creating deployments. See Section 4.14, “Deployments”. |
| Compiles? | A toggle box that indicate whether Roundtable should compile this procedure. |
| Runable | A toggle box that indicates that the PCODE object is a procedure that you can run directly from Roundtable. A procedure that expects parameters to be passed cannot be run from Roundtable. |
| Save .r code | A toggle box that indicates that Roundtable should produce R-code for the object during compile. Note that this flag might be overridden by the R-code flag in the Workspace Modules window or the Workspace Maintenance Window. |
| Deploy | A toggle box that indicates if this object is to be included in deployments of your application. |
| Binary | A toggle box that indicates if the file is a binary file (ex: a bitmap file). Roundtable for MS-Windows automatically detects whether or not the file is binary. Binary files receive special handling for storage in the repository. Roundtable does not store deltas for binary files; the entire file is stored for each new version. |
| Objcopy | A toggle box that indicates that the object should be copied to the alternate r-code directory if an alternate r-code is specified during the installation of a deployment at an end-user site. This attribute is typically used for images and other non-compilable objects that are required for proper functioning of the application. |
| WRX Path and WRX File | Roundtable can manage the versioning, migration, and deployment of WRX files for you. See Section 6.4.10, “WRX Files” for a complete description of how Roundtable does this. If Roundtable finds that you have used an OCX in the current PCODE object, then the name of the WRX file and the directory that it was found in are both displayed. If the current PCODE object does not reference a WRX file, then these fields are left blank. |
| Object Compile Parameters | Compile syntax parameters to be used when compiling this object. Normally, this field can be left blank. It is most often used for objects with support for multiple languages. |
| Override All Other | Does this object's compile parameters override the Workspace or Workspace Module compile parameters? Use this field to have Roundtable ignore Workspace or Workspace Module compile parameters when compiling this object. Only the object's compile parameters will be used. If this field is toggled off, then the object's compile parameters are used in addition to the Workspace or Workspace Module compile parameters. (If there are compile parameters defined for the module, then the Workspace compile parameters are ignored. Only the module and object compile parameters will be used.) |
Follow these steps to add a new PCODE object:
Select a Workspace and Task on the Tabletop.
Choose → from the Tabletop menu. The New Object window appears.
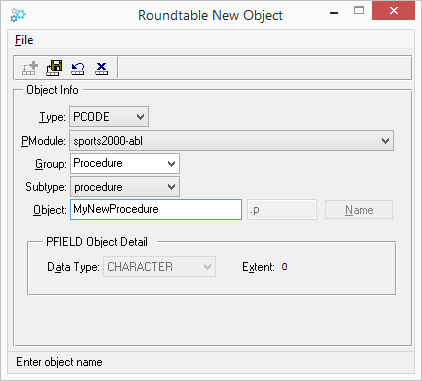
Select PCODE from the Type drop-down list.
From the Product Module drop-down list, select the Product Module that the object will belong to. Only those Product Modules associated with the current Workspace Module are available.
Type in or select the object Group. This field is used to sort objects in the Workspace Module, and is part of the configuration list, not part of the object version record in the repository.
Select a Code Subtype from the Subtype drop-down list. The corresponding file extension is automatically provided.
Enter an object name in the Object field. Alternately, if a name program has been defined for the selected Subtype, you may choose the Name button to have the Object field populated automatically by the name program. See Section 3.13.10, “Name Programs” for more information on naming programs.
Do not type a file extension for the object name if one is provided by the selected Subtype.
Choose the Save Record button. A warning dialog appears showing the object details.
Choose the Yes button to create the new object.
If you have no more objects to create, choose → to close the New Object window.
![[Note]](../images/admon/note.png) | |
Roundtable tests the naming conventions by checking the fields entered on the Roundtable Code Subtypes window against the information entered in the New Object dialog box. For more information, see Section 3.13, “Subtypes”. |
If you must have two objects with the same name in a Workspace, and the Allow Non-Unique system flag is set to No, use the object name aliasing feature. (See Section 3.7, “System Preferences” for a description of the Allow Non-Unique system flag.)
Roundtable has reserved the @ character for the object name aliasing feature. Use the @ character in the first position in an object name. When you enter an object name using the @ character, Roundtable prompts you for filenames for each of the Subtype part files associated with that object. For example, if you must have a post.p program in both the ap and ar subdirectories, use object name aliasing to name the second object @post.p.
Generally, you should not use this feature unless your existing OpenEdge application has duplicate filenames and the Allow Non-Unique system flag is set to No. Try to assign a unique name to each object in your application.
Object name aliasing is only available for PCODE object types. It cannot be used with schema objects or DOC objects.
You can only edit an object's configuration information if you have it checked out under your current task. Follow these steps to edit the Config folder:
From the object browse on the Tabletop, select a PCODE object. If the Object Properties window is not visible, choose → from the Tabletop menu.
Choose the Config folder tab. The Config folder opens.
Edit the fields in the folder. On your first change to any field in the folder, the Save Record buttons are enabled.
Choose the Save Record button.
You can open an editor to edit a PCODE object from inside Roundtable. If a PCODE object includes more than one Subtype part, a dialog box lists the parts of the object. You choose which parts to edit.
Follow these steps to edit a PCODE object:
From the object browse on the Tabletop, select a PCODE Object. If you don't have the object checked out, Roundtable limits you to read-only access.
Choose the appropriate Edit or View button. The Edit buttons (Edit in Procedure Editor, Edit in AppBuilder) are enabled only if the object is checked out under your current task. If an edit procedure is defined for the object's Subtype, any of the Edit/ View buttons will run the defined edit procedure.
If there is only one part to edit, the part is loaded into the selected editor.
If the object has more than one part, the Select Parts to Edit dialog box appears. Continue with Step 3.
Select the parts to edit or view.
To edit one or more parts, highlight the parts to edit and choose the OK button. The editor windows open with each selected part loaded.
When you edit WIP (Work In Process or checked-out) objects, Roundtable places a lock on the object to prevent two Roundtable users from trying to edit an object at the same time. When you edit a PCODE object using an editor other than AppBuilder or Procedure Editor, Roundtable can not release this object lock automatically because it has no way of knowing when the external editor is finished with the object. These object locks are automatically cleared when you exit your Roundtable session or when you manually remove the lock. Follow the steps below to remove an object lock manually.
Choose the object to be unlocked in the browse table.
Choose → from the Tabletop menu.
![[Note]](../images/admon/note.png) | |
An Administrator or the 'sysop' user may unlock objects locked by other users. All other users can only remove object locks created using their own user ID. |
Follow these steps to change the Subtype of an Object.
From the Tabletop, select the Object whose subtype you want to change.
Choose → from the Tabletop menu. The Change Subtype dialog appears.
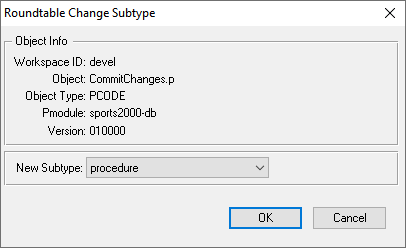
Choose the new subtype you want for the Object from the drop-down.
Choose the Ok button to complete the change. Roundtable will change the subtype of the object to the new subtype.
![[Note]](../images/admon/note.png) | |
| The Object status must be WIP to enable the Change Subtype option. |
![[Note]](../images/admon/note.png) | |
| If the extension of the Object and the extension of the new Subtype are not the same, an error is given. |
Follow these steps to change the Product Module of an Object.
From the Tabletop, select the Object whose Product Module you want to change.
Choose → from the Tabletop menu. The Change Product Module dialog appears.
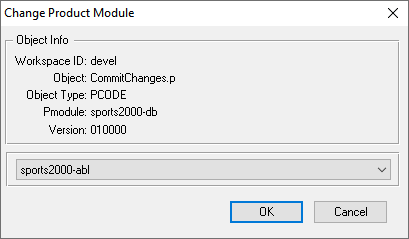
Choose the new Product Module you want for the Object from the drop-down.
Choose the Ok button to complete the change. Roundtable will change the Product Module of the object and move the source code to the new location as required.
![[Note]](../images/admon/note.png) | |
| The Object status must be WIP and its version must be 01.00.00 to enable the Change Product Module option. |
Follow these steps to rename an Object.
From the Tabletop, select the Object that you wish to rename.
Select → from the Tabletop menu. The Rename Object dialog appears.
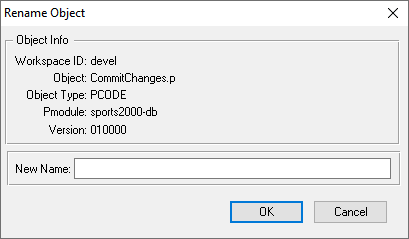
Type in the new name for the Object and choose OK. The name of the Object is now changed.
![[Note]](../images/admon/note.png) | |
| The Object status must be WIP and its version must be 01.00.00 to enable the Rename option. |
Roundtable does the following to help you manage WRX files in your application:
When you perform a File Save from AppBuilder, Roundtable uses AppBuilder XFTR hooks to examine your .w program to see if it references a WRX file. See the "ADE Hooks" section in Appendix A for details about how this works.
Before an object is committed to the repository, Roundtable scans the source file for a WRX reference.
If Roundtable finds a WRX file reference by either of the above methods, it stores the name and directory of that WRX file. The WRX file's name and directory are displayed on the Config folder for that PCODE object.
When you check in your PCODE object, the WRX file is checked in along with it. The WRX file is actually stored as the 10th object part. Since WRX files are binary, Roundtable always handles the 10th file part as a binary file. See Section 3.13, “Subtypes” for a description of Subtype parts. Part 10 of a PCODE object is only available for the storage of WRX files.
Because the WRX file is now stored as a part of your PCODE object, the WRX file is automatically managed for you with all of Roundtable's source management functions, such as version control, imports, and deployments.
The Workspace and Workspace Module Xref level can be overridden for PCODE Objects at the Object level.
From the tabletop, select the Object you wish the set the Xref Level for.
Choose from the Object’s context menu. The Object Xref Level dialog appears.
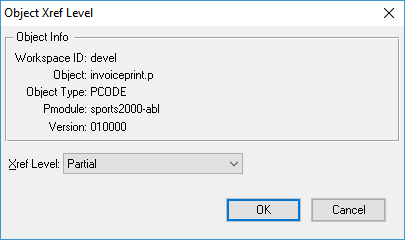
Select the new Xref Level and and choose OK.
The Blame view allows you to view line by line changes for a selected Object version. When viewing an Object in blame format, each line will inlude the version in which it was changed, the author and the date.
From the tabletop, select the Object and version for which you wish to view the blame output.
Choose from the Object’s context menu.
A DOC object is a simple binary object managed by Roundtable. DOC objects by default are not included in deployments except to partner sites. DOC objects are always stored in a subdirectory called DOC off of the subdirectory associated with the Workspace Module the object is assigned to. If any of these restrictions is a problem, create a Subtype for PCODE objects that behave exactly the way you want.
Follow these steps to add a DOC object:
Select a Workspace and Task on the Tabletop.
Choose → from the Tabletop menu. The New Object window appears.
Select DOC from the Type drop-down list.
From the Pmodule drop-down list, select the Product Module to which the object will belong. The list only contains Product Modules associated with the current Workspace Module.
Enter the group.
Enter the object name and a short description.
Choose the Save Record button. A warning dialog appears showing the object details.
Choose the Yes button to create the new object.
If you have no more objects to create, choose → to close the New Object window.
Roundtable provides a complete schema management system that includes full version control. In addition, field and file domains have been implemented to increase the consistency of your overall database schema and reduce the amount of maintenance required for some types of database schema changes.
Roundtable provides version control on the database schema by maintaining the database schema information in three object types:
PDBASE: Database information and file assignments
PFILE: Table definition and field assignments
PFIELD: Field definitions
PFILE and PFIELD objects are reusable definitions, often called domains. A database is defined by a PDBASE object to which one or more PFILE objects are assigned. Each of these PFILE object assignments defines a table in the database. Each PFILE object contains information about the table and one or more PFIELD assignments. Each PFIELD object assignment defines a field in the table.
Refer to the following diagram that shows how Roundtable objects are translated into the _(schema) tables of the OpenEdge database:
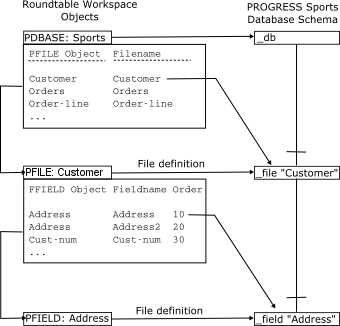 |
Roundtable manages the OpenEdge database schema by taking the database, table, and field definitions in the configuration specified by a Workspace and updating the OpenEdge schema tables in the application database associated with the Workspace so that it conforms to the schema definition contained in the Roundtable objects. Roundtable allows any number of databases to be managed in any number of workspaces up to the limit on database connects allowed by OpenEdge itself.
Both table and field domains are supported by Roundtable.
The idea behind a domain is that you create a single definition that is used in a number of different places. For example, you can define a single PFIELD object called Address and use this field definition in a number of different tables, or even many times in the same table. Each use of the field definition is a field assignment. This assignment establishes a field in the table with name and order specified in the assignment. This can be advantageous when you need to change some attribute of the field definition. You can make the change in a single place, and Roundtable makes sure that all of the tables that use the field definition are updated properly. This ensures consistency in your application and reduces the time spent on database maintenance.
Table domains are similar to field domains except that you are assigning a table definition (PFILE object) to two or more databases. Any change to the table definition is updated in each database by Roundtable. There is a limitation in the current release of Roundtable that precludes the assignment of a PFILE to two or more tables in the same PDBASE. It is possible to assign the same PFILE to two or more tables if these tables belong to different PDBASE objects.
Schema objects are versioned like other objects in the Roundtable system. However, some differences do exist. Schema objects, PDBASE, PFILE, and PFIELD, are not stored as incremental versions. A complete copy of the data structure defining the schema object is stored in the repository for each version of the object. This does not lead to excessive growth in the database because creating a new object version of a PFIELD does not necessarily require new object versions of the PFILEs to which it may be assigned.
In addition, Roundtable maintains internal buffers for checked out schema objects to track the last updated content of the schema objects. In this way, it can track the changes you make to schema objects while they are WIP. You do not have to check in (complete) your schema objects with each schema update process. Instead, you can make changes and update the schema into your application database in an iterative manner. You only check in the schema objects when you have finalized the database schema content.
It is usually a good idea to do your schema changes in a separate task from that used for creating and modifying programs. It is necessary to complete all schema objects before a Release can be created in a Workspace.
Multi-tenant attributes can be specified for a PDBASE object, its PFILE assignments, and sequence definitions. During the schema update process, if the target physical database is enabled for multi-tenancy, the multi-tenant attributes in the logical schema definition are applied to the physical database. Please note that enabling or disabling the multi-tenant attribute of the PDBASE object only affects the logical schema definition, enabling or disabling the ability to edit the multi-tenant attribute of its PFILE assignments and sequences. Changing the value of the multi-tenant attribute of the PDBASE object does not enable or disable multi-tenancy for the physical database associated with the PDBASE object.
See Section 6.6.5.11, “Setting Database Features” in this chapter for details on enabling the PDBASE multi-tenant attribute.
Table-partitioning attributes can be specified for a PDBASE object, its PFILE assignments, and index definitions. During the schema update process, if the target physical database is enabled for table-partitioning, the partitioning attributes in the logical schema definition are applied to the physical database. Please note that enabling or disabling the table-partitioning attribute of the PDBASE object only affects the logical schema definition, enabling or disabling the ability to edit the table-partitioning attribute of its PFILE assignments. Changing the value of the table-partitioning attribute of the PDBASE object does not enable or disable table-partitioning for the physical database associated with the PDBASE object.
See Section 6.6.5.11, “Setting Database Features” in this chapter for details on enabling the PDBASE table-partitioning attribute.
PDBASE (database) objects record a list of PFILE assignments that link a PFILE with the PDBASE object. When a PDBASE object is assigned to a Workspace, additional information is required to allow connection of the physical database. This connection information is part of the assignment of the object to the Workspace. It is not part of the PDBASE object. It is possible to change this database connection information without checking out the PDBASE object. The connection information for a database is contained in the Dbase folder.
There are two things to be aware of when creating a PDBASE object:
Naming a PDBASE object is important because Roundtable uses the PDBASE object name as the logical database name. Roundtable requires this for cross-referencing purposes.
Unless you specify -U and -P connection parameters for the database, Roundtable uses the same user ID and password for the Workspace database as you used for logging into Roundtable. To avoid this, use -U "" -P "" as part of your Workspace database's connection parameters.
The Dbase folder contains the Workspace database parameters of the PDBASE object.
 |
The Dbase folder contains the following fields and buttons:
| Field or Button | Description |
|---|---|
| Connect Order | A fill-in that controls the order in which Roundtable connects to multiple databases. |
| Auto Connect | Check to connect the database when the Workspace is selected. If not checked, Roundtable does not attempt to connect to the database when the Workspace is selected. |
| DB Type | (Display only) Type of database (PROGRESS, ORACLE, ODBC, etc.) |
| DataServer DB | Checked if the database is a DataServer schema holder. Only enabled for a new PDBASE object. |
| Physical Name | A fill-in for the full name of the database, including the directory in which it is stored. If you leave this field blank, Roundtable does not attempt to connect to the database when the Workspace is selected. |
| Parameters | A set of fill-in fields for the OpenEdge connection parameters. When connecting to an application database, Roundtable supplies the user ID and password you used to log into Roundtable. To avoid this, you specify a user ID and password using the -U and -P options. It is possible to pass a blank user ID and password with a connection parameter specification of -U "" -P "". |
| Aliases | Sets up database aliases. |
| Sequences | Creates and manages database sequences. See Section 6.6.5.8, “Adding a Database Sequence” in this chapter. |
| DB Features | Launches the Database Features dialog. |
| Server | Launches the server DB Connection Parameters dialog. This allows you to specify different connection parameters for the PDBASE Object when connecting via the Roundtable AppServer. |
Before you add a PDBASE object, the database should exist in the system and be available for connection. A connect is attempted during the PDBASE object add process to verify the database connection parameters you enter.
Follow these steps to add a PDBASE object:
Choose → from the Tabletop menu. The New Object window appears.
Select PDBASE from the Type drop-down-list.
From the Pmodule drop-down list, select the Product Module to which the object will belong. Only Product Modules that are associated with the currently selected Workspace Module appear in the list.
Enter the object group in the Group field.
Enter an object name in the Object field. The object name that you enter for the new PDBASE object will be used as the logical database name when Roundtable connects to it.
Choose the Save Record button. The following dialog box appears with the object name that you entered:
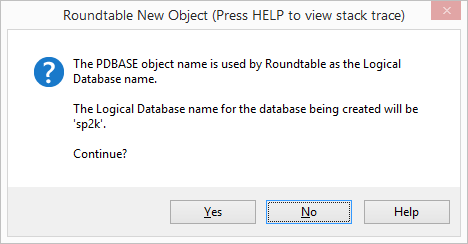
Choose Yes if the object name that you entered is the correct logical name for the database. A warning dialog box appears to confirm creation of the new PDBASE object.
Choose Yes to create the PDBASE object.
Open the Object Properties window.
On the Dbase folder of the Object Properties window, enter the connect order priority number, DataServer DB status, the physical name of the database, and the database connection parameters.
Choose the Save Record button to complete your edit of the folder.
In order to utilize DataServer schemas with Roundtable, PDBASE objects must be defined in specific ways. First, there must be a PDBASE object defined for each database with its schema managed by Roundtable. This is the case, even if one physical OpenEdge database contains schemas for more than one database (such as both its own native schema and the schema of foreign database).
Second, the name of the PDBASE object must be identical to the name of the database used to manage the schema. If the PDBASE object corresponds to a foreign database, the name of the PDBASE object must be the same as the name of the foreign database as it was when it was connected to populate the DataServer schema holder database (stored in the _Db-name field of the corresponding _Db record). The physical database specified for these objects, however, will be the name of the OpenEdge database that serves as the schema holder for the foreign database. If the PDBASE corresponds to a native OpenEdge schema, the PDBASE name will serve as the logical name for that database (unless an -ld value is supplied in the connection parameters for that PDBASE object).
Consider the following sample PDBASE object definitions:
PDBASE definition for ORACLE DataServer schema holder and database. Notice that the physical name specified is for the OpenEdge schema holder. A connection to the ORACLE database is made using the additional connection parameters supplied in the definition (See the OpenEdge Oracle DataServer Guide for appropriate connection parameters).
| Property | Value | Description |
|---|---|---|
| Object Name | ORCL | Name of ORACLE database. |
| Physical Name | C:/rtb/project/devel/orahold.db | Pathname of OpenEdge schema holder. |
| Connection Parameters | -ld orahold -RO -db ORCL -dt ORACLE -U user_1@ORACLE.SERVICE.NAME -P passwd | Logical name for schema holder. Connection parameters for ORACLE database. |
PDBASE definition for ODBC DataServer schema holder and database. Notice that the physical name specified is for the OpenEdge schema holder. A connection to the ODBC database is made using the additional connection parameters supplied in the definition (See the OpenEdge ODBC DataServer Guide for appropriate connection parameters, and DSN setup).
| Property | Value | Description |
|---|---|---|
| Object Name | MS-Demo | Name of ODBC database. |
| Physical Name | C:/rtb/demo/devel/demohold.db | Pathname of OpenEdge schema holder. |
| Connection Parameters | -ld demohold -RO -db MS-Demo -dt ODBC | Logical name for schema holder. Connection parameters for ODBC database. |
PDBASE definitions for OpenEdge database used for both native schema and as a DataServer schema holder for an ORACLE database. The first PDBASE definition is for the native schema, and the second for the ORACLE database. Note the read-only (-RO) parameter in the second definition. Without this, you will get an error message when Roundtable attempts a second connection to a single database.
| Property | Value | Description |
|---|---|---|
| Object Name | Prodemo | Name of OpenEdge database. |
| Physical Name | /usr/rtb/demo/devel/prodemo.db | Pathname of OpenEdge database. |
| Connection Parameters | Only as required per installation. |
| Property | Value | Description |
|---|---|---|
| Object Name | Orademo | Name of ORACLE database. |
| Physical Name | /usr.rtb/demo/devel/prodemo.db | Same pathname as before. |
| Connection Parameters | -RO -db orademo -dt ORACLE -U user_1@ORACLE.SERVICE.NAME -P passwd | Required. Connection parameters for ORACLE database. |
Since OpenEdge DataServer schema holders are designed to be only recipients of foreign schema (using utilities provided in the OpenEdge Data Administration tool), Roundtable also limits one-way update of DataServer schema. This allows you to load in the schema changes from a OpenEdge schema holder for impact analysis and selective compiling. The Load Schema utility finds any change to the physical schema holder and reads it into Roundtable (versioning objects if necessary).
Schema for a DataServer database can only be added and/or updated in Roundtable using Roundtable's Load Schema feature. Schema assigned to a PDBASE object that corresponds to a DataServer database cannot be manually checked out, nor can a user directly modify the properties of the objects.
As with loading native OpenEdge schema using the Load Schema feature, schema objects for DataServer schema will be checked out automatically as required. Even though schema objects assigned to a PDBASE object corresponding to a DataServer database remain WIP until they are checked in, users will not be able to change any of the properties (local table name, data type, etc.) for these objects.
![[Note]](../images/admon/note.png) | |
Roundtable does not support the use of a DataServer for the Roundtable repository. |
Follow these steps to edit the Dbase folder:
From the object browse on the Tabletop, select the PDBASE object to edit.
Open the Object Properties window, and then choose the Dbase folder tab. The Dbase folder opens.
Edit the database parameters in the folder as necessary. Since the Dbase folder only contains workspace-specific connection parameters for the database, you can edit the contents of the folder even if the PDBASE object is not checked out.
Choose the Save Record button to complete your edit of the folder.
The database aliases defined for the database are created for you when Roundtable connects to the database. Otherwise, code that expects these aliases to be available cannot compile. Roundtable does not provide automatic alias support on deployment. Instead, your deployed application will connect to the appropriate databases and create the required aliases.
Follow these steps to add an alias:
From the object browse on the Tabletop, select the PDBASE object to add an alias to. The PDBASE object must be checked-out to add an alias.
Open the Object Properties window, and then choose the Dbase folder tab. The Dbase folder opens.
Choose the Aliases button. The Aliases dialog box appears.
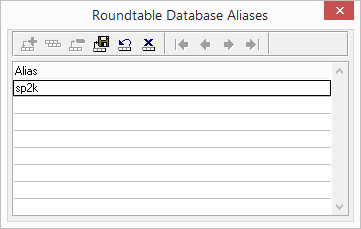
Choose the Add Record button. A new row is enabled in the browse.
Enter the alias name and choose the Save Record button.
Repeat steps 5-7 for additional aliases.
Close the Alias dialog box.
Follow these steps to delete an alias:
From the object browse on the Tabletop, select the PDBASE object to add an alias to. The PDBASE object must be checked-out to add an alias.
Open the Object Properties window, and then choose the Dbase folder tab. The Dbase folder opens.
Choose the Aliases button. The Aliases dialog box appears.
Select the alias to delete.
Choose the Delete Record button. A warning dialog box appears. Choose the Yes button to delete the alias.
Close the Alias dialog box.
Follow these steps to add a database sequence:
From the object browse on the Tabletop, select the PDBASE object to add a sequence to. The PDBASE object must be checked-out to add a sequence.
Open the Object Properties window, and then choose the Dbase folder tab. The Dbase folder opens.
Choose the Sequences button. The Database Sequences dialog box appears.
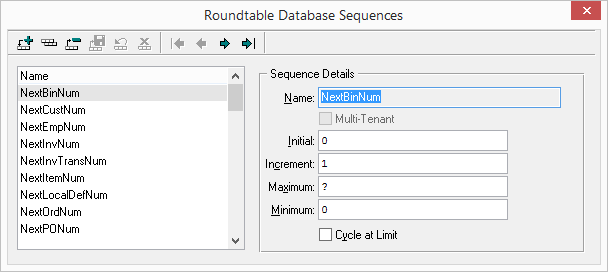
Choose the Add Record button. The Name field is enabled in the Sequence Details panel.
Enter the name for the sequence along, with these values for the new sequence:
Multi-tenant: Add this sequence as multi-tenant.
Initial: The first number to use when assigning numbers.
Maximum: The highest number to assign before stopping or starting over.
Increment: The amount by which to increment each consecutive number.
Minimum: The lowest number that OpenEdge should use when assigning numbers and is only used with negative increments.
Cycle: Check here to have OpenEdge start over assigning numbers once the maximum number is reached.
Choose the Save Record button to complete your new sequence entry.
Close the dialog box.
![[Note]](../images/admon/note.png) | |
Values will be validated against 32-bit or 64-bit limits as determined by the 64-bit sequences property for the PDBASE object. See Section 6.6.5.11, “Setting Database Features” in this chapter. |
Follow these steps to edit a database sequence:
From the object browse on the Tabletop, select the PDBASE object for which to edit a sequence. The PDBASE object must be checked-out to edit sequences.
Open the Object Properties window, and then choose the Dbase folder tab. The Dbase folder opens.
Choose the Sequences button. The Database Sequences dialog box appears.
Select the sequence to edit from the browse. Edit the sequence fields as necessary. On your first change to any of these fields, the Save Record and Reset buttons are enabled. Choose the Save Record button to complete your edit.
Close the dialog box.
Follow these steps to delete a database sequence:
From the object browse on the Tabletop, select the PDBASE object for which to delete a sequence. The PDBASE object must be checked-out to edit sequences.
Open the Object Properties window, and then choose the Dbase folder tab. The Dbase folder opens.
Choose the Sequences button. The Database Sequences dialog box appears.
Select the sequence to delete from the browse.
Choose the Delete Record button. A warning dialog box appears. Choose the Yes button to delete the sequence.
Close the dialog box.
Database features correspond to OpenEdge database features and determine the attributes that can be defined for a PDBASE object.
Follow these steps to set database features:
From the object browse on the Tabletop, select the PDBASE object of which to edit the features. The PDBASE object must be checked-out to edit features.
Open the Object Properties window, and then choose the Dbase folder tab. The Dbase folder opens.
Choose the DB Features button. The Database Features dialog box appears.
Set the desired database feature(s).
| Field | Description |
|---|---|
| 64-Bit Sequences | Check to allow 64-bit sequences to be defined for this PDBASE object. |
| Multi-tenant | Check to allow multi-tenant features to be set for sequences and PFILE objects assigned to this PDBASE object version. |
| Table Partitioning | Check to allow table-partitioning features to be set for PFILE objects assigned to this PDBASE object version. |
![[Note]](../images/admon/note.png) | |
Setting these values does not enable the feature in the physical database associated with the PDBASE object. These settings either enable or disable the corresponding attributes in the logical schema definition. |
The Load OpenEdge Schema utility loads the schema of an existing database into Roundtable. The utility creates PFILE and PFIELD objects for each of the file and field definitions found in the OpenEdge database. The Utility can load changes made to the OpenEdge database schema so that the logical schema object definitions in Roundtable are brought in sync with the physical OpenEdge database schema.
See Section 4.9, “Load Schema” for a complete description of this utility.
The PDBASE Object Report reports the definition of a PDBASE object. It does not report on the definitions of the PFILE assigned to the PDBASE. If you want a complete schema definition, use the Database Definition Report instead. See Section 6.6.5.14, “Database Definition Report”.
Follow these steps to print the report:
From the object browse on the Tabletop, select the PDBASE object on which to report.
Choose → → from the Tabletop menu. The PDBASE Object Report window appears.
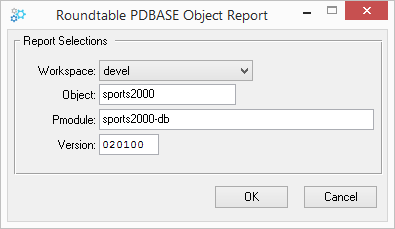
Confirm or modify the report selections, and then choose the OK button.
The Database Definition Report provides the full definition of the database from the contents of the Roundtable schema.
Follow these steps to print the report:
From the object browse on the Tabletop, select the PDBASE object on which to report.
Choose → → from the Tabletop menu. The Database Definition Report window appears.
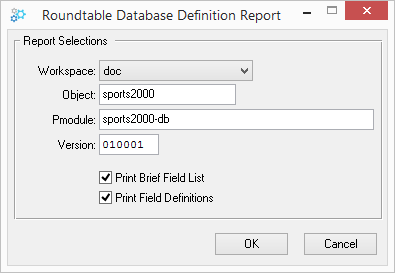
Select report options: Activate the Provide Brief Field List toggle box to print brief field descriptions for the fields defined in each table. Activate the Print Field Definitions toggle box to print the full detailed definition of each field. The Brief Field List and Field Definitions options are not mutually exclusive. The report produces both sections if both options are selected.
Choose the OK button to run the report.
The Database Integrity Check Report compares the Roundtable schema definition with the schema definition in the physical OpenEdge database. This report is useful for finding out if someone has modified the OpenEdge database schema manually.
Follow these steps to print the report:
From the object browse on the Tabletop, select the PDBASE object on which to report.
Choose → → from the Tabletop menu. The DB Integrity Check Report window appears.
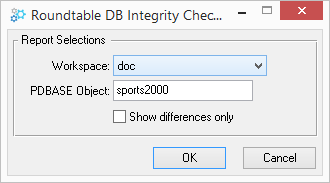
Confirm the PDBASE specification and then choose the OK button to print the report.
A PFILE object defines the contents of a OpenEdge table. It contains:
Schema information related to the table as a whole
Index and table header definitions for the table
A list of PFIELD assignments that include local field names, field order, and mandatory status
Define the fields of a table through assignment of existing PFIELD objects to the PFILE object. In addition to the contents of the PFIELD definition, table fields are further defined by a local field name, a field order, and mandatory status values. The table field name and the PFIELD object name are usually (but do not have to be) the same.
Roundtable shows the content of a PFILE object definition in the Table folder. You perform the following activities to manage a PFILE object:
Edit header properties (Label, Dump Name, Validation, etc.)
Define table triggers
Assign PFIELD objects to the PFILE (Using Logical Schema Manager)
Define indices and index fields for the PFILE (Using Logical Schema Manager
The PFILE reports available are:
PFILE Object Report, which provides the definition of a PFILE object
File Definition Report, which provides the full PFILE definition
The Table folder contains a PFILE object definition.
 |
The File folder contains the following items:
| Field or Button | Description |
|---|---|
| Label | The fill-ins for the label of the table and its string attribute. |
| String Attribute (Unlabeled) | A fill-in for the string attribute for the Label. |
| Dump name | A fill-in for the dump name of the table. |
| Replication | A fill-in for the Replication table attribute. This field was added to the OpenEdge data dictionary in version 8.1A. See the OpenEdge System Administration Guide for more details. |
| Frozen | A toggle box that sets the OpenEdge File _frozen attribute. Roundtable can update files that have the Frozen attribute set. Use this attribute to prevent others from making changes to the file using the OpenEdge Data Dictionary. |
| Hidden | A toggle box that sets the OpenEdge File _hidden attribute. Use this attribute to prevent users from seeing this table. |
| Desc. | An editor widget for the description of the table's use in the system. |
| Record Deletion Validation | An editor widget for the statement that must be true before deleting a record. |
| Validation Failure Message | An editor widget for the message OpenEdge displays if a record deletion validation fails. Also enter String Attributes. |
| String Attribute (Unlabeled) | A fill-in for the string attribute for the Validation Failure Message. |
| Triggers | Button to define database triggers for the table. |
Follow these steps to add a PFILE object:
Choose → from the Tabletop menu. The New Object window appears.
Select PFILE from the Type drop-down-list.
From the Pmodule drop-down list, select the Product Module to which the object will belong. Only Product Modules that are associated with the currently selected Workspace Module appear in the list.
Enter the object group in the Group field.
Enter an object name in the Object field.
Choose the Save Record button.
A dialog appears with the new object details for confirmation.
Choose the Yes button to create the PFILE object.
For instructions on adding fields to the table, see Section 6.6.10.2.1, “Assigning a Field”.
Follow these steps to edit the Table folder:
From the object browse, select a PFILE object that has a WIP status.
Open the Object Properties window, and then select the Table folder tab.
Edit the fields in the folder as desired.
Choose the Save Record button to save your changes.
Roundtable allows you to manage database table triggers. For a description of database triggers, refer to your OpenEdge manuals.
![[Note]](../images/admon/note.png) | |
Roundtable does not support CRCs on triggers because it makes deployment of schema information difficult or impossible in many situations. See the OpenEdge documentation for more information on CRC checks on triggers. |
Follow these steps to add a table trigger:
From the object browse, select a PFILE object that is checked out.
Open the Object Properties window, and then choose the Table folder tab.
Choose the Triggers button. The Triggers for Table dialog box appears.
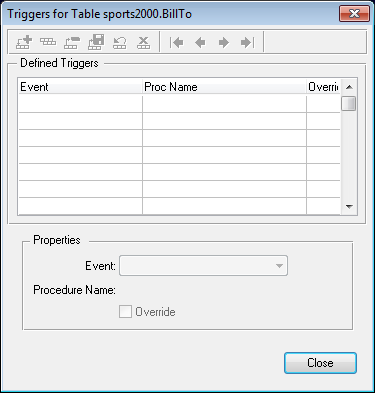
Choose the Add Record button.
Select the trigger event from the Event drop-down list.
Enter the name of the procedure associated with the event.
Activate the Override toggle box if the application code can override this trigger specification. Choose the Save Record button to complete trigger entry
Close the dialog box.
Follow these steps to delete a table trigger:
From the object browse on the Tabletop, select a PFILE object that is checked out.
Choose the Table folder tab. The Table folder opens.
Choose Triggers from the pop-up menu. The Triggers for Table dialog box appears.
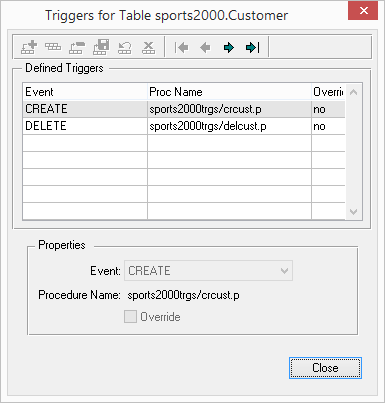
Select the trigger event from the browse.
Choose the Delete Record button. A warning dialog appears to confirm the deletion.
Choose the Yes button to delete the trigger. The trigger record is deleted, but Roundtable does not delete the procedure source code.
Close the dialog box.
The PFILE Object Report prints the definition of a selected PFILE object.
Follow these steps to print the report:
From the object browse on the Tabletop, select the PFILE object.
Choose → → from the Tabletop menu. The PFILE Object Report window appears.
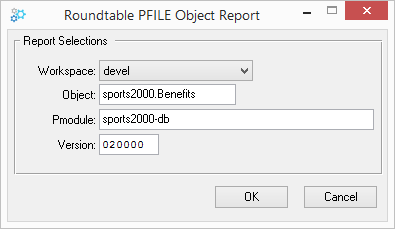
Confirm or modify the object specifications, and then choose the OK button.
The Table Definition Report prints a full file definition from the contents of Roundtable schema.
Follow these steps to print the report:
From the object browse on the Tabletop, select the PFILE object.
Choose the → → from the Tabletop menu. The Table Definition Report window appears.
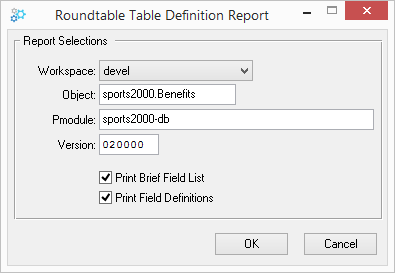
Confirm or modify the object specifications, and select from the report options:
Activate the Print Brief Field List toggle box to print a brief list of all the fields in the file.
Activate the Provide Full Detail toggle box to print the full details of each field in the file.
The Brief List and Full Detail options are not mutually exclusive. The report produces both sections if both options are selected.
Choose the OK button.
PFIELD definitions in Roundtable are similar to the field definitions found in the OpenEdge Data Dictionary. However, unlike OpenEdge field definitions, PFIELD objects can be used in one or more field assignments in PFILE table definitions.
For example, you can define a single PFIELD object called Address and assign this definition to one or more PFILE table fields. This allows for global changes, such as changing the length of the Address field. You make only one change in the PFIELD definition. Roundtable updates the table's field definition wherever a field is assigned to a table.
The Field folder contains the PFIELD definition. You can change most of the fields in this folder, except the data type or extent of the field. To change the data type or extent of a field, see Section 6.6.7.4, “Changing the Data Type or Extent of a Field”. You can change the decimal field only if the field is a decimal data type.
 |
The fields in the Field folder include:
| Field | Description |
|---|---|
| Type | Display only field. This shows field's data type. |
| Extent | Display only field. Defines the number of elements in an array field. |
| Decimal | Display only field. Indicates the number of stored decimal digits for a decimal field. |
| Case Sensitive | A toggle box that indicates whether to regard uppercase and lowercase letters as differences in a field. |
| Label | Fill-ins for the field label and string attribute. |
| Col-label | Fill-ins for the column label and string attribute. |
| Format | Fill-ins for the format phrase for the field and string attribute. |
| Initial | Fill-in for the initial value of the field and string attribute. |
| Help | Fill-ins for the field's help line and string attributes. |
| SQL Width | Field width for SQL-92 clients. |
| Max Size | Fill-in for the maximum size of a BLOB or CLOB field. |
| Desc. | An editor widget for the field's description. |
| View As | The View As expression for the field. |
| Validation | The validation expression for the field. |
| Val Msg | The validation message and string attribute for the field. |
Follow these steps to add a PFIELD object:
Choose → from the Tabletop menu. The New Object window appears.

Select PFIELD from the Type drop-down list.
From the Pmodule drop-down list, select the Product Module to which the new PFIELD object belongs. Only Product Modules associated with the current Workspace Module appear in the list.
Enter the object group, object name, data type and extent.
Choose the Save Record button. A warning dialog appears to confirm the object creation.
Choose the OK button to complete the addition of the PFIELD object. The new PFIELD object appears on the Tabletop's object browse.
Close the New Object window if you have no more PFIELDs to add.
Follow these steps to edit the Field folder:
From the object browse, select a PFIELD object that is checked out.
Open the Object Properties window, and then choose the Field folder tab. The Field folder opens.
Edit the folder as desired. Choose the Save Record button to complete your entry in the folder.
The PFIELD must be checked-out in order to be modified. If you have used the field in an index, you cannot change the extent of the field.
![[Note]](../images/admon/note.png) | |
Changing the data type or extent of a field might cause loss of data in your application database. Roundtable does provide a mechanism for transforming the data from one type to another during the schema update process, but you often have to write your own data conversion routines. See Section 4.8, “Database Schema Updates”. |
Follow these steps to change the data type or extent of a field.
From the object browse on the Tabletop, select a PFIELD object.
Open the Object Properties window, and then choose the Field folder tab. The Field folder opens.
Change the data type and/or extent of the field, as desired.
Choose the Save Record button to complete the data type and extent change.
A field validation is an expression that must be true before you can leave the field. The PFIELD object must be checked out for its validation to be changed:
Follow these steps to edit a field validation:
From the object browse on the Tabletop, select a PFIELD object.
Open the Object Properties window, and then choose the Field folder tab. The Field folder opens.
Edit the validation expression and message as desired.
Choose the Save Record button to complete your changes.
The View As phrase provides a default expression used to display the field as a GUI widget.
Follow these steps to edit a view-as phrase:
From the object browse on the Tabletop, select a PFIELD object.
Open the Object Properties window, and then choose the Field folder tab. The Field folder opens.
Edit the view-as phrase as desired.
Choose the Save Record button to complete your changes.
The PFIELD Object Report prints the field definition information for a selected field.
Follow these steps to print the report:
From the object browse on the Tabletop, select the PFIELD object.
Choose → → from the Tabletop menu. The PFIELD Object Report window appears.
Confirm or modify the object specification, and then choose the OK button.
The hierarchy of the selected schema object can be viewed in a treeview format. The level to which you can explore is based upon whether you are viewing by version or by a Workspace event. When viewing by version, only the immediate children known to the selected object can be displayed in the treeview. When viewing by Workspace event, the entire hierarchy can be explored based on the context of the selected event history item.
Follow these steps to view the schema object hierarchy:
From the Tabletop, select the schema object version.
Double-click the selected object version. The schema view window appears.
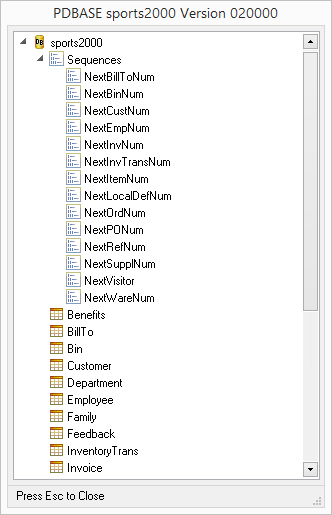
Chose ESC to close the window.
![[Note]](../images/admon/note.png) | |
To view by event history, double-click the event at which you wish to view the schema from the Object Workspace History view. |
The hierarchy of the selected schema object can be compared and the results displayed in a treeview format. The level to which the comparison is built is based upon whether you are comparing by version or by a Workspace event. When comparing by version, only the immediate children known to the selected object can be compared. When comparing by Workspace event, the entire hierarchy can be compared based on the context of the selected event history item.
From the Tabletop, select the schema object you wish to compare.
Choose the VisDiff button from the Tabletop toolbar. The visual compare dialog appears.
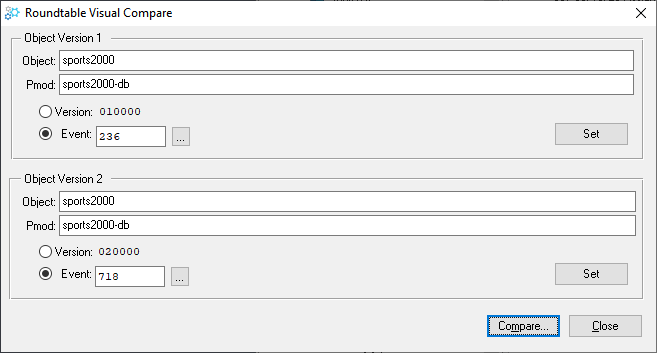
Set the version or event you wish to compare.
Chose the Compare button. The schema compare windows appears.
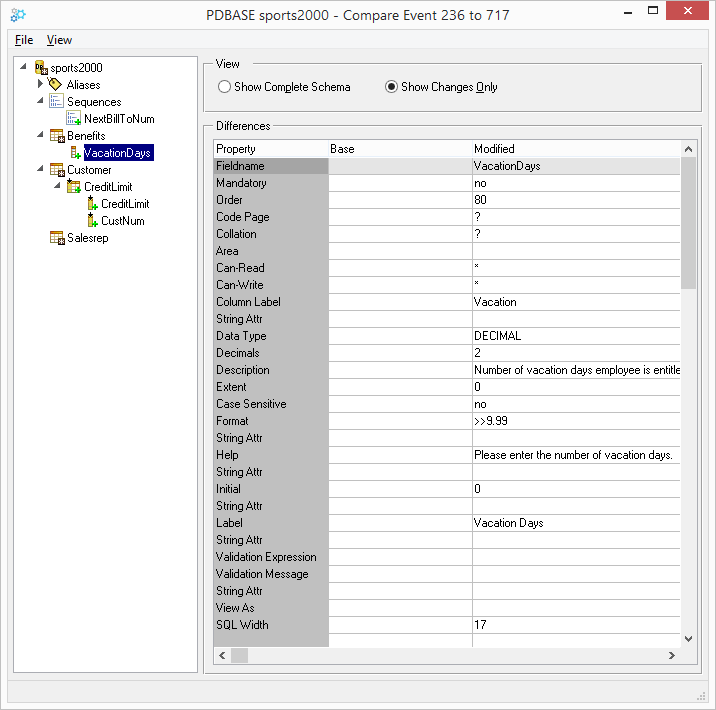
Choose ESC to close this window.
In order to apply the definitions provided by PDBASE, PFILE, and PFIELD objects to a physical Workspace database, the objects must be assembled into a logical database schema. Logical database schemas are constructed using the Logical Schema Manager window.
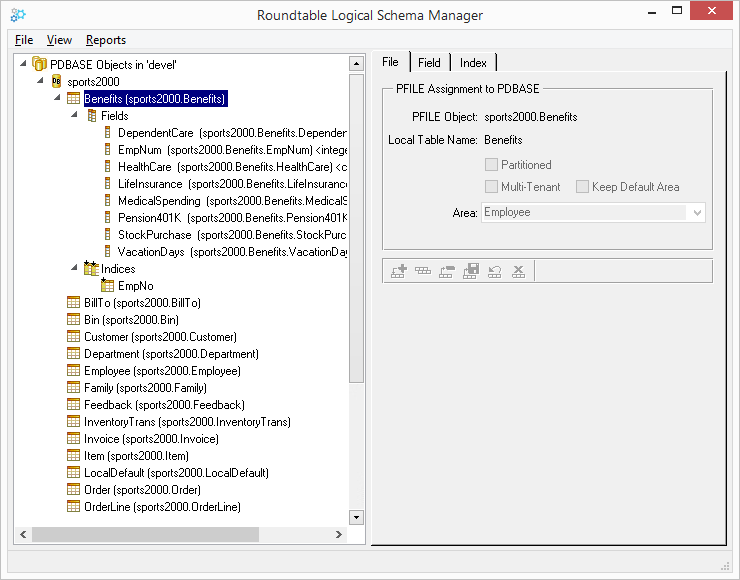 |
The following items are on the Logical Schema Manager window:
| Item | Description |
|---|---|
| TreeView | A hierarchical tree showing databases, tables, fields and indices that form a database schema. Database schemas are represented with the following icons: |
| File folder | Manages the assignment of a PFILE objects to a PDBASE object. |
| Field folder | Manages the assignment of PFIELD objects to a PFILE object. |
| Index folder | Manages the definition of indices for a PFILE object. |
The nodes of the Logical Schema Manager TreeView are expanded, collapsed and selected as in similar applications, such as Windows Explorer.
A database is comprised of one or more tables. Define these tables by assigning PFILE objects to the PDBASE object that defines the database. To see the tables in a database, expand the database's node in the Logical Schema Manager's TreeView. If the PDBASE object is checked out, you can create, edit, or delete table assignments.
The details of table assignments are shown on the File folder of the Logical Schema Manager window.
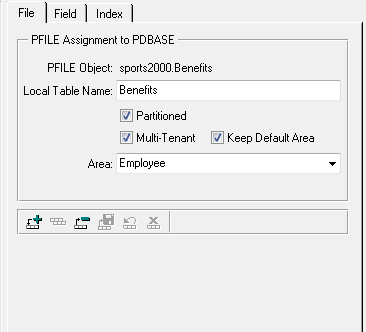 |
| Field | Description |
|---|---|
| PFILE Object | Displays the name of the PFILE object definition. |
| Local Table Name | A fill-in for the name of the table in the database. The local table name may be different than the name of the PFILE object. For example, the PFILE object name may be "sports.customer" while the local table name is "customer". |
| Area | The database storage area name for the table. You may select an existing name from the drop-down list, type in any name, or leave this value blank. |
| Multi-tenant | Check to add or enable the table as multi-tenant. The table will be added or updated as multi-tenant during a schema update. The appropriate multi-tenant attributes will also be written out to the corresponding .DF file when a schema deployment is performed. This check box is active when the PDBASE object is enabled for multi-tenancy. |
| Keep Default Area | Check to indicates that the default area is to be kept for the default tenant. This check box is active when the PDBASE object is enabled for multi-tenancy. |
| Partitioned | Check to add or enable the table as partitioned. The table will be added or updated as partitioned during a schema update. The appropriate partition attributes will also be written out to the corresponding .DF file when a schema deployment is performed. This check box is active when the PDBASE object is enabled for table-partitioning. |
Follow these steps to add tables to a database by assigning one or more existing PFILE objects to the PDBASE object:
Choose → from the Tabletop menu. The Logical Schema Manager window opens.
In the Logical Schema Manager TreeView, select the database to assign a table to.
![[Note]](../images/admon/note.png)
The PDBASE object associated with the database must be checked-out to your current task.
Choose the File folder tab. The File folder appears.
Choose the Add Record button on the File folder's toolbar. The Assign PFILE to PDBASE dialog box appears.
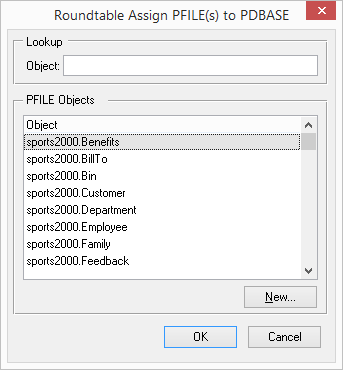
Select one or more PFILE objects to assign. You can add a new PFILE object to the list by choosing the New button. After selecting the desired PFILE object(s), choose the OK button.
If adding a single PFILE assignment, the cursor is placed on the Local Table Name field. The Local Table name will be the name of the table in the physical database schema. Enter an appropriate name, and then choose the Save Record button. When adding multiple PFILE assignments, the Local Table Name for each PFILE assignment defaults to the unqualified object name. To change the Local Table Name of a PFILE assignment, see Section 6.6.10.1.3, “Changing Local Table Name”.
(Optional) Enter or select a database storage area for the table.
![[Note]](../images/admon/note.png)
The table will be placed in the specified area only when it is newly added to a database during a schema update, and the named storage area exists in the target database. If no area is named, or the named area does not exist in the target database, the table will be placed in the default Schema Area.
Using the New button on the Assign PFILE to PDBASE dialog, you can create a new PFILE object from within the Logical Schema Manager.
To create a new PFILE object, perform the following steps:
Choose the New button on the Assign PFILE to PDBASE dialog. The New Schema Object Dialog appears:
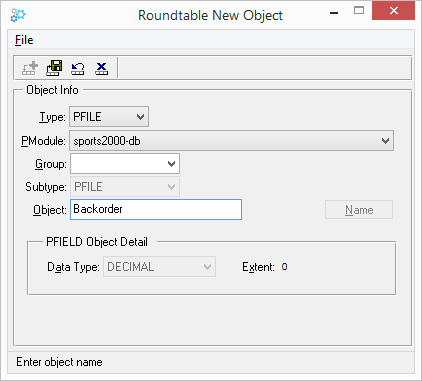
Complete the New Schema Object dialog by selecting the proper Product Module, and object Group, and providing an object name.
Choose the OK button. The newly added PFILE object appears in the browse on the Assign PFILE to PDBASE dialog.
Although you are able to add a new table from within the Logical Schema Manager Window, you should set the particular properties (such as Dump Name and Validation properties) for the table using the Object Properties Window, that is opened via the Roundtable Tabletop.
You can delete a table from your database by removing the PFILE assignment that defines the table. Deleting the PFILE assignment does not delete the PFILE object.
Follow these steps to delete a table:
Choose → from the Tabletop menu. The Logical Schema Manager window opens.
In the Logical Schema Manager TreeView, select the table to remove.
![[Note]](../images/admon/note.png)
The PDBASE object associated with the database must be checked-out to your current task.
Choose the File folder tab. The File folder appears.
Choose the Delete Record button on the File folder's toolbar. A warning dialog box appears.
Choose the Yes button to remove the table assignment. Roundtable deletes the table from the database but does not delete the associated PFILE object.
The local table name is the name of the table seen in the OpenEdge database. When you assign a PFILE object to a PDBASE object to create a table, you specify the local table name.
To change the local table name of a PFILE assigned to a PDBASE follow these steps:
Choose → from the Tabletop menu. The Logical Schema Manager window opens.
In the Logical Schema Manager TreeView, select the table to rename.
![[Note]](../images/admon/note.png)
The associated PFILE object must be checked-out to your current task.
Choose the File folder tab. The File folder appears.
Enter the new Local Table Name in the field provided.
Choose the Save Record button to save your change.
The properties for the PFILE object associated with the table can be viewed and/or edited (if the PFILE object is WIP in the current Task) from within the Logical Schema Manager window.
To view and/or edit the properties of the associated PFILE object follow these steps:
Select the table in the Logical Schema Manager's TreeView.
Choose → from the Logical Schema Manager window menu. The PFILE Object Properties dialog appears.
Edit (if applicable) the necessary properties, and then press the OK button.
![[Note]](../images/admon/note.png) | |
For a description of PFILE object properties see Section 6.6.6.1, “Table Folder Description” |
A table is comprised of one or more fields. Define these fields by assigning PFIELD objects to the PFILE object that defines the table. To see the fields in a table, expand the Table's node in the Logical Schema Manager's TreeView. If the PFILE object is checked out, you can create, edit, or delete PFIELD object assignments to change the field definitions of the table.
The details of field assignments are shown on the Field folder of the Logical Schema Manager window.
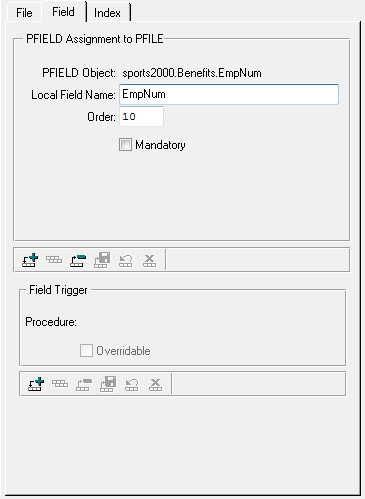 |
| Field | Description |
|---|---|
| PFIELD Object | A fill-in for the name of the PFIELD object definition. |
| Local Field Name | A fill-in for the name of the field in the file. The local field name may be different than the name of the PFIELD object. For example, the PFIELD object name may be customer.name while the local field name is "name". |
| Order | A fill-in for the field ordering value. |
| Mandatory | A toggle box that indicates whether this field is required. |
| Code Page | When assigning a CLOB field, use this drop down list to select the appropriate code page for the field in the selected database. The list appears only when assigning a CLOB field. |
| Collation | When assigning a CLOB field, use this drop down list to select the appropriate collation for the field in the selected database. The list appears only when assigning a CLOB field. |
| Area | When assigning a LOB field, the database storage area name for the LOB field. You may select an existing name from the drop-down list, type in any name, or leave this value blank. |
| Trigger Procedure | A fill-in for the name of a field trigger procedure. |
| Overridable | A toggle box that indicates whether applications using the database can override the specified field trigger. |
You can add fields to the table by assigning an existing PFIELD definition. The PFILE object must be checked out for new fields to be added.
Follow these steps to assign an existing PFIELD object:
Choose → from the Tabletop menu. The Logical Schema Manager window opens.
In the Logical Schema Manager TreeView, select the table to assign a field to.
![[Note]](../images/admon/note.png)
The associated PFILE object must be checked-out to your current task
Choose the Field folder tab. The Field folder appears.
Choose the Add Record button on the toolbar beneath the PFIELD to PFILE Assignment panel. The Assign PFIELD to PFILE dialog appears.
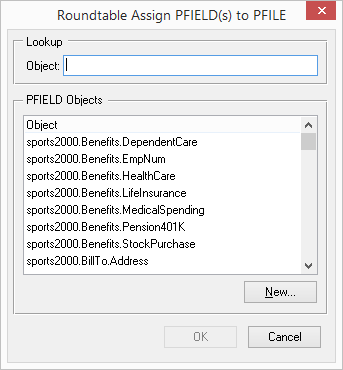
Select one or more PFIELD objects to assign to the PFILE object. You can add a new PFIELD object to the list by choosing the New button. After selecting the desired PFIELD object(s), choose the OK button.
If you selected multiple PFIELDs, default values for Local Field Name, Order and Mandatory data are supplied. To change these values, see Section 6.6.10.2.3, “Editing a Field Assignment”.
If you selected a single PFIELD, continue with the steps below:
Enter the appropriate Local Field Name, Order, and Mandatory data on the Field folder.
(Optional) When adding a CLOB field, you may also select a Code Page and Collation from the drop-down lists for those fields.
(Optional) When adding any LOB field, you may also specify a database storage area, either by selecting an area name in the drop down from the Area field, or typing in another name.
![[Note]](../images/admon/note.png)
The LOB field will be placed in the specified area only when it is newly added to a database during a schema update, and the named storage area exists in the target database. If no area is named, or the named area does not exist in the target database, the LOB field will be placed in the default Schema Area.
Choose the Save Record button to complete the field assignment.
Using the New button on the Assign PFIELD to PFILE dialog, you can create a new PFIELD object from within the Logical Schema Manager.
To create a new PFIELD object, perform the following steps:
Choose the New button on the Assign PFIELD to PFILE dialog. The New Schema Object Dialog appears:
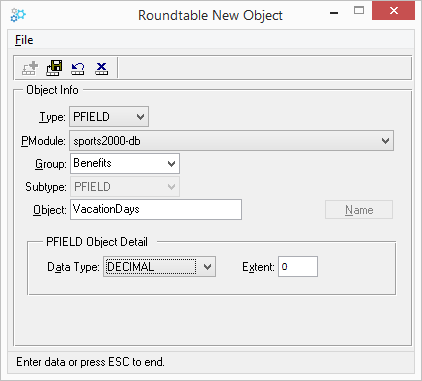
Complete the New Schema Object dialog by selecting the proper Product Module, Data Type, and object Group, and providing an object name and proper field extent.
Choose the OK button. The newly added PFIELD object appears in the browse on the Assign PFIELD to PFILE dialog.
Although you are able to add a new field from within the Logical Schema Manager Window, you should set the particular properties (such as Label and View-As properties) for the field using the Object Properties Window, that is opened via the Roundtable Tabletop.
Follow these steps to edit a PFIELD assignment:
Choose → from the Tabletop menu. The Logical Schema Manager window opens.
In the Logical Schema Manager TreeView, select the field to edit.
![[Note]](../images/admon/note.png)
The associated PFIELD object must be checked-out to your current task.
Edit the Field folder data as necessary.
Choose the Save Record button to complete the field assignment changes.
When you delete a PFIELD assignment from a PFILE object, you are not deleting the PFIELD object from the Workspace, only its assignment to the PFILE.
Follow these steps to delete a PFIELD assignment.
Choose → from the Tabletop menu. The Logical Schema Manager window opens.
In the Logical Schema Manager TreeView, select the field to delete.
![[Note]](../images/admon/note.png)
The PFILE object for the associated table must be checked-out to your current task.
Choose the Delete Record button on the toolbar beneath the PFIELD Assignment to PFILE panel on the Field folder. A warning dialog box appears. Choose the Yes button to delete the field assignment.
The properties for the PFIELD object associated with the field can be viewed and/or edited (if the PFIELD object is WIP in the current Task) from within the Logical Schema Manager window.
To view and/or edit the properties of the associated PFIELD object follow these steps:
Select the field in the Logical Schema Manager's TreeView.
Choose → from the Logical Schema Manager window menu. The PFIELD Object Properties dialog appears.
Edit (if applicable) the necessary properties, and then press the OK button.
![[Note]](../images/admon/note.png) | |
For a description of PFIELD object properties see Section 6.6.7.1, “Field Folder Description” |
A table can have multiple indices. Define these indices through the Index folder. To see the indices in the table, open the Logical Schema Manager window, and then expand the associated table node in the TreeView. If the PFILE object is checked out, you can create, edit or delete indices for the table.
The details of an index are shown on the Index folder of the Logical Schema Manager window described below:
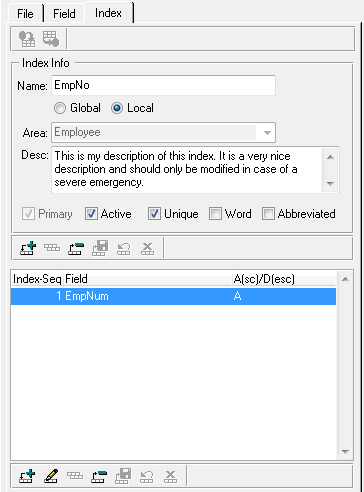 |
| Field | Description |
|---|---|
| Name | A fill-in for the name of the index. |
| Desc | An editor widget for the description of the index. |
| Global / Local | A radio-set to indicate whether the selected index is to be updated as a global or local index. This value will only be considered when the PFILE object to which the index belongs is assigned to its parent PDBASE as partitioned. |
| Area | The database storage area name for the index. You may select an existing name from the drop-down list, type in any name, or leave this value blank. |
| Active | A toggle box that indicates the Active status of the index. This allows you to deactivate the indices on the table during an update schema process. Note that you would then need to manually re-index. See Section 4.8.4, “Toggle Index to Activate/Deactivate” for more information |
| Unique | A toggle box that indicates whether duplicate keys are allowed. |
| Word Index | A toggle box that indicates whether the index is to be a word index. |
| Primary Index | A toggle box that indicates that the index is the primary index for the table. |
| Abbrev Index | A toggle box that indicates whether the last description field can be abbreviated. |
| Fields in index (unlabeled) | A table that displays the fields in the index. Each index must have at least one field. |
Follow these steps to add an index:
Choose → from the Tabletop menu. The Logical Schema Manager window opens.
In the Logical Schema Manager TreeView, select the table to add an index to.
![[Note]](../images/admon/note.png)
The associated PFILE object must be checked-out to your current task.
Choose the Index folder tab. The Index folder appears.
Choose the Add Record button on the toolbar beneath Index Info panel.
Edit the Index Info (Name, Description, Active, Unique, Word Index, Primary Index, Abbreviated Index, and Storage Area) to define the new index.
![[Note]](../images/admon/note.png)
The index will be placed in the specified area only when it is newly added to a database during a schema update, and the named storage area exists in the target database. If no area is named, or the named area does not exist in the target database, the index will be placed in the default Schema Area.
Choose the Save Record button. You can now add fields to the new index.
Choose the Add Record button on the toolbar beneath the index fields browse on the lower portion of the Index folder. A new row appears in the index fields browse.
Verify or edit the field sequence number, then position the cursor to Field column
Type in the local field name of the field to be added to the index.
Choose the Save Record button to complete the field addition.
Repeat steps 7-10 for each field to be added to the index.
Choose the Commit button to complete the index addition.
Follow these steps to delete an index.
Choose → from the Tabletop menu. The Logical Schema Manager window opens.
In the Logical Schema Manager TreeView, select the index to delete.
![[Note]](../images/admon/note.png)
The PFILE object for the associated table must be checked-out to your current task.
Choose the Delete Record button on the toolbar beneath Index Info panel. A warning dialog box appears to confirm the index deletion.
Choose the Yes button to delete the index.
Follow these steps to rename an index:
Choose → from the Tabletop menu. The Logical Schema Manager window opens.
In the Logical Schema Manager TreeView, select the index to rename.
![[Note]](../images/admon/note.png)
The PFILE object for the associated table must be checked-out to your current task.
Enter a new index name in the Index Info panel on the Index folder.
Choose the Save Record button to complete your index rename.
There are a variety of actions that can be taken on a Workspace object. The following sections describe the actions that are common across all object types.
The assign process allows you to extract any completed version of any object from the Roundtable repository and assign it to the current Workspace. It becomes available in the Workspace Module that is associated with the Product Module to which the object belongs. If the object already exists in the Workspace, the current object version is overwritten by the newly assigned object version.
Follow these steps to assign an object version to the current Workspace:
Choose → from the Tabletop menu. The Assign Object dialog box appears.
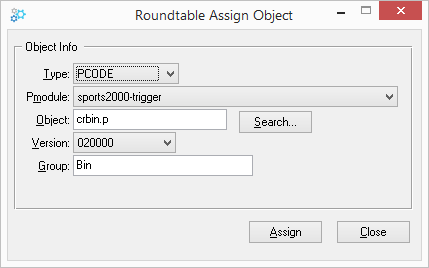
Fill in the values in the dialog box to specify the object version to assign.
To lookup an object, choose the Search button. The Object Lookup dialog box appears.
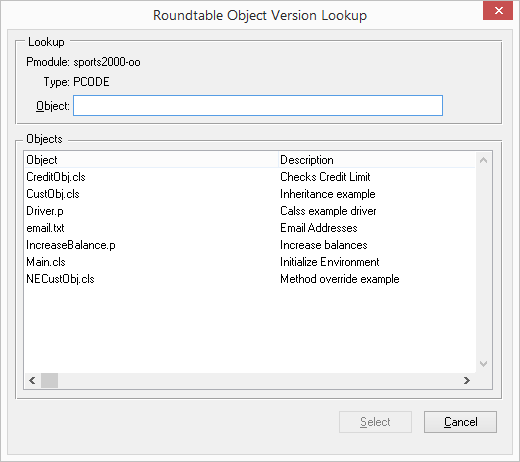
As you type in the Object field, the Objects list shows objects matching your entry. Highlight the object you want then choose the Select button.
From the Version drop-down list on the Assign Object dialog, select the version number of the object to assign.
Choose the Assign button to complete the assignment. Roundtable assigns the selected object to the Workspace.
Deleting an object allows you to remove an object version assignment from the Workspace. Deleting a completed object only removes the reference to the object from the current Workspace. It does not remove it from the repository.
Follow these steps to delete an object.
Choose the object to delete from the object browse table in the Tabletop.
From the Tabletop menu, choose → . The Delete Object dialog box appears.
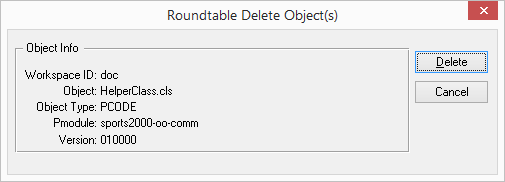
The Delete Object dialog contains the Object name, Object Type, Product Module and Version of the selected object.
Choose the Delete button.
![[Note]](../images/admon/note.png)
If the object to be deleted has a status of W (work in process), you will be warned of lost changes before proceeding.
If another version of the object was previously assigned to the Workspace, you will be prompted to revert to the previously assigned version.
Checking-out an object allows you to edit the version currently assigned to the Workspace (or replace it with a Lab object), and associates the new version with the active Task.
![[Note]](../images/admon/note.png) | |
You cannot check out an object that already has a W (work in process) status because it is already checked out by another Roundtable user. |
Follow these steps to check out an object.
Choose the object to check out from the object browse table in the Tabletop.
Choose the Check Out button. The Check Out dialog box appears.
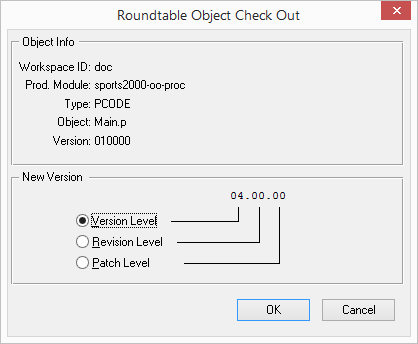
The Check Out dialog box contains the Product Module, object name, and current version number for the selected object.
Choose whether you want to increment the Version Level, Revision Level, or Patch Level number by selecting the respective radio button.
Determine the level according to your company's policy. A patch might be used for a minor change, a revision for a major change, and a version for a complete overhaul.
![[Note]](../images/admon/note.png)
If a default Checkout Level has been set for the Workspace, and the Group that the User belongs to does not have Checkout Level access, then this radioset will be disabled. The User can change the checkout level only if no default checkout level has been set for the Workspace or if the User's Group has checkout level permission.
Choose the Increment button. The selected level increases by one. For example, if the version number was 010000 and you choose to increment the revision level, the new version number would be 010100.
When checking-out a Workspace object, if the source of the OS file in the Workspace directory differs from the source in the repository, when an object is checked out, a warning dialog appears. You may select one of the two files to work with or cancel the operation.
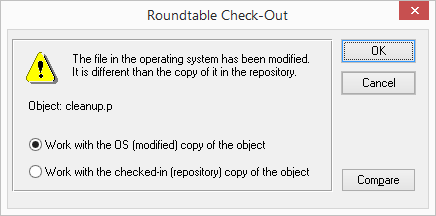
This resolves the discrepancy, or if there is none, and the object is now checked out into your Task.
Roundtable allows you to create more than one variation of the same object called a variant. Variants have the same name and type but belong to different Product Modules. See Section 4.7, “Object Variants”.
Follow these steps to create an object variant. When you create an object variant, it will be Version 1.0.0, with a Work In Process (WIP) status. The original object cannot be WIP when you are creating a variant of it.
From the Tabletop menu, choose → . The Create Object Variant dialog box appears.
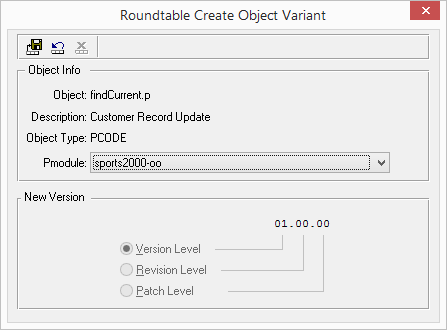
![[Note]](../images/admon/note.png)
You must have a Module selected in the Tabletop TreeView to enable the Create Object Variant menu item.
Select the new Product Module that your new object variant will be assigned to. This must be a different Product Module than the one that the original object is assigned to.
Choose the Save Record button. The following dialog box appears:
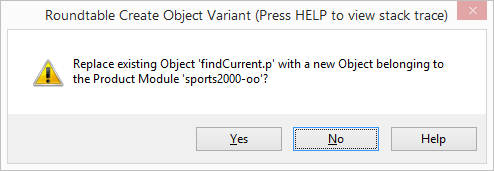
Choose Yes. The object variant is created and displayed, and you are returned to the Tabletop. You can see that your new object variant is Version 1.0.0, and its status is WIP. You can also see that this object's Product Module is the one that you specified in the previous step. Your new custom variant is now a part of your Workspace. The original object variant is no longer assigned to this Workspace.
Checking-in an object commits the changes made to the selected object version to the repository.
![[Note]](../images/admon/note.png) | |
You cannot check in an object until it has an update status of Current. A PCODE object's update status is changed to Current when the object has a Share Status of Central and a successful compile with xref has been performed. A schema object's update status is changed to Current after a successful schema update process. The check in process changes the object's status to C (complete) and permanently stores the contents of the object version in the repository. |
Follow these steps to check in an object:
From the object browse table in the Tabletop, select the object you want to check in.
Choose the Check In button. The Object Completion dialog box appears.
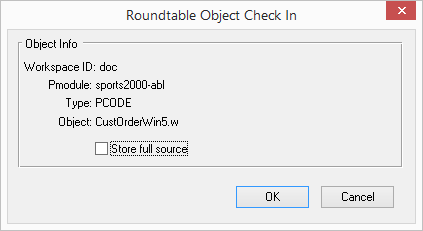
(Optional) Toggle Store Full Source on to store the full source code or off to store just the changes in the repository. This option is not shown for schema objects or PCODE objects that track binary files because these objects are not stored as incremental differences.
Choose the OK button. The object version is stored permanently in the repository and the Status of the object is changed to C (complete).
Roundtable allows for private, parallel development of PCODE and DOC objects through Task Labs (See Section 5.6, “Task Labs”). The following sections describe the available actions for Lab objects.
When an object is added to the Lab for the currently selected Task, a copy of the object source for the most recently assigned completed version of object will be placed into the Lab.
![[Note]](../images/admon/note.png) | |
You cannot have the same object both in the Lab and checked-out in the same Task. |
Follow these steps to add an object to the Lab for the currently selected Task:
In the object browse, select the object to be added to the Lab.
From the object's context menu, choose .
When a Lab object is compiled, only its r-code in the Task directory will be updated. Neither the Workspace content nor the Workspace cross-references will be affected. Selective compile is not available for Lab objects.
Follow these steps to compile a Lab object:
Select the object to compile in the object browse of the Lab view.
From the object's context menu, choose or click the Compile button on the Tabletop toolbar.
Checking-out a Lab object will remove the object from the Lab and create a new WIP object in the Workspace with the Lab object's content. A Lab object cannot be checked-out if it is dirty (and not reviewed) or if the Workspace object is WIP. You must have appropriate object permissions in the selected Workspace to check out a Lab object.
Follow these steps to check out a Lab object:
Select the object to check out in the object browse of the Lab view.
Choose from the object's context menu or choose the Check Out button on the Tabletop toolbar.
See Section 6.7.3, “Checking-out an Object” for instructions on completing the checkout process.
Objects in a Lab may be deleted from the Lab at any time. Deleting Lab objects will not affect the Workspace content.
Follow these steps to delete an Object from the Lab for the currently selected Task:
Select the object to be deleted in the Lab view.
Press the Del key, or choose from the object's context menu. The Delete Lab Object confirmation message appears.
Choose the button to confirm the deletion.
![[Warning]](../images/admon/warning.png) | |
All source for the Lab object will be deleted from the file system. |
The content of a Lab object can be compared with the content of other object versions. To facilitate Review (See Section 6.8.6, “Review a Lab Object” below), a Lab object will be compared to its corresponding Workspace object by default. However, the object version to compare to the Lab object may be changed in the Roundtable Visual Compare window (See Section 7.7, “Visual Difference” for details on using the Visual Difference tool).
Follow these steps to compare a Lab object with its corresponding Workspace object:
Select the object to be compared in the Lab view.
From the Lab object's context menu, choose → or choose the VisDiff button on the Tabletop toolbar.
The Lab context menu can also be used to quickly compare a Lab object to the original version on which it was based.
Select the object to be compared in the Lab view.
From the Lab object's context menu, choose → .
If the Workspace object associated with the a Lab object (the object upon which the Lab object is based) is modified after the object is added to the Lab, the Lab object becomes "dirty", as reflected in the Lab object's Dirty flag. Dirty Lab objects cannot be checked-out until they are marked a reviewed via the Lab object's Reviewed flag, allowing the merging of any changes from the Workspace object as required.
Once the differences between the Workspace object and the Lab object have been reviewed and merged (as required), follow these steps to update the Lab object's Reviewed flag:
Select the object to be updated in the Lab view.
From the Lab object's context menu, toggle .
As with a WIP object in a Workspace, update notes can be entered for a Lab object. If the Lab object is checked-out into the Workspace, the update notes entered for the Lab object will be transferred to the resulting WIP object.
Follow there steps to enter update notes for a Lab object:
Select the object to be updated in the Lab view.
From the Lab object's context menu, choose . The Lab Object Properties dialog is displayed.
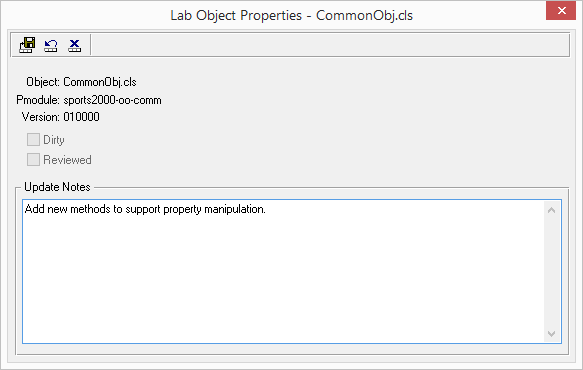
Enter the notes in the Update Notes area of the dialog.
Choose the Save Record button.
There are a number of reports you can access to provide information on the objects managed by Roundtable. The available reports include:
Version in Product Module Report: Shows the history of the development of object versions for the currently selected object in a specified Product Module.
Version in Workspace Report: Shows the history of the development of object versions for the currently selected object in specified Workspace.
Cross-reference reports, including:
Xref Report: Shows what other objects the selected object uses.
Where Used Report: Shows where a selected object is used in the system.
Object Usage Report: Provides a diagram of the call sequences to a selected program.
Call Diagram Report: Provides a diagram of the calls between the programs in your system.
Informal Xref: Provides a list of each object that uses a specified informal object. Informal objects include shared variables, shared workfiles, etc.
Unused Object Report: Shows the registered objects in your system that aren't being used by other objects.
External Objects Report: Shows the objects that are referenced by objects in the Workspace, but aren't defined in the Workspace as objects.
Index Usage Report: Provides a list of all programs that use a specified table index.
Class Details Report: Shows the details for a specified class, including class hierarchy, implemented interfaces, direct known subclasses, methods, and data members.
The Versions in Product Module Report provides a history of the development of an object's versions for a selected Product Module. This report helps to identify and integrate changes made to an object in different workspaces.
The report provides:
Object
Versions of the object
Status of the object
Notes
The Versions in Product Module Report window identifies the scope of the report.
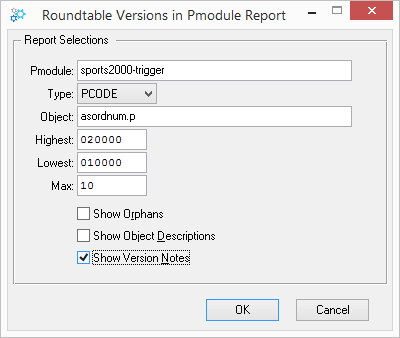 |
| Field | Description |
|---|---|
| Product Module | A drop-down list to select the Product Module. |
| Object type | A drop-down list from which you select the type of object. |
| Object | Enter the name of the object. |
| Lowest Version | Enter the starting version. |
| Highest Version | Enter the ending version. |
| Max Versions | Enter the maximum number of versions printed. This prevents excessive numbers of versions from being printed when you are not sure how many versions exist across the version range specified. |
| Show Orphans | A toggle box to print orphans. Orphans exist when you create a version of an object based on a version that is not the most recent version in the repository. |
| Show Object Descriptions | A toggle box to print full details for each object. |
| Show Version Notes | A toggle box to print the history notes for the object. |
Follow these steps to print the Version in Product Module Report:
Choose → → from the Tabletop menu. The Report window appears.
Enter report criteria, and then choose the OK button.
The Versions in Workspace Report will display the version notes for all versions of an object in any Product Module of the current Workspace. This report shows the development of an object across one or more Product Modules
The report provides:
Object
Versions of the object
Product Module
History Notes
The Version Workspace Report dialog box allows user to identify object to examine.
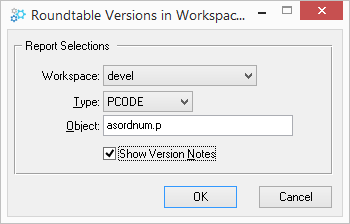 |
| Field | Description |
|---|---|
| Object type | A drop-down list to select the object type. |
| Object | Enter object name. |
| Show Version Notes | A toggle box to print the version notes for the object. |
Follow these steps to print the Versions in Workspace Report:
Choose → → from the Tabletop menu. The Report dialog box appears.
Enter report criteria into the dialog box fields. Choose the OK button.
The Xref Report prints the cross-references for the selected object. For example, to see all the fields used in a PFILE object, print the Xref Report for that PFILE.
Follow these steps to print the Xref Report:
Choose → → from the Tabletop menu. The Xref Report dialog box appears.
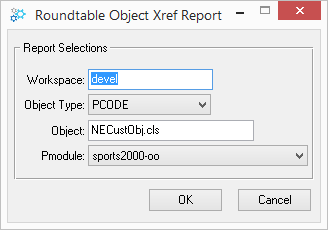
Enter the Product Module, type of object, and name of the object in the dialog box, and then choose the OK button.
The Where Used Report shows where a selected object is used in the system. For example, a Name field might be used in a number of different tables, including an invoice table, a mailing label table, etc.
Follow these steps to print the Where Used Report:
Choose → → from the Tabletop menu. The Where Used Report dialog box appears.
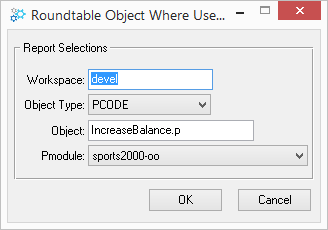
Enter the report options in the dialog box, and then choose the OK button.
The Object Usage Report provides a diagram of the call sequences to a given program. This report is used to:
Find the call sequences that lead to a program or include a file's usage
Find all of the programs that are passed through to reach the specified program
Use this report to ensure that shared buffers and variables are set in the programs that lead to the specified program.
Follow these steps to print the Object Usage Report:
Choose → → from the Tabletop menu. The Object Usage Report window appears.
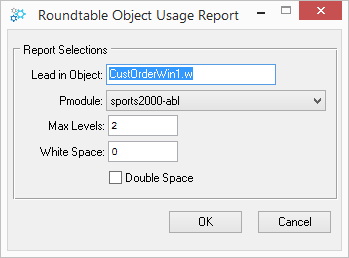
Enter the report options in the window:
Enter the name of the program or include file for which to run the report in the Lead in Program field.
Enter the name of the product module in which the program is located in the Pmodule field.
Enter the maximum number of levels to include in the report in the Max Levels field.
Enter the number of white spaces to use as indents for each level in the White Space field.
Activate the Extra line toggle box to double-space the report.
Choose the OK button.
The Call Diagram Report provides a diagram of the calls to identified Lead in Program.
Follow these steps to print the Call Diagram Report:
Choose → → from the Tabletop menu. The Call Diagram Report window appears.
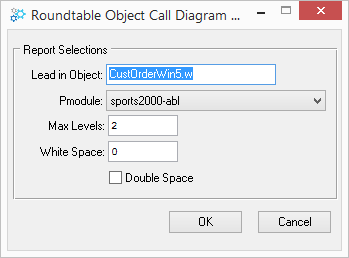
Enter the report options in the window:
Enter the name of the program or include file for which to run the report in the Lead in Program field.
Enter the name of the product module in which the program is located in the Pmodule field.
Enter the maximum number of levels to include in the report in the Max Levels field.
Enter the number of white spaces to use as indents for each level in the White Space field.
Activate the Extra line toggle box to double-space the report.
Choose the OK button.
The Unused Objects Report provides a list of objects that are not referenced by any object in the Workspace. Use this report to track down code that is no longer used in the system.
Some objects that are no longer used in - but assigned to - the Workspace appear on this report. For example, a menu.p program might appear on this report, if it is the root program for entering the system and is not referenced by other objects in the system.
Any objects that are only called via RUN VALUE() statements also appear in the report.
To print the Unused Objects Report:
Choose → → from the Tabletop menu.
The External Objects Report identifies objects that are referenced in the Workspace, but are not defined in the Workspace as objects.
To print the External Objects Report:
Choose → → from the Tabletop menu.
The Index Usage Report shows where a selected index is used in the system.
Follow these steps to print the Index Usage Report:
Choose → → from the Tabletop menu. The Index Usage Report window appears.
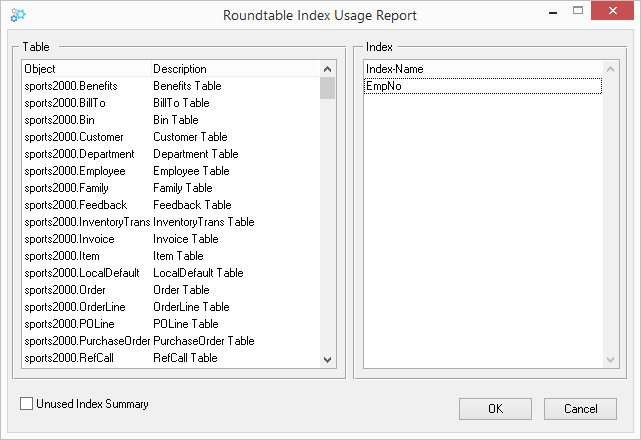
Select the tables and/or indices for the report. If you select multiple tables, all indices in the tables will appear on the report. Selecting the Unused Index Summary toggle box shows all unused indices in the system.
Choose the OK button.
Provides details for a specified class object, including the following:
Class hierarchy
Data members in the class
Methods in the class
Interface implementations (if any)
Direct known subclasses
Follow these steps to print the Class Details Report:
Choose → → from the Tabletop menu. The Object Class Report window appears.
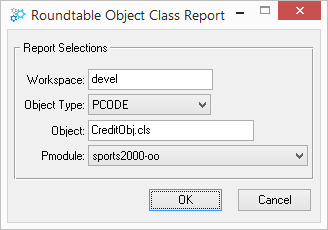
Enter the report options in the dialog box, and then choose the OK button.
Objects Backups are copies of WIP Workspace PCODE Objects or Lab PCODE Objects that are stored in the Roundtable repository database, and provide a means of easily comparing with or reverting to a prior version of saved work.
When the Enable Object Backup System Preference is turned on, a copy of the Object contents are stored on each save of the Object. The Backups are stored per user, per task up to the number of Maximum Backups specified under the System Preferences properties. When the maximum number of Backups is reached, the earliest Backup by timestamp is replaced with the latest copy.
Object Backups are created for WIP PCODE Objects in both Central and non-Central Tasks, as well as Lab Objects.
![[Note]](../images/admon/note.png) | |
| Object Backups are only created for saves that are performed from within an OpenEdge editor. |
The contents of the Backups cannot be manually removed. Backups are automatically purged by the system under the following conditions:
When the WIP Object is checked-in to the Roundtable repository
When the WIP Object is deleted or reverted to a prior version
When the user owning the Backups is deleted from the Roundtable repository
Follow these steps to view an Object Backup:
Select the Backup in the browse of the Backups view.
From the Backup context menu, choose either or .
![[Note]](../images/admon/note.png) | |
| Object Backups cannot be saved. However, a copy of the Backup can be obtained using the menu option. |
Object Backups can be compared with the current Workspace Object or another Object Backup using the configured visual difference application.
Follow these steps to compare an Object Backup with its corresponding Workspace object:
Select the Backup to compare in the Backups view.
From the Backup object's context menu, choose → or choose the VisDiff button on the Tabletop toolbar.
Follow these steps to compare two Object Backups:
Select the Backups to compare in the Backups view.
From the Backup object's context menu, choose → .
Table of Contents
- 7.1. Introduction
- 7.2. Group Checkout Utility
- 7.3. Group Delete Utility
- 7.4. Compiling Tools
- 7.5. Module Load
- 7.6. Test Version Integrity
- 7.7. Visual Difference
- 7.8. Partner Site Replication Window
- 7.9. Server Upload Window
- 7.10. Repository Check Report
- 7.11. Build Names Table
- 7.12. Administrator Toolkit
- 7.13. User Shelves
This chapter documents a number of useful tools provided in the Roundtable environment. These include:
Group Checkout/Change Finder: Check-out multiple objects or find changed objects
Group Delete: Delete multiple objects
Compiling Tools: Compilation rules and utilities available in the system
Module Load: Registers new objects into Roundtable
Test Version Integrity: Compare disk content with repository data
Visual Difference: Compare different versions of objects
Partner Site Replication: Share repository data with a partner repository
Deploying Roundtable Objects to AppServer partitions and WebSpeed brokers using the Server Upload tool.
Shelf Browser: Add, delete, and update files in your personal Shelf.
Repository Check Report: Identify problems in the Roundtable repository database.
The Group Checkout utility provides a flexible way of selecting numerous objects for a quick check-out. Use Workspace module and object group selection criteria to locate a specific group of objects in the Workspace, and then select one or more of the objects to be checked out. Use either a group or individual check-out process to assign new version code values and an initial update note.
The Change Finder utility compares the physical source files of the objects in the selected Workspace Module(s) or Product Module(s) with the contents of those files in the repository. The objects whose files differ appear in a list. This makes it easy to search for changes in the Workspace that were made outside of Roundtable and bring them under version control.
![[Note]](../images/admon/note.png) | |
| You must be an Administrator, have Change Finder privilege, or be logged in as the sysop user to run the Change Finder utility. |
This section explains the various components of the Group Check out window that is available from the → menu option. The window has two folders: Object Selection and Check-Out Options.
 |
The following table lists the elements of the Object Selection folder:
| Element | Description |
|---|---|
| Module | A drop-down list from which you select the Workspace module. Only objects belonging to the specified module appear in the object browse list. Use the Any value to include all of the workspace's modules. |
| Group | A drop-down list from which you select the Workspace module group code. Only objects belonging to the specified group appear in the object browse list. Use the Any value to include all objects in the selected module. |
| Object browse list | This is a multiple-select browse list. Objects selected from this browse list will be checked out when you choose the Check Out button. |
| Select All button | A button that forces all of the objects in the object browse list to be selected. |
| Select None button | A button that deselects any selected objects in the object browse list. |
| Find | This button allows you to reposition the object browse list to an object with the name that you specify. |
| Check Out | Choose this button when you are ready to check out the selected objects. |
| Close | Closes the window. |
The following table lists the elements of the Change Finder folder:
| Element | Description |
|---|---|
| Modules List | A multi-select selection-list from which you can select one or more Workspace Modules or Product Modules to search for changes. |
| Object browse list | This is a multiple-select browse list. Objects selected from this browse list will be checked out when you choose the Check Out button. |
| Select All button | A button that forces all of the objects in the object browse list to be selected. |
| Remove Deleted | A button that removes objects from the Workspace whose source files have been deleted from disk (as indicated by delete in the Action column). |
| Compare | Invokes the configured visual diff application to compare the repository image and source file(s) for the selected changed object. |
The following table lists the elements of the Check-Out Options folder:
| Element | Description |
|---|---|
| Individually | A radio button that indicates that each selected object will be checked out individually. This allows you to choose different version, revision, or patch-level increments for each object. |
| As a Group | A radio button that indicates that the selected objects will be checked out as a group. All the objects are checked out with the Increment Level and Version Note specified. |
| Level | A radio set that allows you to specify whether to increment the version, revision, or patch level of each object being checked out. |
| Version Note | An editor widget for the version update note to attach to each checked out object. |
| Move to | A drop-down list that allows you to move selected objects from one product module to another. Choose <No Change> to simply check objects out without moving them from one Product Module to another. If you choose to move objects to a different Product Module, then a new WIP version of the selected object(s) will be created in the selected Product Module. Increment Level is ignored if you choose to move objects to a different Product Module. |
The Change Finder folder of the Group Checkout utility is used to initiate the Global Change Finder routine. This initiates the comparison of the files in the Workspace that belong to an object with the image of those files stored in the repository. The objects whose files differ are displayed in the object browse on the folder.
After comparing the content of the directory contents of specified Workspace Module(s) with the repository, any object differences are displayed in the object browse. The Action column of the browse indicates one of two values for each object: changed or deleted. The changed action indicates that there are internal differences between the source on disk and the object's repository image. The deleted action indicates that there is no source on disk for the object.
The Group Delete utility provides a flexible way of selecting one or more objects to delete from the current Workspace. Use the Workspace Module tab folder to select by Workspace Module and Object Group, or use the Current Task tab folder to select objects checked-out in the currently selected Task.
Follow these steps to run the Group Delete utility.
Choose → from the Tabletop menu. The Group Delete window appears.
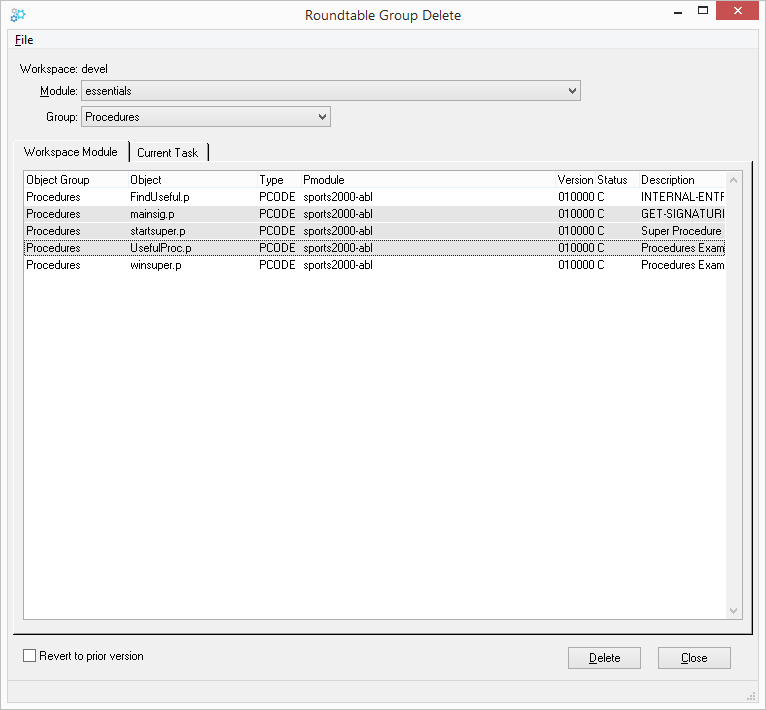
Select the Workspace Module or Current Task tab folder to filter the results.
Select one or more Objects to delete.
Check the Revert to Prior Version toggle-box if you wish to revert to the previously assigned version of the object.
Choose the Delete button to begin the deletion process.
Roundtable provides sophisticated tools for compiling Workspace objects.
Roundtable provides the following compilation options:
Compile
Compile with Xref
Compile with Listings and Xref
Selective Compile
The compile rules are discussed below. These rules are especially important to understand if you are using the Share Status option. When you use a Share Status other than Central, two copies of the same object exist, one in the Workspace and one in the Task directory. The object in the Workspace is the previously completed version and the object in the Task directory is the work-in-process version. For more information on the Share Status option, see Section 5.3.2, “Share Status”.
All the compile options in Roundtable follow the same set of rules. The compile actions taken on an object are governed by the following values:
Selected Task
Object Share Status
R-code, S-code and Server Compile flags specified for the Workspace or Workspace Module
Xref option
When the Share Status of an object is not Central, two copies of the object source exists: one in the Workspace directory structure and the other in the Task directory structure. This makes the impact of some of the following rules rather subtle, so read them carefully.
Compilation of source in a Task directory is always done with the PROPATH precedence of Task directory path, Task Group directory path(s), and then Workspace directory path.
Compilation of source in a Workspace directory is always done with the PROPATH including only the Workspace directory path.
Compilation of source in a Task directory only occurs when the Task owning the directory is selected.
![[Note]](../images/admon/note.png)
Compilation of source in a Task directory will not occur when running in a distributed AppServer configuration and the Workspace or Workspace Module server-compile flag is Yes. Dependent PCODE object r-code is generated in the task directory of the specified task during selective compilation when the ‘Task R-Code’ option is selected and the specified object has a non-Central Share Status.
![[Note]](../images/admon/note.png)
When the object is moved back to Central, the r-code of the dependent objects is removed from the Task Directory. R-code is never generated for the source in Task Group directories.
When an object with a non-Central Share Status is compiled with xref, both the source in the Task directory and Workspace directory will be compiled.
![[Note]](../images/admon/note.png)
The generation of r-code for the Workspace directory source is dictated by the 'Save R-Code' attribute for the version of the source assigned to the Workspace directory. Xref data is only generated for source in the Workspace directory.
Xref data is never generated for the source a Task directory.
Follow these steps to compile an object:
From the object browse table in the Tabletop, select the object you want to compile.
Choose → from the Tabletop menu.
Roundtable performs a compile for the selected Object. If Roundtable finds errors, a procedure window is opened with the error report in it.
Follow these steps to compile an object with xref:
From the object browse table in the Tabletop, select the object you want to compile.
Choose → from the Tabletop menu.
Roundtable performs a compile for the selected object and stores xref data in the repository.
![[Note]](../images/admon/note.png) | |
| Upon successful compilation with xref, the update status of an object will change from Modified to Complete. |
Optionally, you can choose to compile with xref and listings. When this option is selected, the xref, debug and listing output from the OpenEdge compiler is preserved in the Workspace Module directory.
Follow these steps to compile an object with debug listings and xref:
From the object browse table in the Tabletop, select the object you want to compile.
Choose → from the Tabletop menu.
Roundtable performs a compile for the selected Object, stores xref data in the repository and also generates debug and listings files.
Choose → to view the compile listings file.
Choose → to view the debug listings file.
Choose → to view the xrefs file.
Selective Compile allows you to selectively compile many Workspace objects at once. Based on given criteria, the Selective Compile process intelligently selects objects that need to be compiled based on the object update status, or if an object references a modified object.
Follow these steps to selectively compile objects in your Workspace:
Choose → from the Tabletop menu to display the Compile dialog box.
Enter your selective compile options in the Compile dialog box.
Choose the Start Compile button.
Choose the Close button to close the window.
The Selective Compile dialog box allows you to specify criteria for a selective compile. For all fields except the Task number, you can enter an asterisk (*) to signify all (such as all object types, all object names, etc.).
The following table describes the fields in the Selective Compile window:
| Field | Description |
|---|---|
| Task Number | A fill-in for the Task number for the compile. If you enter a Task number, Roundtable restricts its search for objects to those included in the specified Task. If you enter a value of 0, the search is not restricted to any Task. |
| Module | A fill-in for the Workspace Module for the compile or an asterisk (*). If you enter a specific Workspace Module, Roundtable restricts its search for objects to that Workspace Module. |
| PModule | A fill-in for the Product Module for the compile or an asterisk (*). If you enter a specific Product Module, Roundtable restricts its search for objects to that Product Module. |
| Object Group | A fill-in for the group to compile or an asterisk (*). If you enter a specific group, Roundtable restricts its search for objects to that group. |
| Object Type | A combo-box for the specific type of object. Roundtable restricts its search for object to objects of the specified type. |
| Object | A fill-in for the object name or a match expression using an asterisk (*) placeholder (wildcard). For example, you could specify a value of "ar*.p" to restrict Roundtable to searching for objects that begin with "ar" and end with ".p". |
| Filter by Date | Activate this toggle-box to choose a range of dates for object selection. Only objects with event-history between the given dates will be considered. |
| Import List | Activate this toggle-box to only consider objects in the current Workspace Import table for selection. When this option is checked, no other object selection parameters can be specified. |
| Compile with Xref | Activate this toggle-box to create a compile with cross-references. |
| Force Compile | Activate this toggle-box to force each selected object to compile, even if Roundtable doesn't think the object needs compiling. Normally, Roundtable keeps track of which objects should be recompiled. |
| Listings | Activate this toggle-box to generate the fully expanded code and debug listings. These files are saved in the workspace\list\ directory as *.l and *.dbg files. |
| Stop On Error | Activate this toggle-box to stop the compile process whenever a selected object generates a compile error. |
| Task R-Code | Activate this toggle-box to create the r-code for a selected Object’s dependents in the Task directory. This toggle box is enabled when both a Task Number and an Object are specified. |
| Ignore Warnings | Activate this toggle-box to disregard any compile warnings that may be generated. |
| No Dependencies | Activate this toggle-box to only compile Objects matching the given selection criteria. This can increase performance as it will bypass any dependency resolution. However, all Objects requiring compilation may not be selected. |
| Delete R-Code | Activate this toggle-box to delete existing r-code prior to compilation. |
Module Load is a utility program that loads large numbers of PCODE objects into a Workspace managed by Roundtable. To load the objects, Roundtable scans a directory specified by a Workspace module for files that have not already been defined as PCODE objects in your Workspace. By browsing through this table, you can choose the files needed to create PCODE objects.
Prior to using Module Load, you must define your subtypes and products. In addition, you must create the Workspace where the PCODE objects exist.
Module Load is provided as open-source and can be customized. The source for this tool is located in rtb/w/rtb_modload.w. If you modify this program, be sure to keep a copy of your modified program in another directory so that future updates to Roundtable do not overwrite your copy.
Before using Module Load, you need to:
Define Code Subtypes and Products. See Section 3.10, “Configuration Hierarchy”, Section 3.13, “Subtypes”, and Section 3.11, “Products”.
Create the Workspace where the PCODE objects exist. See Section 4.2.4, “Adding a Workspace”.
Assign Workspace Sources. See Section 4.5, “Workspace Sources”.
Create and select a Task. See Section 5.3.4, “Adding a Task” and Section 5.3.7, “Selecting a Task”.
The Module Load window allows you to scan one or more Workspace Modules for new files. The reults are displayed in a multiple-select browse which allows you to select an arbitrary number of files to change their attributes before loading them.
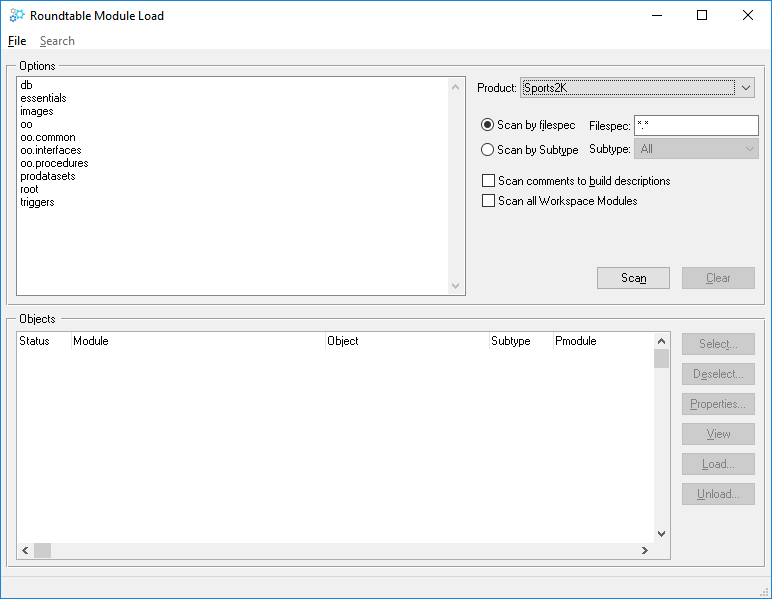 |
The following table lists the Module Load window fields and buttons:
| Field or Button | Description | |||
|---|---|---|---|---|
| Options | Select one or more Workspace Modules to scan. | |||
| Product | This optional drop-down list will be filled with Product definitions that have a Product directory specified and are sourced to the selected Workspace. Select a Product if you want to scan Workspace Modules relative to a Product directory. Otherwise, the scan will be relative to the Workspace directory. | |||
| Scan comments to build descriptions | Activate this toggle-box to build object descriptions from comments in the source file(s). | |||
| Scan all Modules | Activate this toggle-box to scan and load from all Workspace Modules (disables Workspace Module list selection). | |||
| Scan by Filespec | Select this radio button to scan the Workspace Module directory for files matching the filespec that you provide. | |||
| Scan by Subtype | Select this radio button to scant the Workspace Module directory for objects of the selected Code Subtype. | |||
| Filespec | Filespec used when scanning by filespec. | |||
| Subtype | Code Subtype used when scanning by Subtype. | |||
| Scan | Choose this button to scan the Workspace Module directory using the selected scan criteria. | |||
| Clear | Clears the object browse of unloaded objects matching the selected scan criteria. | |||
| Select | Choose this button to select browse objects matching a specified pattern. | |||
| Deselect | Choose this button to deselect browse objects matching a specified pattern. | |||
| Properties | Opens the Module Load properties dialog, that allows you
to change the properties of selected files.
| |||
| View | Choose this button to view the contents of the selected object. | |||
| Load | Choose this button to create Roundtable object records for the selected unloaded object(s). Files that have been loaded are indicated by a status of "Done". | |||
| Unload | Deletes the Roundtable object records created by the load process for the selected source files. Choose Unload if you change your mind about some files that you loaded. Only files with a status of "Done" can be unloaded. | |||
| Browse Fields | ||||
| Status | New indicates that the PCODE object has not been created. "Done" indicates that a PCODE object was created for the source file. | |||
| Module | The Workspace Module of the source file. | |||
| Object | The name of the source file. | |||
| Sub Type | The name of the Subtype to assign to the new PCODE object The Subtype can be changed through the Properties dialog box. This field is blank if the Subtype has not been assigned yet. A file cannot be loaded until a Subtype has been assigned to it. | |||
| Pmodule | The Product Module that the PCODE object will be assigned to. The Pmodule can be changed through the Properties dialog box. This field is blank if the Subtype has not been assigned yet. A file cannot be loaded until a Subtype has been assigned to it. | |||
| Object Group | Used for sorting objects within a module. The Object Group can be changed through the Properties dialog box. | |||
| Fullpath | The fully qualified path and name of the source file. | |||
To change the properties of one or more selected objects, choose the Properties button. The Roundtable Code Properties dialog box appears.
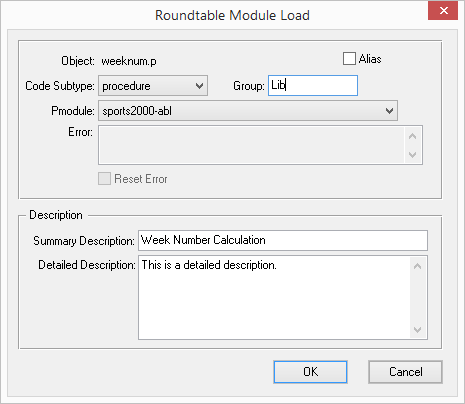 |
Some of these fields are not editable if you have selected more than one file. Any changes that you make in the Properties dialog box will affect all of the selected files.
The following table lists the Properties dialog box fields:
| Field | Description |
|---|---|
| Object | The object name (display only). |
| Alias | Activate this toggle-box to create an alias object record. |
| Code Subtype | Edits the name of the Subtype to assign to the new PCODE object |
| Group | Edits the group name used for sorting objects within a module. |
| Pmodule | Edits the Product module that the PCODE object is assigned to. |
| Error | Any error message encountered during attempted load of the object. (Display only) |
| Reset Error | Activate the toggle to clear the Error status of an object that failed to load. |
| Summary Description | Provides a short description of the PCODE object. This is used often in reports. |
| Detailed Description | Provides an additional description of the PCODE object. |
Choose the Load button to start the process of creating PCODE objects for the selected files. Only selected files with defined Code Subtypes and Product Modules can be loaded. Files that have been loaded are indicated by a status of "Done". Objects that could not load due to an error are indicated by a status of "ERROR".
You can unload files by choosing the Unload button. Only the selected files with a status of "Done" can be unloaded. The PCODE objects created by the load process are deleted.
Use the test version integrity utility to determine if a file in the Workspace directory has been modified outside of Roundtable. This tool performs a CRC check on the contents of the object in the operating system directory and then compares it with the CRC generated when the object was stored in the repository. If these CRC values do not match then the object has been modified outside of Roundtable. WIP objects cannot be checked in this manner.
Follow these steps to check the version integrity of a PCODE Object:
Select the object to test in the object browse table.
Choose → from the Tabletop menu. The Version Integrity dialog appears:
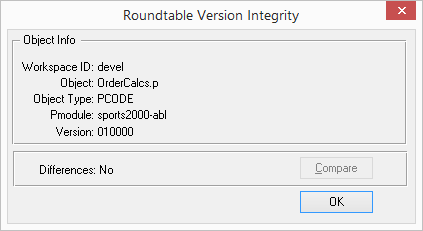
Differences are indicated by "Yes" in the Differences field.
Choose the OK button to close the dialog.
Roundtable provides access to a visual difference application. A visual difference application is a program that allows you to compares two versions of the same file by displaying them in adjacent windows. Typically, these programs tell you which lines of code have been added, deleted, or modified. The added, deleted, and modified content is color-coded for easy identification.
For example, you might need to compare the latest copy of a file to an earlier version to see what changes have been made. Roundtable allows you to compare versions using the configured visual difference application.
The visual difference application is a separate program from Roundtable. You can configure Roundtable to use the visual difference application of your choice, and is configured on a per user basis. See Section 3.6, “User Preferences” on how to configure a visual difference application.
Select an object from the Tabletop object browse.
Choose the VisDiff button from the Tabletop toolbar. The VisDiff dialog appears.
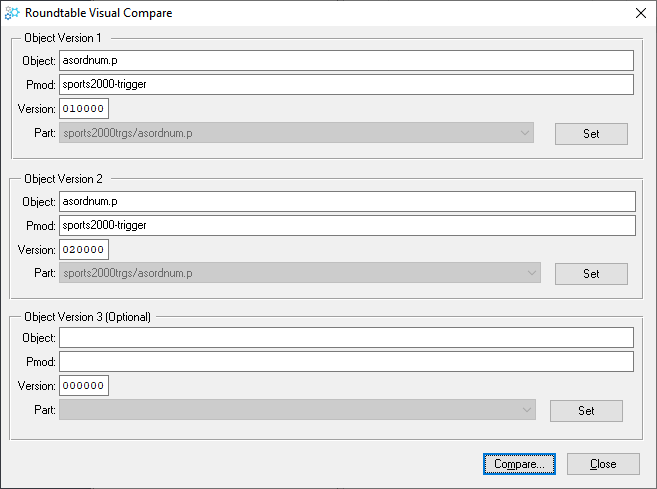
The First Object to Compare panel defaults to the object version that is currently selected in the Tabletop. The Second Object to Compare defaults to the previous version of the object.
If either of the object versions is a multi-part object, you can select the part to compare from the respective Part drop-down-list.
To compare different objects or different versions other than the defaults, select the different object or version (using Versions or Version Ancestry view) on the Tabletop object browse and choose the corresponding Set button (Object Version 1 or Object Version 2) to select that object version for comparison. Alternatively, you can manually enter the version of the Object and choose the OK button.
Choose the Compare button. Roundtable runs the configured visual difference application, passing the files to compare.
![[Note]](../images/admon/note.png) | |
| If you have configured three-way differencing, then up to three versions can be compared. See Section 3.6, “User Preferences”. |
When viewing the versions of a Task via the Versions folder of the Tasks window, you can quickly compare an object version created in the selected Task with its immediately previous version using the configured visual difference application. Follow these steps to visually compare the Task version with the immediately previous version:
Choose a version in the browse on the Versions folder of the Task window.
the browse to show the context menu.
Choose from the context menu. If the object has more than 1 part, you are prompted for the part that you want to compare.
The Partner Site Replication window provides a visual interface for loading Workspace information from a partner development site. Use the Partner Site Replication window to load Partner Site receipt workspaces from Partner Site deployments on disk, or directly from the release data in a partner repository, either by connecting to the partner repository database, or by connecting to the Partner Site via an AppServer partition. For an explanation of Partner Sites, see Section 1.10, “Distributed Development”
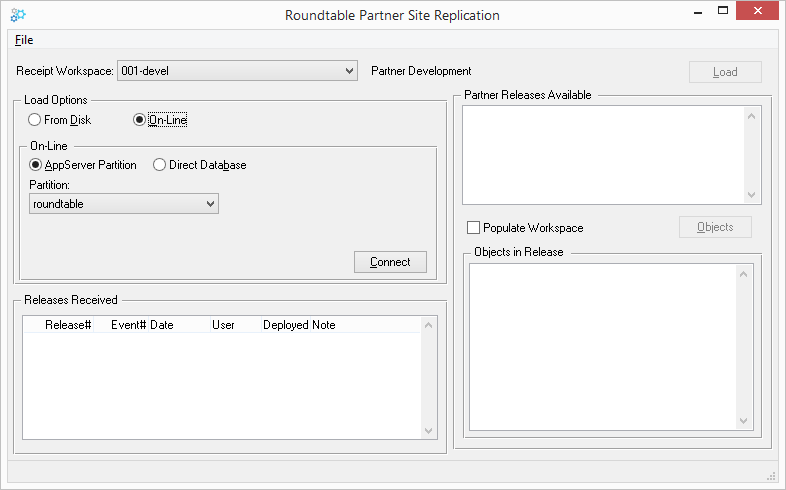 |
| Field or Button | Description | |||
|---|---|---|---|---|
| Receipt Workspace | A drop-down list of Workspaces identified as Partner Site receipt Workspaces. | |||
| Load Options | Choose the source for the Partner Site data:
| |||
| AppServer Partition | Choose this option to connect to the AppServer partition selected in the Partition drop-down-list. The list is populated from the AppServer partitions defined for the current OpenEdge session using the OpenEdge Service Parameter Maintenance PRO*Tool.
| |||
| Direct Database | Choose this option to connect to a remote repository database using the connection parameters that you supply. | |||
| Connect | Initiates a connection to the specified AppServer/database. | |||
| Releases Received | A browse table listing the Partner Site releases already loaded by the local site. | |||
| Load | Loads the selected Release into the local repository. | |||
| Partner Releases Available | A browse table listing the releases that are available at the Partner Site (AppServer only). | |||
| Populate Workspace | Activate this toggle-box to populate the Partner Workspaces after the data transfer is complete (On-Line transfers only). | |||
| Objects | Displays the objects in the selected available Release (On-Line only). | |||
| Load Workspace button | Starts the Partner Site Replication process. |
If you will be retrieving Partner Site data via an AppServer partition, follow these steps to prepare the AppServer partition for transfer of Roundtable repository data:
Ensure that the same version of Roundtable TSMS is installed at the remote partner site.
Ensure that compatible OpenEdge AppServer software is installed at the remote partner site.
Create a stateless OpenEdge AppServer Broker and Agent at the remote partner site, according to OpenEdge instructions.
Configure the remote OpenEdge AppServer Agent to connect to the remote Roundtable repository database, and include the Roundtable TSMS installation in the Agent's PROPATH. For example:
\\server\apps\rountable;@{WinChar Startup\PROPATH};@{WorkPath}.Use the OpenEdge Service Parameter Maintenance PRO*Tool in the local client session to define an AppServer partition that connects to the AppServer Broker defined above.
Follow the steps below to load a partner site Release:
Choose → from the Tabletop menu. The Partner Site Replication Window appears.
Select the Partner Site Workspace to load from the Receipt Workspace drop-down list.
Select the source of the Partner Site data (Disk or On-Line). If loading from disk, skip to step 8.
Select AppServer or Direct Database as appropriate.
![[Note]](../images/admon/note.png)
Your session must be connected to your own site's repository database in order to connect a remote site via AppServer. You cannot make an AppServer connection to a remote repository if your Roundtable session is connected via AppServer to your own site's repository. If loading via AppServer, select the appropriate AppServer partition from the drop-down list.
If loading via a direct database connection, supply the connection parameters in the space provided.
Choose the Connect button to connect to the on-line data source.
Choose the Load button to begin the Workspace information load process. A status dialog appears while the information in loaded into the repository.
Close the Partner Site Replication window.
If the Workspace has not been loaded before you will have to find each PDBASE object managed by the Workspace and specify the connection parameters for the Workspace's databases.
If cross reference information is being maintained for the Workspace you must do a full Workspace compile to ensure that it is up to date after the load process.
The Server Upload window enables you to deploy objects from a Workspace to a remote WebSpeed or AppServer host using the transfer facilities provided by those products. The Server Upload utility eliminates the need for other access to these servers, such a FTP or shared directories, for deploying server-side code from Roundtable Workspaces.
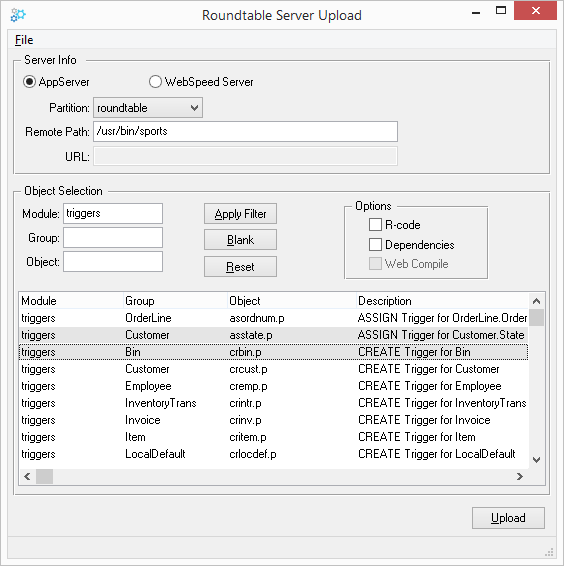 |
The following table lists the Server Upload window fields and buttons:
| Field or Button | Description |
|---|---|
| AppServer | Choose this radio button to upload objects to an existing AppServer partition. |
| WebSpeed Server | Choose this radio button to upload objects to an existing WebSpeed broker. |
| Partition | Used for AppServer uploads. Drop-down list of defined AppServer partitions. |
| Remote Path | Used for AppServer uploads. The target root directory on the AppServer file system. Uploaded objects will be written to the AppServer file system relative to this directory. |
| URL | Used for WebSpeed uploads. URL to the target WebSpeed broker. Defaults to the WebSpeed broker URL defined in AppBuilder Preferences. |
| Module | Used to filter the object list by Workspace Module. |
| Group | Used to filter the object list by Object Group. |
| Object | Used to filter the object list by Object name. |
| Apply Filter | Filters the object list using supplied Module, Group, and Object values. |
| Blank | Blanks the Module and Group fill-ins. |
| Reset | Resets the Module and Group fill-ins to pre-edit values. |
| R-Code | Used for AppServer uploads. Activate this toggle-box to transfer r-code instead of source files. |
| Dependencies | Used for AppServer uploads. Activate this toggle-box to transfer objects necessary to compile code on the AppServer partition. For example, if you select to upload a .p file that references an include file, the include file will also be uploaded. |
| Web Compile | Used for WebSpeed uploads. Activate this toggle-box to compile embedded SpeedScript after deploying objects to the WebSpeed broker. |
| Upload | Choose this button to upload selected object to the selected server. |
Use the following steps to move web objects to the web server:
Choose → from the Tabletop menu. The Server Upload window appears.
Choose the WebSpeed Server Server radio button in the Server Info panel.
Verify or edit the WebSpeed broker URL.
Optional. Use the Module, Group and Object filter to narrow the query results that appear in the object browse.
Optional. Activate the Web Compile toggle to compile embedded SpeedScript on the broker.
From the objects displayed in the browse, range select or highlight individually (using Ctrl-) the objects to move to the web server.
Choose the Upload button to deploy the selected objects to the specified web server.
Close the Server Upload window.
When developing distributed applications with Roundtable, a Workspace may contain some client-side code objects and some server-side code objects. Although Roundtable allows workspaces to be contained on remote systems using UNC paths and mapped network drives, developers may wish to place server-side objects on an AppServer partition that is not accessible through the Workspace path for testing or local deployment purposes.
Sites that require access to AppServer partitions from Roundtable that do not have a means of accessing a remote directory through the Workspace path need a way to move objects from Roundtable Workspace to an AppServer partition.
This release of Roundtable provides a means for copying objects (both source and/or r-code) from a Workspace to an AppServer partition using AppServer itself, rather than using FTP, NFS or other file transfer methods. Copying an object to an AppServer partition depends upon Roundtable connecting to an AppServer broker (defined using the OpenEdge AppServer Partition Deployment Tool). Then sending the object to a server-side program to place the object on the AppServer partition.
If you can access your AppServer partition through the Workspace path (i.e. The AppServer partition directory is the same as the Workspace path, or a subdirectory under the Workspace path as defined by a Workspace module and/or code Subtype), there is no need to move objects from a Roundtable Workspace to a remote location. These instructions are intended for sites where the AppServer partition is not accessible through the Workspace path.
Enabling Roundtable to copy objects to an AppServer partition using Roundtable's Server Upload window requires these setup steps:
Setup an AppServer according to OpenEdge documentation.
Manually copy the Roundtable programs rtb/p/rtb_asio.p, rtb/p/rtb_fileio.p and rtb/p/rtb_fileloadwrite.p, located under the Roundtable installation directory, to the AppServer partition(s). These programs may be placed anywhere on the AppServer partition, so long as they are in the AppServer Agent's PROPATH.
Compile the above programs on the remote system.
Follow these instructions to move objects from a Workspace to an AppServer partition, once the setup has been done:
Choose → from the Tabletop menu. The Server Upload window appears.
Choose the AppServer radio button in the Server Info panel.
Select the target AppServer partition from the Partition drop-down list.
Verify or edit the remote path.
![[Note]](../images/admon/note.png)
The entire path of the remote object will consist of: - remote path - subdirectories indicated by Workspace Modules and/or code subtypes - object name. Optional. Use the Module, Group and Object filter to Object filter to narrow the query results that appear in the object browse.
Optional. Activate the R-Code toggle to deploy only r-code to the AppServer partition.
Optional. Activate the Dependencies toggle to deploy dependent objects along with the selected objects.
From the objects displayed in the browse, range select or highlight individually (using Ctrl-) the objects to move to the web server.
Choose the Upload button to deploy the selected objects to the specified AppServer partition.
Close the Server Upload window.
The Repository Check Report is used to identify problems in the Roundtable repository database. Typically, this report is run only at the request of Roundtable Technical Support. This process can evaluate four different areas:
Check repository records against object version records
Check links between repository records
Check for empty object versions
Check for missing full source object versions
Follow these steps to print the Repository Check Report:
Choose → from the Tabletop menu. The Repository Check window appears.
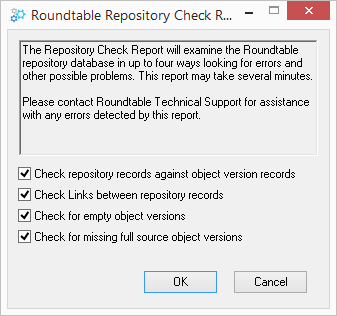
Select the processes that you would like to be reported.
Choose the OK button.
Contact Roundtable Technical Support for assistance with any errors detected by this report.
This option rebuilds the physical names table for any Workspace in the repository. This utility is rarely needed. Run this utility only when you believe that Roundtable has become confused about the physical names of objects in a Workspace. When you run this utility, ensure that no one is using the Workspace (s) in which the utility is run.
Optionally, you can process aliased objects during the Names Table build. The paths for aliased object parts are specified when the object is created and are stored with the object. Including aliased objects will set their paths according to the corresponding module and Subtype paths. Do not include aliased objects if you wish to preserve the paths that were entered for them when they were created.
Follow these steps to run the Build Names Table utility:
Choose → from the Tabletop menu. The Build Names Table dialog appears.
(Optional) Check the Include Aliased Objects toggle-box to process aliased objects.
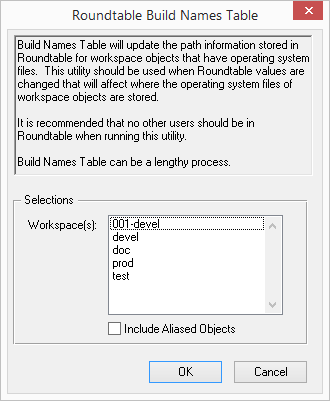
Select Workspace and then choose OK.
The Roundtable TSMS Administrator Toolkit is used to modify repository data that cannot be modified via the traditional Roundtable TSMS user interface or API. Using the Toolkit, you can rename or remove specified entities as shown on the user interface. Since core repository data is either renamed or removed, please exercise caution when using the Toolkit. Be aware that choosing the remove action completely purges the data from the repository, including all historical data related to the entity. The purged data CANNOT be recovered; consequently, previous releases and deployments containing those entities CANNOT be reconstructed!
Before performing any actions with the Toolkit, you should always CREATE A BACKUP OF YOUR REPOSITORY DATABASE.
![[Note]](../images/admon/note.png) | |
| You must be logged into a Roundtable TSMS session as ‘sysop’ in order to run the Administrator Toolkit. It is recommended that you ensure that all users are logged out to prevent others from making changes while the Toolkit is being used. |
Follow these steps to run the Administrator Toolkit.
Choose → from the Tabletop menu. The Administrator Toolkit dialog appears.
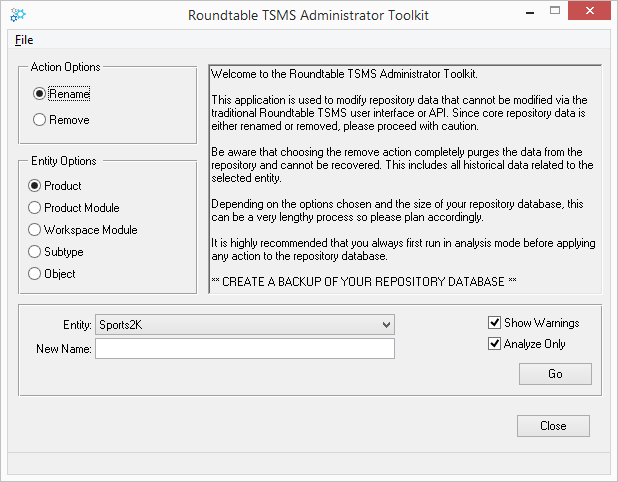
Under Action Options, select Rename or Remove as appropriate.
![[Note]](../images/admon/note.png)
If you selected Rename, you can rename any of the entity types. If you selected Remove, however, you can only remove a Product or Product Module. Select the entity type you would like to rename or remove.
Select the entity from the drop-down or type in the name if Object was selected. If you are renaming the entity, also enter the new name.
It is highly recommended that you always first run actions in Analysis mode by checking the 'Analyze Only' toggle-box BEFORE applying any action to the repository database. Always CREATE A BACKUP OF YOUR REPOSITORY DATABASE before making any changes.
Choose GO to run the utility.
User Shelves provides a means to store unmanaged files in the Roundtable repository and share them with other members of your team. Each user has their own Shelf where they can store any number of files. Using the Shelf Browser, users can add, view, delete, or update items that have been placed on a Shelf.
![[Note]](../images/admon/note.png) | |
| Although Shelf items are visible to all users, you can only add items to your Shelf or modify items that belong to your Shelf. |
The Shelf Browser is available via → from the Tabletop menu.
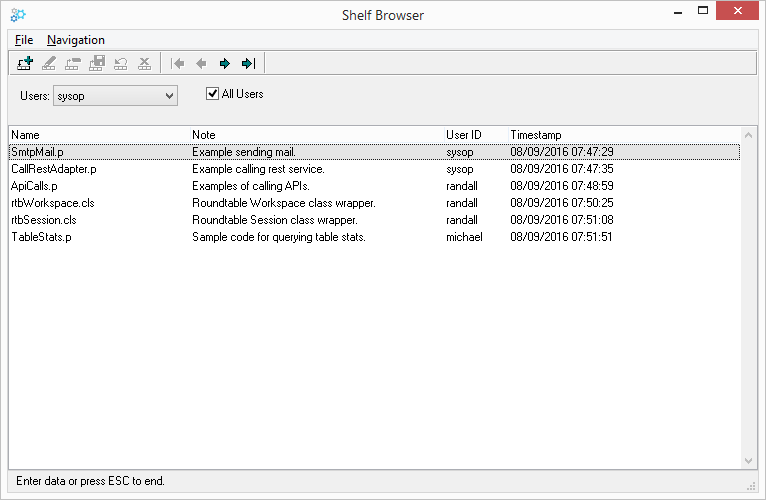 |
The Shelf Browser contains the following fields:
| Field | Description |
|---|---|
| Name | Filename of the item added to the Shelf |
| Note | Text description of the Shelf item |
| User Id | Owner of the Shelf item |
| Timestamp | Date and time Shelf item was created |
Follow these steps to add a Shelf item:
Choose the Add Record button. The Open File dialog appears.
Find the file to add to the Shelf and choose Open.
![[Note]](../images/admon/note.png) | |
| The contents of a WIP Object can be quickly added to your Shelf by choosing from the Tabletop Object context menu. |
Follow these steps to delete a Shelf item:
Choose the Delete Record button.
Choose the Yes button to delete the Shelf item.
Follow these steps to update a Shelf item:
Choose the Update Record button.
Modify the Note as required.
Choose the Save Record button.
Follow these steps to update Shelf item contents:
From the Shelf item context menu, choose . The File Open dialog appears.
Find the file containing the updated contents and choose Open.
Table of Contents
- A.1. Introduction
- A.2. Edit Program: rtb/p/rtb_open.p
- A.3. Managing Application Data with the Edit Program
- A.4. Report Source Files Locations
- A.5. Task Record Access Using the user-task-ref Field
- A.6. Roundtable PROPATH Management
- A.7. Roundtable Interfaces with the ADE
- A.8. Hooks and Application Programming Interfaces (API)
This appendix describes the entry points into the Roundtable environment that you can use to customize your environment and a thorough description of PROPATH management in Roundtable.
Edit Program: rtb/p/rtb_open.p
Managing Application Data with the Edit Program
Report Source File Locations
Task Record Access Using the Ref-num Field
Roundtable PROPATH Management
Roundtable Interfaces with the ADE
Hooks and Application Programming Interfaces
A specialized edit program can be associated with a Subtype. The name of your edit program is stored in your PCODE Subtype's Edit Program field. See Section 3.13, “Subtypes”. When you instruct Roundtable to edit an object, your specialized edit program runs. There is a specific programming interface required for the edit program that includes a Pmode parameter. This Pmode parameter is used to instruct edit programs to do specialized tasks like import, export, and delete on the data in the managed objects.
The rtb_open.p procedure is provided as source for your examination. As provided, rtb_open.p runs rtb_winopen.p, also provided as source, which launches applications that edit files based on the filename extension.
Sometimes it is necessary to keep track of versions of data in an application. This data could be static code tables, menu content, program generation data, or seed data to be delivered with an application. It is possible to manage this data by developing user-defined edit programs specific to the application data on which version control is desired. The name of your edit program is stored in your PCODE Subtype's Edit Program field. See Section 3.13, “Subtypes”.
The only way to run one of these programs should be from the Roundtable environment. This will prevent making untracked changes in the application data.
Each program should have Edit, View only, Import, Export, and Delete modes:
Edit Mode should allow the entering or editing application data. Roundtable will run the program in Edit Mode when the object is WIP and owned by the current task.
View Mode should allow only viewing application data. Roundtable will run the program in View mode when the object is not WIP or belongs to a task other than the current task.
Import mode should delete current data (if any) in the application database and then load the object by reading in new content from one or more text files formats specific to the type of managed data. Roundtable will run the program in Import mode when the All PCODE Data Imports option is chosen from the WS-config menu or just prior to the first Edit of the program after a recent assignment of the object to the Workspace. The Import process assigns objects to a Workspace. It is also possible to manually assign a version of an object to the Workspace.
Export mode should create one or more text files containing the data stored in the application database. This process is run prior to the completion of the object and the registration of the object’s text files into the repository.
Delete mode should delete data associated with the object from the application database.
An optional View Hist mode can be supported by the application edit program if desired. This mode would allow the view of a prior version of the object. When you select a previous version of an object and choose the Edit option off the PCODE Object Menu, Roundtable creates one or more temporary files by retrieving the requested version from the repository. The edit program in View Hist mode should allow the user to review this earlier version of the object without corrupting the current application database. This mode is optional.
An optional Xref mode can be supported by the application edit program if desired. This mode allows the program to generate Roundtable Xref entries. This option can be especially useful for applications where the application menus are driven by tables in the application database. This mode is optional.
Here is a sample Menu Manager application to illustrate how an edit program interface can be implemented.
This edit program allows the Roundtable system to manage menu tables in an application database.
The application menus are contained in two tables in the application database:
- menu_header
Describes the menu and its placement on the screen
menu name x(32)
menu title x(76)
menu row integer
menu col integer
- menu_item
Describes each menu item
menu name x(32)
item seq integer
item type P)rogram, M)enu
item name x(32)
item desc x(76)
A PCODE Subtype called menuman is created in Roundtable. An edit program named menuman.p is specified. This program has the following prototype definition:
/* menuman.p MENU MANAGER */
DEFINE INPUT  PARAMETER Pmode  AS CHARACTER NO-UNDO.
DEFINE OUTPUT PARAMETER Perror AS CHARACTER NO-UNDO.

/* Shared variable definitions passed by Roundtable */
DEFINE SHARED VARIABLE Urtb-object     AS CHARACTER           NO-UNDO.
DEFINE SHARED VARIABLE Urtb-part       AS CHARACTER EXTENT 10 NO-UNDO.
DEFINE SHARED VARIABLE Urtb-part-desc  AS CHARACTER EXTENT 10 NO-UNDO.
DEFINE SHARED VARIABLE Urtb-path       AS CHARACTER EXTENT 10 NO-UNDO.
DEFINE SHARED VARIABLE Urtb-name       AS CHARACTER EXTENT 10 NO-UNDO.
DEFINE SHARED VARIABLE Urtb-tmpl       AS CHARACTER EXTENT 10 NO-UNDO.
DEFINE SHARED VARIABLE Urtb-num-parts  AS INTEGER             NO-UNDO.
DEFINE SHARED VARIABLE Urtb-sub-type   AS CHARACTER           NO-UNDO.
DEFINE SHARED VARIABLE Urtb-userid     AS CHARACTER           NO-UNDO.
DEFINE SHARED VARIABLE Urtb-task-num   AS INTEGER             NO-UNDO.
DEFINE SHARED VARIABLE Urtb-task-desc  AS CHARACTER           NO-UNDO.
DEFINE SHARED VARIABLE Urtb-PROPATH    AS CHARACTER           NO-UNDO.
DEFINE SHARED VARIABLE Urtb-ws-PROPATH AS CHARACTER           NO-UNDO.
DEFINE SHARED VARIABLE Urtb-mod-dir    AS CHARACTER           NO-UNDO.
DEFINE SHARED VARIABLE Urtb-module     AS CHARACTER           NO-UNDO.
DEFINE SHARED VARIABLE Urtb-pmod       AS CHARACTER           NO-UNDO.

IF Pmode = "Edit" THEN
DO:
  /* Allow user to update data related to object in the
     application database */
END.
ELSE IF Pmode = "View" THEN
DO:
  /* Allow user to view data related to object in the
     application database */
END.
ELSE IF Pmode = "Import" THEN
DO:
  /* Delete current data. Load new data from text files. */
END.
ELSE IF Pmode = "Export" THEN
DO:
  /* Export data from application database to text files */
END.
ELSE IF Pmode = "Delete" THEN
DO:
  /* Delete data related to object from the application database */
END.
ELSE IF Pmode = "View Hist" THEN
DO:
  /* Allow user to view data placed in temp text files retrieved
     from repository */
END.
ELSE IF Pmode = "Xref" THEN
DO:
  /* Create rtb_xref records based on content of the object's
     data in app database */
END.
ELSE Perror = "Unknown Mode".
RETURN.All of the reports in the Roundtable system are generated in report library procedures that are provided in source form for your convenience. The library and procedure that produced a report are shown in the report header.
If you decide to modify a report, copy the modified report library procedure to a new directory with a new name so that your modifications are not overwritten by future updates of Roundtable.
The following table shows the report library procedures and the reports that they produce:
Report Library | Contained Reports |
|---|---|
rtb/p/rtb_rpt_product.p |
|
rtb/p/rtb_rpt_repo.p |
|
rtb/p/rtb_rpt_schema.p |
|
rtb/p/rtb_rpt_subt.p |
|
rtb/p/rtb_rpt_task.p |
|
rtb/p/rtb_rpt_wspace.p |
|
rtb/p/rtb_rpt_xref.p |
|
Tasks are a significant part of managing work with the Roundtable system. Often customers want to retrieve information on tasks in the Roundtable system using a key field value that is meaningful to their support and management staff. To facilitate this, an indexed field called user-task-ref is included in the rtb_task record.
Since the Roundtable repository is a OpenEdge database, you can use standard OpenEdge 4GL commands to access the task records in the database.
Be careful to find records NO-LOCK in your reporting routines to avoid competing with Roundtable for locks on these important records.
Roundtable has a set of rules that it follows regarding PROPATH management so that it can provide an environment that makes it easy for you to switch from task to task, or even from Workspace to Workspace. Of course, it also has to ensure that its own programs can be found in the PROPATH.
The Roundtable startup program, _rtb.p, adds <RTB> and <RTB>/rtb to the front of your OpenEdge default session PROPATH, where <RTB> is the Roundtable install directory.
It will only prefix the PROPATH with <RTB> if it is not already there. <RTB> is already in your PROPATH if you have installed the compiled Roundtable programs into <DLC>/gui.
It will prefix the PROPATH with <RTB>/rtb regardless of whether or not it has already been defined in your PROPATH. This ensures that <RTB>/rtb always comes before <DLC>/gui so that the Roundtable version of some ADE programs are found first. See Section A.7, “Roundtable Interfaces with the ADE”.
When you select a Workspace, your Workspace directories are added to the front of your PROPATH. You define your Workspace directories in the workspaces maintenance screen. Note that if you have special tokens defined in your Workspace directories, then these will be expanded and added to your PROPATH.
When you select a task, Roundtable checks to see if it belongs to any task groups. If it does, then these are added to the front of your PROPATH.
Finally, if the task is not Central, then the task directory is added to the very front of your PROPATH.
Here is the order of the directories that Roundtable may add to your PROPATH (where <RTB> is the Roundtable install directory):
 <task directory> + <group directories> +
      <Workspace directories> + <RTB/rtb> + <RTB> + <the
      default PROPATH defined for your session>
Any time that a wait state is set in Roundtable, the Roundtable directories are automatically moved to the very front of your PROPATH. This improves Roundtable’s execution speed. If a long string of directories is built up in your PROPATH in front of the Roundtable directories, then every RUN statement executed within Roundtable becomes very slow. OpenEdge would have to look through your task, group, and Workspace directories before it could finally find the Roundtable programs in its PROPATH.
As soon as the wait state has completed, then the Roundtable directories are moved back down to their original position in the PROPATH.
So that Roundtable can be a tightly integrated part of the OpenEdge Application Development Environment, various intercepts and hooks have been added to GUI Roundtable. This section presents a summary description of some of these intercepts and hooks.
Roundtable has its own version of the following programs, which are found in the <RTB>/rtb subdirectory (where RTB is the Roundtable install directory):
adeedit/_dlggetf.p - This is the File Open and File Save As dialog box used by the OpenEdge Procedure Editor.
adecomm/_getfile.p - This is the File Open and File Save As dialog box used by the OpenEdge Procedure Windows and the UIB.
adecomm/_chosobj.p - This is the Choose Object dialog that the UIB uses for selecting a SmartObject for insertion into your current SmartContainer.
adeweb/_webfile.w – For remote objects, this accesses the File Open and File Save As dialog boxes used by the OpenEdge Procedure Windows and the UIB.
These programs run before the OpenEdge version of them because <RTB>/rtb is found in your PROPATH in front of the OpenEdge subdirectories.
For all three of these programs, the Roundtable version simply passes its parameters to the main Roundtable persistent procedure. This triggers the Roundtable Tabletop to become the active file selection window. From the Tabletop, you can choose to Open or Save As by the OS. When you do that, these procedures call their counterparts found in the OpenEdge subdirectories, so that you can select files through the regular file selection dialog boxes outside of the object management framework of Roundtable.
Roundtable also has its own version of adecomm/_adeevnt.p. All of the hooks described in the next section go through this program.
Roundtable’s intercept programs are provided in source form.
OpenEdge provides adecomm/_adeevnt.p as a primary source for hooks into the ADE. Please see the comments in that program (as provided by OpenEdge) for a detailed description of how it works and what you can do with it.
Roundtable’s version of _adeevnt.p passes most of the hook events straight through to the main persistent Roundtable procedure. This section describes the hooks Roundtable watches, and how they are used:
p_event = "Open"
Roundtable uses this event to finalize object locking and to keep track of which objects are being viewed in read-only mode.
p_event = "Close"
Roundtable uses this event to delete the object lock or to delete the entry out of the table that it uses to keep track of which objects are marked read-only.
p_event = "Before-Save"
Roundtable uses this event to check that the object is not marked read-only. If it is marked read-only, then Roundtable cancels the save operation.
p_event = "Save"
Roundtable uses this event to handle the complexities involved if you do a "Save As" on one Roundtable object to another Roundtable object.
If you would like to be able to write your own programs that interact with Roundtable, the following section will describe some of the options available.
Roundtable PUBLISHes an event, evRtbUserEvent, for several actions during a Roundtable session. The parameters passed by the event indicate the action performed by Roundtable. You can SUBSCRIBE to this event to extend and customize the functionality of Roundtable.
Roundtable provides a program called rtb_events.p, which can be found in the directory where you installed Roundtable. This program SUBSCRIBEs to evRtbUserEvent and documents the parameters PUBLISHed by the event. Additionally, the program provides backward compatibility for earlier versions of Roundtable that used the rtb_evnt.p procedure.
By modifying rtb_events.p, you can intercept or filter various events that occur in a Roundtable session. Please see the documentation inside the rtb_events.p program for a detailed list of supported event hooks. Most of the event hooks have a corresponding "Before" event, which is published immediately before the indicated action.
Roundtable provides a number of procedure and function calls that allow you to automate many Roundtable activities. These functions and procedures are accessed through the API program rtb/p/rtb_api.p. Please see the detailed list and documentation for these functions inside the rtb/p/rtb_api.p procedure. It contains a description of input parameters and the coding required before calling certain API procedures.
- Alias
An alternate name for a database.
- Aliased Object
A PCODE object that has an object name that is different from its physical operating system filename. Object aliases are normally used when two files in different directories have the same filename.
- Assigning an Object
To add to a workspace an object that has already been created.
- Central Object Repository
Roundtable keeps objects in the Central Object Repository (COR). The COR stores all of the objects and their definitions in the system.
- Changes Report
A list of changes in a workspace across a range of events. Provides testers and/or customers with extensive information about what has changed in a workspace between any two events.
- Check In
To copy a checked out version of an object into the Central Object Repository. Checking in an object completes the object and allows others to see the changes and use the new version.
- Check Out
To create a new version of an object by copying the object and assigning it to a new version number. The new version is used for a specific task and can only be used by one programmer.
- Completing a Task
An activity processed once the work is finished in the task. Completing the task gives all the objects in the task a C (complete) status.
- Configuration
A map of the contents of your application at a given time.
- Configuration Hierarchy
A map of the contents of your application that usually corresponds closely to the architecture of your system.
- Configuration Level
Application software systems under configuration control are mapped into a configuration hierarchy. The configuration level refers to the depth of the hierarchical tree where an object is found.
- CRC
See CRC.
- Cross Reference
A cross reference (Xref) is generated for many kinds of relationships among objects in a workspace. These cross references are generated when a full compile is performed on a compilable object. Database schema objects are also cross referenced automatically by the system.
- CRC (Cyclical Redundancy Check)
This is a calculated value that is generally unique for any given piece of data. Roundtable calculates a CRC value for each file loaded into the repository. When required, this CRC value can be compared with a CRC calculation on a file at the operating system level to determine if the repository file and OS file are the same.
- Data Type
The OpenEdge data type determines what kind of data can be stored in a variable or database field.
- Deployment
Roundtable manages the process of packaging a release of an application system from a workspace for delivery to a remote site. The process of packaging the release is called the deployment process, and the update package created is called a deployment.
- Development Workspace
A workspace used to create, modify, and delete new objects and data. Since this workspace is unstable, it is only suitable for limited, informal testing, usually done by the programmers.
- DOC
An object that normally contains documentation and is always stored in a type directory called doc off of the objects’ workspace module directory. You can also use the PCODE object to store documentation objects. Check out a DOC object to modify the document it contains.
- Domains
Occur when you create a single definition that is used in a number of different places. For example, you might define a single PFIELD object called Address and use this field definition in a number of different tables, or even many times in the same table.
- Event
Each completed change that results in a change to the contents of a workspace is recorded as a sequential event in the workspace event history.
- Event History Report
The event history of a workspace sorted from newest to oldest between two events. Traces the history of individual objects or groups of objects belonging to a product module.
- Field Assignment
A PFIELD object contains attributes that describe a field (column) and are referenced by field assignments in PFILE objects. The collection of attributes in the PFIELD object and PFILE field assignment completely define a field in a table. A field assignment contains the product module and name of the PFIELD object, local field name, field order, mandatory status, and triggers of the field.
- Force Compile
A compile that occurs even if Roundtable does not think the object needs compiling.
- Full Compile
A compile with cross references. Leave blank to just compile and save.
- Group Access
You define a collection of security privileges and name them with a group access code. You assign one or more group access codes to one or more users in a workspace. Security privileges accumulate based on each group access code assigned to a user in a workspace.
- Group Access Code
A code that identifies a set of security privileges that can be enjoyed within the Roundtable environment. You create access groups and then specify what security privileges belong to the group. You can then associate one or more access groups with one or more users by workspace.
- Group Code
User-defined values entered when the user defines objects. The group code is used to sort objects in the object browse table.
- Group Directories
Roundtable checks out objects to a task directory where the programmer modifies them. The changes are not seen by others until the programmer executes the Update Group/Public Source option, which copies the modified objects into a group directory. Other programmers might choose to see the changes by attaching one of their tasks to the group. The last completed version of the objects remains in the workspace directory.
- Listings
Check to print the fully expanded code (with the include files). This is like the Listing parameter in OpenEdge. Roundtable saves the listing file as *.lis file.
- Module Load
A Roundtable utility used to search for objects in the operating system directory associated with a selected workspace module. The user is able to quickly create new objects for the new source code.
- Object
Any field, table, database, document, or piece of code that you want Roundtable to manage. It is the lowest level of configuration management.
- Object Group
User-defined values entered when the user defines objects. The group code is used to sort the objects in the object browse table.
- Object Types
All workspaces are comprised of collections of Roundtable objects. These objects are of one of the following types: PCODE: A collection of optimized files whose purpose is specified by assigned subtype PFIELD: A database schema definition for a field PFILE: A database schema definition for a table PDBASE: A database schema definition for a database DOC: A special type used for documentation objects
- Object Variants
Variations of the same object in a system.
- Object Version
Created each time you check in an object. Object versions are stored in the repository. You can see a list of all versions of an object by selecting the object in a workspace and then choosing View. Object versions are permanent. They are never deleted from the repository.
- Orphan
An orphan condition exists when an object version higher than the current version exists but its immediate ancestor is a version that is lower than the current object version.
- Partner Site
A Roundtable installation that receives repository information from another Roundtable installation. You perform a partner site deployment at the sending site and a partner site load at the receiving site to move repository information among sites. Each site must have a different site number.
- PCODE
An object that encapsulates up to nine files that together define a system component. These system components can contain textual or binary data, and you assign a subtype code to each PCODE object to describe these files. These files are called parts and their attributes are specified in the subtype definition. Check out a PCODE object when you need to modify the system component it encapsulates.
- PDBASE
An object that contains the topmost components of a database schema definition. PDBASE (database) objects record a list of table assignments that relate PFILE objects with the PDBASE object. Check out a PDBASE object when you need to add, delete, or change the name of a database table or sequence.
- PFIELD
An object that contains attributes that describe a field (column) and are referenced by field assignments in PFILE objects. The collection of attributes in the PFIELD object and PFILE field assignment completely define a field in a table. A field assignment contains the product module and name of the PFIELD object, local field name, field order, mandatory status, and triggers of the field. The PFIELD object contains the remainder of attributes that define a field in a table.
- PFILE
An object that contains attributes that describe a table. PFILE objects are referenced by table assignments in PDBASE objects. The collection of attributes in the PFILE object and PDBASE table assignment completely define a database table. Check out a PFILE object when you need to add, delete, or change a PFILE assignment or an index definition.
- Pre-production Workspace
After testing, objects and data are imported from the testing workspace into the pre-production workspace. Since this workspace should function with few or no major problems, you can release it to sophisticated users for Beta testing and evaluations. Normally you would require approval to make changes in this workspace for load testing of the application.
- Product
Roundtable provides three logical levels of configuration hierarchy: product, product module, and object. Products own one or more product modules, and product modules own one or more objects. This hierarchy provides a logical view of an application system and is useful for implementing promotion and deployment strategies for the application system.
- Product Module
Roundtable provides three logical levels of configuration hierarchy: product, product module, and object. Products own one or more product modules, and product modules own one or more objects. This hierarchy provides a logical view of an application system and is useful for implementing promotion and deployment strategies for the application system.
- Production Workspace
A "live" system that must function flawlessly under real-world conditions. You normally require approval to make changes in the workspace.
- Promote
The process of importing objects from one or more source workspaces into a target workspace.
- PROPATH
A comma-delimited string that contains the operating system directory paths that will be searched by OpenEdge for source code during the compile process.
- R-code
OpenEdge-compiled procedures have an extension of .r. Any compiled OpenEdge procedure is referred to as r-code.
- Release
A record of a specific event number in a workspace. It is used to re-create the exact contents of the workspace configuration that existed as of that event for purposes of promotion and deployment from a workspace. A release labels a version of a workspace.
- Release Record
A record that features a sequential release number that uniquely identifies it in the workspace. Release records also contain a text label that describes the configuration of the system at the time the release record was created. For example, release number 23 from the Test workspace might have the descriptive label "Beta Release 2.1a."
- Release Report
A detailed list of the changes in a workspace between two releases. Useful for testers and/or customers when receiving new releases.
- Remote Site
A site that receives updates packaged by Roundtable.
- RTBSETUP File
The Roundtable parameters file that contains workstation-specific options.
- Runtask.p
A program used to set up your task environment if you need to work with your task outside of Roundtable.
- Run-time, Query, or Development
OpenEdge products types.
- S-code
OpenEdge source code.
- Schema Objects
PFILE, PFIELD, and PDBASE objects.
- Selective Compile
Provides you with a number of options for your compile. You can enter a specific task to compile or you can enter a 0 to disregard the task number. If you specify a task number, Roundtable compiles only the objects within the selected task that have changed.
- Share Status
Checked out objects have a share status of Task, Public, Group, or Central. The share status controls where the object is edited and the visibility of the edits on the object to the rest of the users in a workspace.
- Source Workspace
The promotion of code through a development cycle is defined by assigning source workspaces to each workspace in the system. The import process build searches each specified source workspace for objects that should be imported into a selected target workspace. For instance, if you have a development workspace and a testing workspace, you specify that the development workspace is a source workspace for the testing workspace. The import process pulls completed object versions included in the latest source workspace release level into the target workspace.
- Subtype
Controls the naming, management, creation, and storage of PCODE objects. Up to nine file parts are used to define a system component. These system components can contain textual or binary data. In addition to file parts, you specify edit, naming, and procedure generation services for a subtype, as required.
- Syntax Check
A compile that does not create R-code. It ensures the source code will compile without actually compiling.
- Table Trigger
A database table might have a table trigger. The trigger specifies the name of a procedure file to execute when a trigger condition occurs. The trigger conditions include: FIND, CREATE, WRITE, and DELETE.
- Target Workspace
The destination of objects in an import process. The import process is executed in the target workspace, and objects are imported into it from one or more source workspaces.
- Task Directories
Created where checked out objects are copied. This makes it possible to isolate your work from others until it is ready to be checked in or promoted for review into the group or central workspace directories. The use of task directories is optional.
- Task Number
The number you specify for a task. If you enter a task number, Roundtable compiles only the objects that have changed in that task. If you enter 0, Roundtable disregards the task numbers and compiles everything that needs compiling.
- Task Management
The management of units of work performed on the application system managed by Roundtable. All work done on individual objects in the Roundtable system is performed under a task. Usually, managers assign tasks and programmers check out one or more objects under the task. Completing a task checks in all objects that were checked out under the task. Various task reports are available.
- Testing Workspace
Where the application is created after importing objects and data from the development workspace. Although this workspace changes less frequently than the development workspace, some changes are necessary to complete the testing process. This workspace is stable enough for significant quality assurance Alpha testing.
- Trigger
An event, such as reading, writing, deleting, or updating a record, that causes another procedure to execute.
- Update Status
An attribute of an object’s assignment to a workspace. The update status attribute can have a value of Current, Modified, or New. This update status attribute is one of the attributes used to determine if the object needs to be compiled or updated.
- Unapplied Changes Report
A list of all schema changes that have been entered but not updated. Verifies the status of the schema in the workspace.
- User Access Assignments
Specify what security privileges a user enjoys in a specified workspace. A user access assignment consists of a user paired with a group access privilege in a workspace. Users can be given different security privileges in each workspace.
- User Maintenance
The process of adding, editing, or deleting users in the Roundtable system.
- Variant
Roundtable allows you to create more than one variation of the same object to create variants. Variants have the same object name and type but belong to different product modules. For example, you might need three variations of an install program, one each for UNIX, DOS, and Windows. Only one of the variants of an object can appear in a workspace at the same time. Variants are often created in custom workspaces that are specific to customers or vertical markets.
- Version Control
The ability to manage concurrent changes by multiple programmers by creating new object versions.
- WIP
See WIP.
- WIP (Work-in-process)
The status of an object when it is checked out or when a task is being worked on.
- Workspace
A copy of your application programs and related databases, the content of which is known and managed by Roundtable. Roundtable manages the creation, deletion, and modification of objects (code, databases, tables, fields, and text) within the workspace. A workspace is a configuration of object versions.
- Workspace Directories
A workspace has a root directory under which the subdirectories and files that make up the software application exist. The root directory is specified as an absolute path in the Workspace Maintenance screen. Subdirectories are defined as part of workspace module definitions and subtype definitions.
- Workspace Event History
Roundtable maintains a record of every change to object versions within a workspace. Roundtable records these changes–called events–in the event history file. Roundtable assigns event numbers to object versions when you complete, assign, or de-assign an object. You can view the event history of a workspace or an object in a workspace at any time.
- Workspace Module
The contents of each workspace is broken up into one or more workspace modules. Unlike a file system where many levels of nested subdirectories can be seen, only one level of workspace modules exists. Each workspace module points to a single relative subdirectory under the workspace root directory. This subdirectory is defined in the workspace module definition. The contents of a workspace module are defined by the assignment of workspace module definitions to one or more product modules.
- Workspace Module Definition
Names a workspace module, provides a description for the workspace module, and specifies a file system subdirectory relative to any workspace’s root directory. You assign a workspace module definition to product modules. You assign product modules to workspaces to define the logical content of your application. Roundtable creates a workspace module and associated subdirectory in the workspace based on the workspace module definition associated with the assigned product module. You specify a product module when creating a new object. The object is stored in the subdirectory specified in the workspace module definition, and the object is listed in the workspace module.
- Workspace Path
Tells Roundtable the directory where you want to store the workspace and its components. The first workspace path should always be the root directory to your workspace. No two workspaces should share the same root directory. Roundtable uses the other specified paths to locate your source code.
- Workspace Releases
Consist of changes or events that have occurred in a workspace since the last release. Roundtable allows you to create two types of releases, a developmental release and a formal release. The developmental release is an internal release distributed to other workspaces within the system, while a formal release is a release distributed to users. Normally, you create releases in conjunction with the quality assurance process.
- Workspace Report
A complete list of the objects in a workspace ordered by a workspace module. Provides a hard-copy of the current workspace configuration.
- Workspace Source
The import process promotes code from one or more workspaces (source workspaces) into the current (target) workspace.
- Workspace Target
The import process promotes code from one or more workspaces (source workspaces) into the current (target) workspace.
- Xref Level
The amount of cross reference information maintained in a workspace is defined by the user-specified Xref level.